|
|
Post by spanks79 on Jan 17, 2015 23:16:20 GMT -5
Looking great man!! Still waiting for you to get that hood on though... Haha I'm coming up again in a couple weeks. Should be around you saturday the 31st. Think you'll be around?? No reason to wait for the hood to go on, I already know it won't fit. I will probably do it just to see how close it is but I seriously doubt it will be even remotely possible. At this point I don't even know if the standard Performer intake will work. I should be around late morning thru early afternoon. You can take a look through my pile of unused parts and see if you can use any of it. |
|
|
|
Post by countrybunker on Jan 18, 2015 5:07:10 GMT -5
Cool, I'll get up with ya when the time gets closer. That should be exactly when I'll be around you.
That sucks about the hood! Time to cut a hole!?!? Lol the performer should fit. Its pretty much an exact copy of the stock intake, just allum...
Did you send me an email the other day? I feel like ya did, and it got deleted on accident..
|
|
|
|
Post by spanks79 on Jan 19, 2015 8:49:41 GMT -5
Cool, I'll get up with ya when the time gets closer. That should be exactly when I'll be around you. That sucks about the hood! Time to cut a hole!?!? Lol the performer should fit. Its pretty much an exact copy of the stock intake, just allum... Did you send me an email the other day? I feel like ya did, and it got deleted on accident.. Keep me posted about your travel plans. My weekends are crazy busy this time of year. Well it's eother a performer or a square bore iron intake off ebay. Have not decided yet. No emails from me. I did try to text you but wasn't sure if it went thru or not. |
|
|
|
Post by spanks79 on Jan 21, 2015 22:56:07 GMT -5
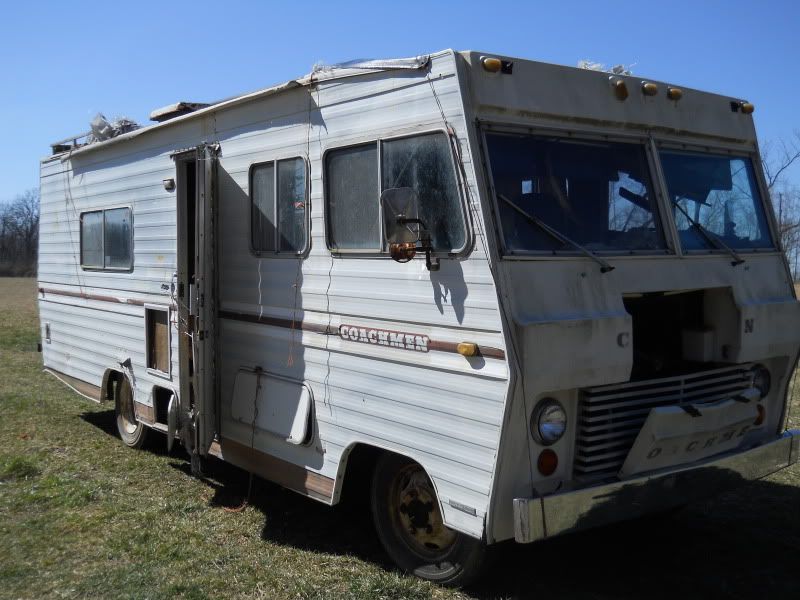
Ok so as I posted last week, we have been getting very busy on the Blumo. So much so it’s been hard keeping up with pictures and updates. Well I finally got time to sit down and compile an update. Also, I have been organizing some pictures in my photobucket account so if some of my picture links appear broken, hopefully I’ll have them fixed within the next couple days. If you remember about this time last year I picked up an entire interior and wiring harness from the car in this thread. bluesmobiles.proboards.com/thread/1729/parting-1976-dodge-monaco-royal This car was super clean and the parts were in great shape. Not everything is Blumo correct but the condition was too good to pass up. This was our haul last year: 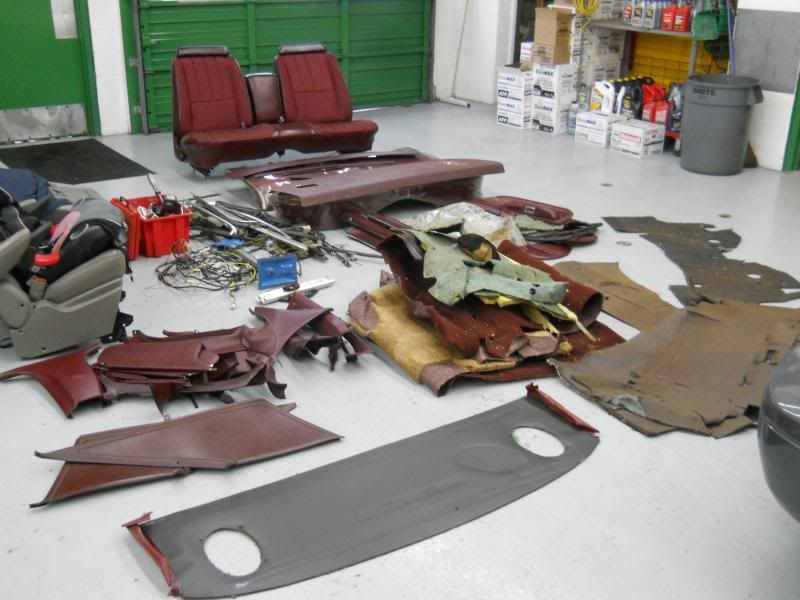 A good portion of these parts are making their way into the car. One of the key components was the entire wiring harness and dash assembly from the 76 was installed into my 74. It was pretty much a direct fit with minimal changes made. For the sake of others who may want to tackle the same project here is a list of differences I ran across. Lean Burn, no seat belt starter interlock, alternator plugs different, washer pump wiring on the wrong side for 74, engine harness connector in a different spot, field/load relay, front turn/park/marker lights different, trans harness comes from the right across the top of the trans instead of from the left fender well area. This sounds like a lot but the benefits of using the newer harness FAR outweighed the downside of using the crispy 74 harness my car came with or attempting to build a custom harness. The Lean Burn elimination simply required using the ignition box connector from the 74 harness and eliminating a bunch of wires. There were a total of 5 wires to solider. Here is the finished product:    Note that the main engine harness plug is at the right rear of the engine near the firewall, The 74 harness positions this connector on the right front near the alternator. The seat belt interlock was no real loss to me. There was nothing to do in terms of installing the 76 harness because none of the wiring is there. My 74 chassis was already stripped of the harness when I got it so there was nothing to remove but if you have a 74 car with a complete harness in it already you will be able to eliminate a bunch of wires under the seats and also an electronic control box under the dash and a relay on the left hood hinge support. The alternator connectors were different from the 76 alternator and my 74 alternator. I’m not sure if that is a model year difference or simply an alternator option difference? At any rate the wires were basically the same but with different connectors. All I did here was use a connector tool to “pin out” the terminal of the 76 plug and insert them into the 74 plug. One wire. I have not had it running with the charging system hooked up yet, it should be interesting to see if it works ok. I wanted to eliminate any unneeded chance of melting wires in this new harness….. I already had one casualty…. More on that later. The washer bottle on a 76 is on the right hand side, it also has a low level sensor and associated wiring. I wanted to keep the 74 washer bottle location so I am simply going to lengthen the washer pump wires to go up around the front of the core support over to the left side. My 74 washer bottle does not have a low level sensor so I’m just going to leave that connector where it is for now. Maybe Ill come up with an alternate use at some point. The 76 cars had a “field/Load relay” and the 74 did not. Im not 100% positive I know what the purpose of the field/ load relay is but from what I gather doing google research is that it prohibits the alternator from charging during cranking and start up. I didn’t not have to do anything with it, simply mount the relay to the fire wall.  The last issue was that the 76 Royal harness has some extra stuff to operate the headlight door motor and that the harness to the turn signal and marker lights is different. The headlight door motor sub harness was simply unplugged. And we made our own new sub harnesses for the turn signal and marker lights. Using new light sockets www.dormanproducts.com/p-4125-85833.aspx?origin=keyword and www.oreillyauto.com/site/c/detail/BWD0/PT85/01912.oap?year=1974&make=Dodge&model=Monaco&vi=5157816&ck=Search_01912_5157816_2466&categoryRedirect=01912&pt=01912&ppt=C0243 and some Delphi 56 series connectors, so it looks like factory, www.mouser.com/ProductDetail/Delphi-Connection-Systems/02984378-B/?qs=sGAEpiMZZMs7eK6h2EBtKtZWmdIJZ52n7r6GSbxNs6o%3d we built park and turn signal harnesses. This was fairly simple, just took a bit of playing around with jumper wires at first to make sure the correct lights were park (dim element on the park light bulb and bright element for the turnsignal) before soldering it all together. We did run into one problem where a fuse kept blowing and found that one of the new sockets was internally shorted, just had to rearrange the wires inside and it was all good. Also beware the car has two turnsignal flashers. One for the hazard flasher and one for the turnsignal. They are inexpensive so I recommend saving yourself some trouble and install new ones.    My original 74 car was a power window and cruise control car. In effort to keep the car screen accurate we did eliminate both the power windows and cruise. The 76 did not have power windows so nothing had to be done there. The cruise control module uses its own sub harness and a 4 terminal brake light switch instead of 2 terminals. Once again no big deal, simply more parts in the not used pile. All in all it went very well, only the sharpest observer will notice any of these differences. It took a bit of time and the test light and volt meter certainly got a work out but a great exercise in basic automotive electrical!   The one casualty of the whole process…. My awesome oil pressure gauge got smoked! I’m still figuring out how to repair or replace it, as these are not easy to come by. Basically what happened was, I overlooked the fact that I was wiring the car for gauges but installed idiot light sending units in the engine. The sending unit for an idiot light is basically a switch. With the engine off (no oil pressure) it is grounded. So when I hooked up the sending unit and turned the key for the first time the poor oil pressure gauge took full current as the sending unit was basically shorted to ground. Minor set back, I’m going to have to find a repair house to send it to and see if they can bring it back.   More to come! |
|
|
|
Post by spanks79 on Jan 21, 2015 23:57:28 GMT -5
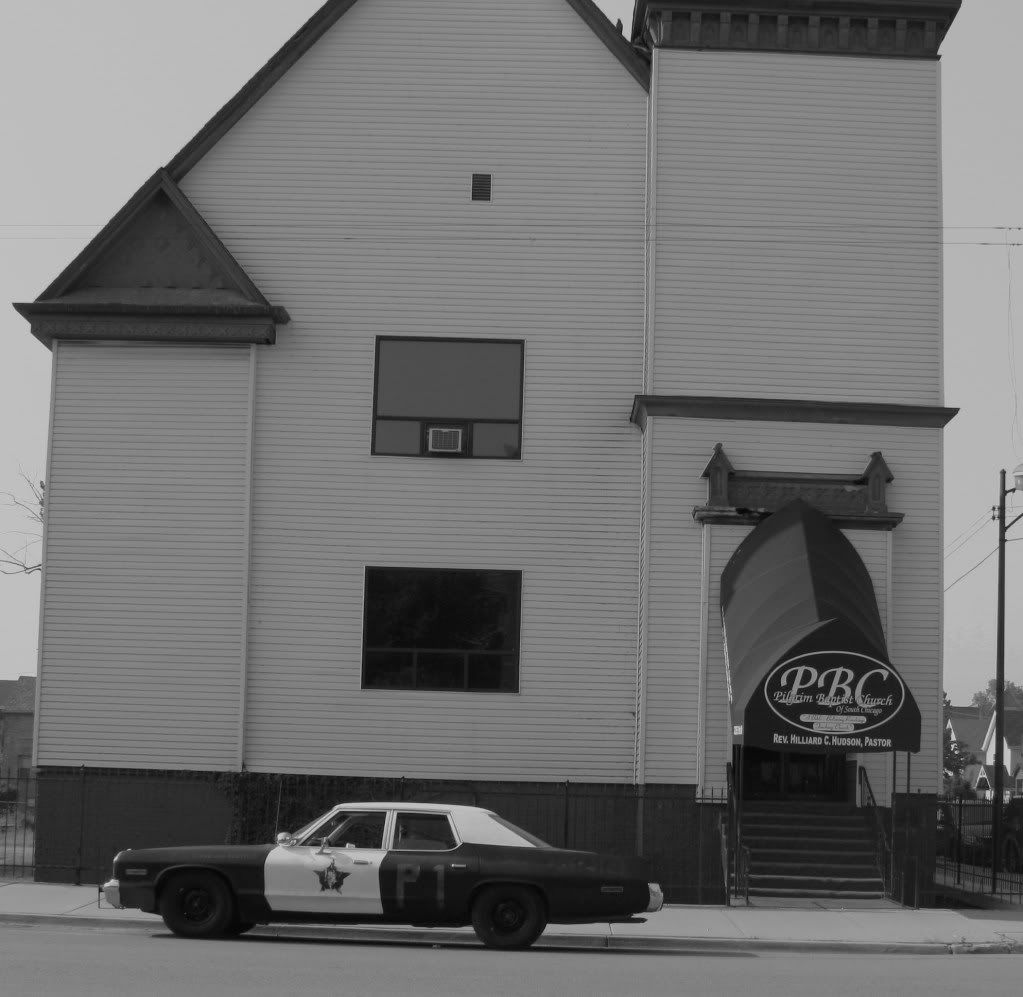
Told ya I had more! As you have seen from my pictures the last couple weeks, all of the sheet metal is on and lined up. The doors are all assembled with latches, regulators, glass and rubber trim. This was a bit of a task because none of these doors or sheet metal came from this chassis. We were starting from scratch. The doors I have came from Mona, my original 74 car. They were just ok, all of them were power window doors, most of the latches were seized or broken, none of them had glass in them. I believe 3 of them were 74 doors and the drivers door was from a 76-77, it was different color and had some different holes in it. The rear doors were the easiest to get together. We used almost all of the parts from the 76 Royal. The manual regulators, glass, U channel, belt line weatherstrips, and associated hardware. I had previously installed my door weatherstrips from Steele and they fit great. It all pretty much bolted together and fit well.  Don't pay attention to the steering wheel hanging out in there.....just checking the fit.  We used the lower door panels from the 76 Royal and the uppers are supposedly from a 76-77 Fury cop car that I purchased on the board here a while back. They were cleaned up and sprayed with SEM Camel 15173. I think the finished product is outstanding.   The front doors were a bit more tricky. We had a hard time getting the drivers door to line up. It took some time and adjusting but its finally on there and it shuts perfectly. Even lines up with the fender nicely. I had to buy a set of manual regulators off of car-part.com because the 76 parts car had vent windows.  The glass came from one of Arthurs cars. The glass was one of the first purchases I made for the car when I bought it nearly 3 years ago. The U channel and belt line weatherstrips came from Restoration Specialties. The U channel seems to work OK. The fit is not perfect but it works and I figure it might get better after it sits in the sun a few times. It sure beats the old cracked and missing stuff that was there before.     I also had to get a couple new latches for the front doors because they were broken. Remember the door latch Josephblues installed? 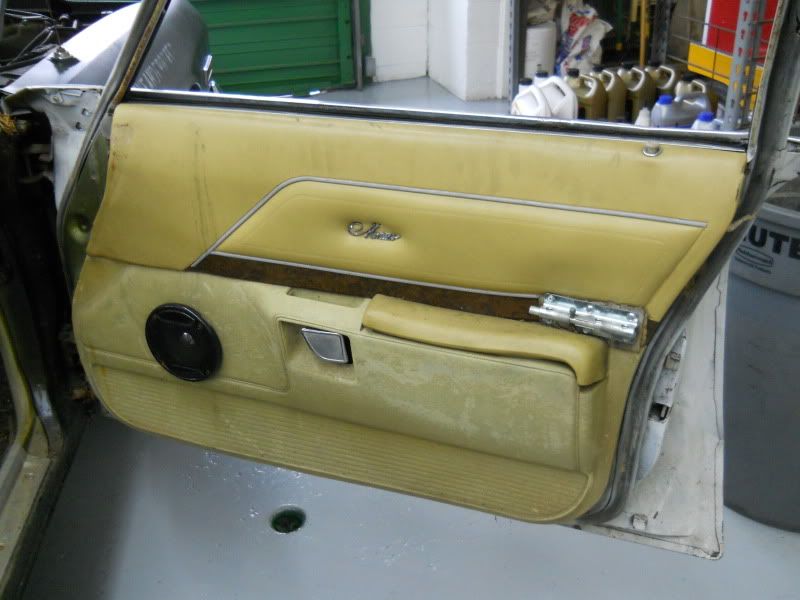 Still need to get a good outside door mirror and install the door panels.  The front end is all together and lined up. My buddy Mike had to do a little work on the headlight rings and springs, but he was able to reuse most all of the hardware. Plus all new bulbs were installed. I don't know what others have done when installing or swapping front ends but we found that truing to resuse the old hardware nearly impossible. We purchased a box of 100, 5/16-18 and 1/4-20 body bolts from AuVeCo. Saved a ton of time and looks great! Its a pet peeve of mine but I hate seeing hardware store bolts under the hood of a car.  I cleaned up, pressure tested and flushed out the evaporator core before installing.  I also got a new drier for it and plan on sending out all the AC lines to be restored by www.classicautoair.com Bumper is on with Josephblues built aluminum stand in push bars. The Push bars look great but are completely cosmetic. I am currently in the process of getting the steel together needed to build a functional set of push bars. I just need to find some of those cool rubber strips! Even added my red primer spot!    Jeeze, I didn't realize how dirty the car was until I looked at these pictures! |
|
|
|
Post by spanks79 on Jan 22, 2015 0:38:56 GMT -5
|
|
|
|
Post by cynot on Jan 22, 2015 8:13:37 GMT -5
Awesome pics and progress!
|
|
|
|
Post by josephblues on Jan 28, 2015 20:56:36 GMT -5
Hey, looks like your Bluesmobile is finally coming together. Love the pushbar!
|
|
|
|
Post by spanks79 on Feb 3, 2015 0:21:14 GMT -5
Since this has been moving so quickly I had to dig out a few items to get them in the works. Namely the seats and seatbelts. The 74 seatbelts I have from the car are in pretty rough shape. 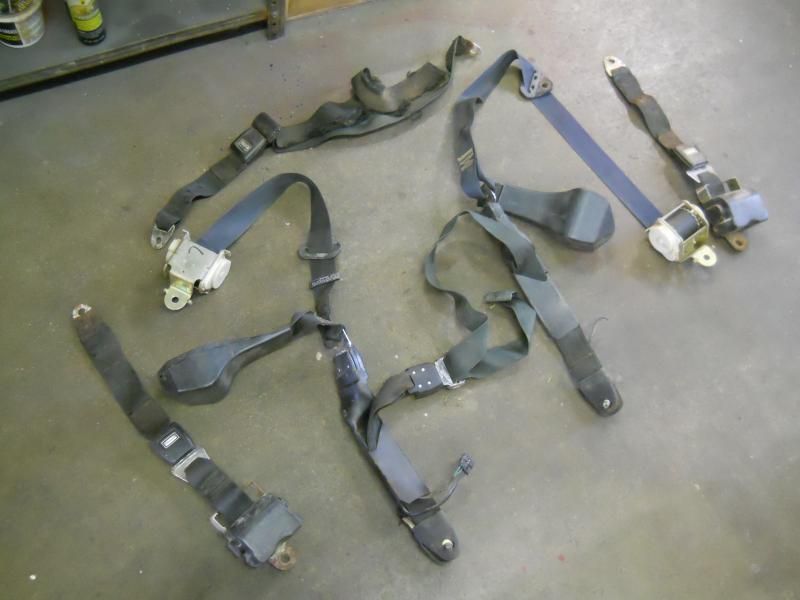 And they are specific to 74. 1975 and up belts use different buckles and retractors. The 76 belts I have are in decent shape but are the wrong color and the mounting points would have to be modified. 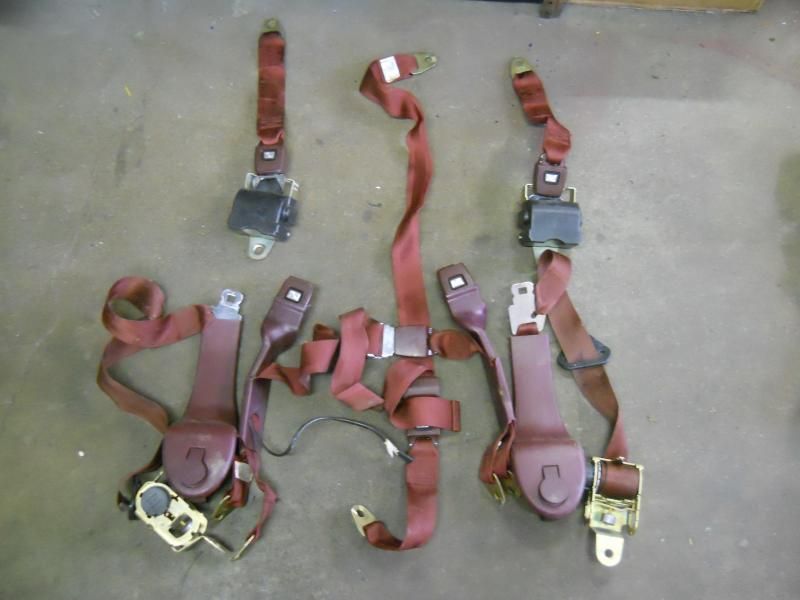 My plan at this point is to send both sets of belts, the 74 and 76, out to Ssnake Oyl products and see if they can make me one good set without costing me a ton. Well, I guess I’m expecting it to cost a ton, just hopefully not a ton and a half! The 74 seats I had were power bench but they were wasted, tracks and frame rusted and the upholstery was shot. I actually ended up trading the owner of the 76 my wasted seats for his nice maroon seats. He would only do a trade because he needed a seat for the demo derby. The maroon 40% 20% 40% arm rest seat is nowhere near Blumo correct but the condition was too good to pass up. It is also pretty damn comfortable, epically with the center arm rest.  Originally the plan was to simply dye the seats to match the tan / camel interior but after really looking at it I decided it would be a better option to get them recovered in a more appropriate looking material. So I dropped the front and rear seats off at a local custom upholstery guy. After a couple days the upholstery guy hits me with a number $$$$ wow! Now I am certain he will do a super job but I start to think, If I am going to drop real cash on re covering my seats I would feel better about it if it was the correct seat. So now the search is on for a proper bench seat. My intension is to have properly functioning air conditioning. I already have installed a new AC compressor, have a new drier, have flushed, cleaned and pressure tested the condenser and evaporator. Instead of trying to reuse any of my old lines I boxed up all the lines I had and sent them to these guys www.classicautoair.com/MOPAR_OEM_Parts_Hose-Lines.html Once again I’m hoping not to spend a fortune!  |
|
|
|
Post by spanks79 on Feb 3, 2015 0:32:37 GMT -5
With all the “big” stuff going, I don’t want to overlook all the little details. Picked up an OE type heater control valve on ebay.  Got some OE type harness clips from Mr Moparts.  Picked up a ceiling mount mirror from a ’73-’74 Cuda, or so the seller claimed, on ebay. It fit good and all we had to do was drill a third hole. Installed pics soon.   The door mirror is a remote style mirror. I needed a good mirror glass and control cables. I bought a remote mirror off of ebay for a 74 New Yorker. I was hoping I could just bolt it on but the mount was wrong. Its amazing the stupid money folks want for 74 mirrors! Ended up taking the guts out of it and rebuilding my Monaco mirror. Turned out nice.   Last little bit of wiring to do was to repair the headlight dimmer switch wiring. It appears it has gotten a bit warm.  Couple bucks at the parts store and all fixed up  The next updates will be on floor covering and the dash pad. |
|
|
|
Post by cynot on Feb 3, 2015 8:15:26 GMT -5
Do you know the OE part number on the mirror you picked up? I need one but I don't know what will work.
|
|
|
|
Post by spanks79 on Feb 3, 2015 9:13:17 GMT -5
|
|
|
|
Post by cynot on Feb 3, 2015 10:02:57 GMT -5
Thanks, I should have been more specific. I need an inside rear view mirror for mine. It was missing when I got the car, I'm not sure what its supposed to have...I don't see any signs that there was ever one glued to the windshield, so I'm assuming I need the one that mounts to the headliner and supports the sunvisors, like the one you picked up. There are 3 mounting screw holes in my headliner but I have also seen the sunvisor brackets mounted there with the glass mounted mirror on other Monacos. I will have to start looking around for something like you got and see if it works.
|
|
|
|
Post by spanks79 on Feb 3, 2015 16:52:40 GMT -5
|
|
|
|
Post by spanks79 on Feb 4, 2015 0:43:29 GMT -5
For floor covering I am using ACC carpeting. I picked up this carpeting along the way sometime a while back from Arthur. I think it actually came with his 76 parts car. I thought about using a black rubber mat like Blusmbl did but I already had this and it looks pretty decent.   My dash pad is in really good shape. It had a couple cracks on the edges and a couple holes where a Monaco or “Mona” emblem had been attached. A bit of filler took care of the holes, but the big decision was whether or not to cut it for the Craig.  Actually it was not much of choice. I had always planned on cutting it but I know a lot of guys have a hard time cutting up a good dash. I did not really like it but I feel it is an important part of the Bluesmobile. Using a razor blade and air powered body saw I cut it up! It actually turned out nice. I think my cut out actually turned out too nice!    Also painted the dash bezel wood grain black. I wanted to do this to mimic a cop car dash. This was actually kind of a pain in the a$$. I guess from years of different oils and cleaners, even after cleaning, prepping and sanding the paint wanted to fisheye. In the end it turned out nice.  Painted the Evap canister at the same time, of course the paint covered it easily no problems  Also painted the maroon upper instrument panel with some “camel toe” 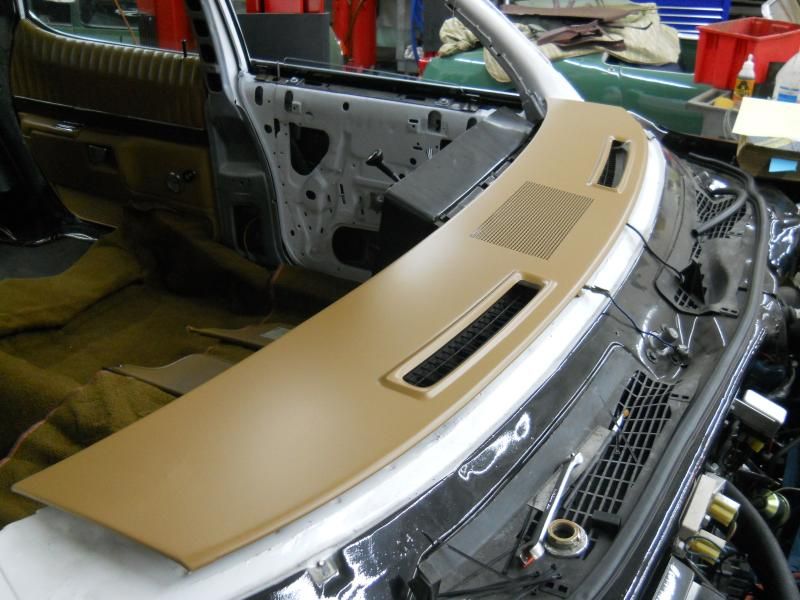 Next up, some more interior panels painted plus some super awesome unexpected news regarding hood installation! |
|