|
|
Post by 77granfury on Mar 14, 2022 21:10:48 GMT -5
PART 1. Searching for a Bluesmobile and bringing it homeEver since I showed my little man - now 7 - the movies I grew up with, there was always a downside to it. Showed him "Small Soldiers" and ended up spending hundreds of $$$ on 80s action figures that he wanted. Showed him Chucky, he wanted the doll and outfit for Halloween. Showed him my favourite movie of all time - the Blues Brothers - he wanted a Bluesmobile. Just this time, it seemed to work out just perfectly different...! Having my wife breathing down my neck for every new "pile of trash" I'm towing into the driveway to fix up, this time would be different. It wasn't for my pleasure. It wasn't a woodie wagon, a Trans Am or something she usually sees sitting here for years. This time it was for the little man, and HE wanted a Bluesmobile. PERFECT. I gave in and started to look on kijiji, auto trader and the likes. I live in the Greater Toronto Area, and in my whole life, I've never seen a real Bluesmobile. A Monaco. A Fury. They're simply gone. Maybe it's our salt here, maybe it's the fact that I was born when they stopped making the big C-bodies. Finding one is a true challenge, so I learnt. Canada-wide there was no Monaco for sale with the exception of a burgundy 2dr coupe in Alberta, and no Fury with the exception of a rotten one with lots of missing parts in Saskatchewan. But then I found this one: Some of you might remember the ad: 1977 Plymouth GranFury Brougham, 360 4bbl/727, 50000mls, near mint!
   It was the day before Mother's day 2021 when my son and me took via rail for the first time of our lives to Windsor, ON, to pickup the Fury. The interior was absolutely mint, the vinyl top was mint, the paint was shiny, I couldn't find any rust with the exception of some surface rust in the rear lower wheel well lips, but that was about it. Had it not been 44 years old, I could have sworn it had some new car smell left in it...Lies :-) New Delco battery, new magnaflow muffler, new Edelbrock carb, Edelbrock aluminum intake manifold, fancy 90s stereo that plays Blues Brothers CDs through one center front and 2 rear speakers, decent tires, and many more positive surprises. The car is from the US. It was owned by the original owner until well into the 90s or early 2000s - in Minnesota - sold by Rosemount Chrysler/Plymouth. It must have sat in the garage for years. The seller and me came to an agreement, he disclosed that there's a small rad leak, and we went straight onto the 401 heading Eastbound to reach the 300km radius for CAA to give me a free tow. 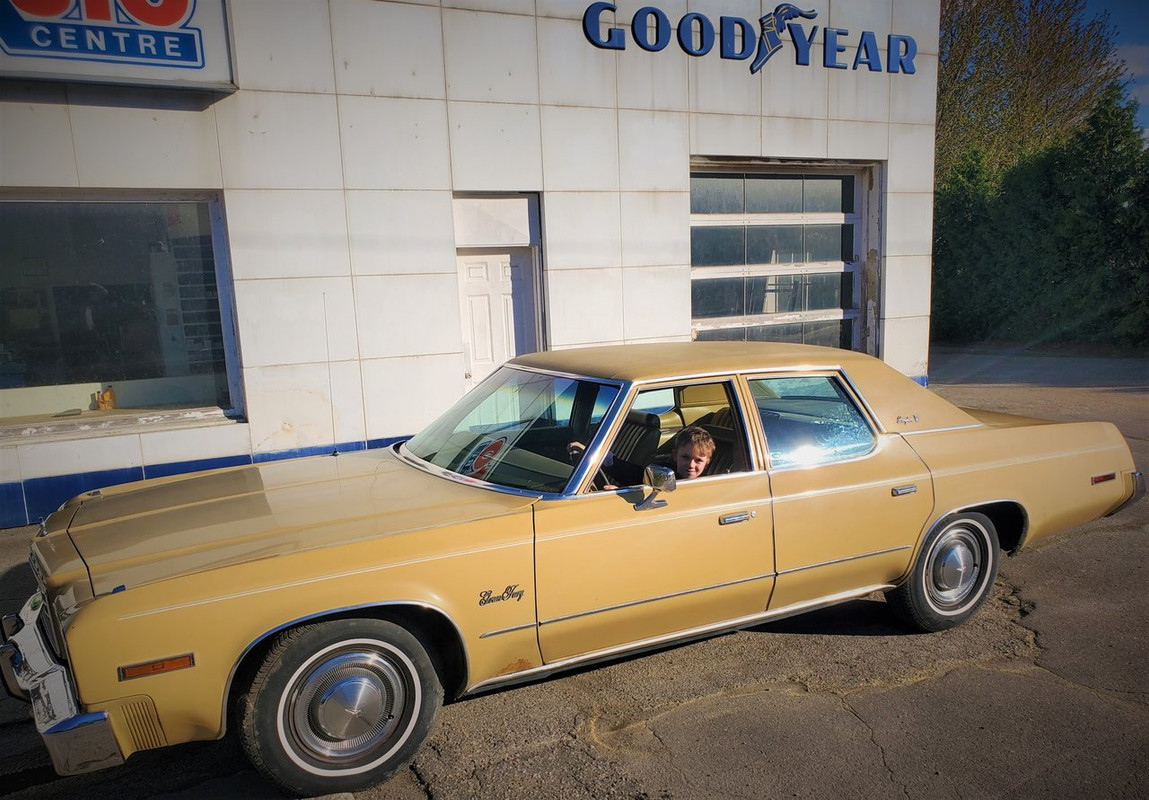 First time on the highway...like a grandpa at first, but what a smooth ride!  For the next weeks my son kept polishing the car and asking me when we start tearing it apart and making it a Bluesmobile - while I was trying to find an answer to the question if I can "destroy" such a nice car with original paint and flawless vinyl top. I made the mistake to post on a C-Body group and got ripped a new one. This wasn't an easy decision, but after finding out that a nice C-body isn't worth much, and that Chrysler isn't GM where a boxy Caprice in questionable shape sells for 3 times as much as what I stole the Fury for, AND that my rear quarters had been redone (so not all original paint etc) - I forced myself to see the green light and started with my little man to convert into a Bluesmobile. After all - I bought it to create some memories with him, to have a great time with him and maybe to have a first car for him, too (if he chooses his place of work/school etc wisely, so he can walk instead of paying these prices for gas) I'll continue in the next days with more pictures and good/bad experiences. Thank you all for reading!
|
|
|
|
Post by 77granfury on Mar 14, 2022 21:42:58 GMT -5
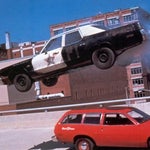
PART 2: Gathering parts... CENTRAL of Roseville, Minneapolis - I think I said it wrong above. The sticker was still above the taillights. I was even considering - for a split second - to go a slightly different route after finding on the OPP (Ontario Provincial Police) website this picture:  ...but then I also found THIS picture - and immediately drove almost 3 hours into rural Ontario to pickup what I thought I can never find locally: a 74 header panel.  The seller was a complete MOPAR nut. He had a 66 Charger, a 68 Charger, a few trucks, and 70s parts to build a few cars out of. Yes, I overspent a bit. Yes, my wife doesn't know until today that these parts actually cost money. I walked away with a truckload full of Monaco/C-body parts for a proud amount of money, but I was also aware that finding parts is next to impossible. So I grabbed.... -74 Monaco header panel with trim and grille (somebody had already bought the front bumper a few months or years earlier) -74 Monaco rear bumper, taillights, trim, bumper filler and fuel door, -15x7 police wheels, 5 of them, with matching dog dish caps -Various pieces like an 8 Track stereo, some switches/backup parts, digital clock, etc.  More to come soon.
|
|
|
|
Post by Steam McQueen on Mar 15, 2022 12:11:40 GMT -5
- Amazing. I saw some of your old posts where you were gathering parts, I'm not sure if I ever knew what you were doing. I definitely remember the green header panel ...  - Thanks for the info and pics.  |
|
|
|
Post by 77granfury on Mar 15, 2022 16:10:29 GMT -5
The green header panel was of a complete 74 Big Block Monaco station wagon he parted out years back...oh well...one side was full of bondo, I had my "private body shop worker" chip away on it and we decided to leave the crumpled section - because according to my little assistant, there's a fair chance that this exact header panel was damaged while the donor Monaco smashed into an Oldsmobile dealership window, or into other random things at the mall... :-)  |
|
|
|
Post by 77granfury on Mar 15, 2022 17:17:13 GMT -5
PART 3: Wheels: Steel and SteeringNothing bugs you more in your C-body than an ugly 2 spoke steering wheel and tiny wheels, the so-called pizza slicers. It literally represents the "malaise era" of Detoit cars of the 70s after the fuel crisis, barges in different brown tones with huge engines that barely put out 140 hp. That's NOT what you want. Your sleek - soon-to-be - Bluesmobile in elegant black and white, able to outrun the Police themselves, deserves an appropriate steering wheel and solid steel wheels that can't only take a beating, but also a beefy tire. I read somewhere about correct wheel sizes for Bluesmobiles being what I already had, the 15x6 steel wheels, but there seemed to be room for improvement. When picking up the above mentioned header panel, I also bought a set of early 70s Police wheels in 15x7. The inch difference doesn't sound like a game-changer, but the looks do. Especially wrapped in the 245/60-15s I had here, they might not be tall enough, but I say we shaved about 30 years off her age! What looked like the once-a-week ride for grandma to bingo, is now the daily driver of choice for the 30 year old, slightly dirty librarian... 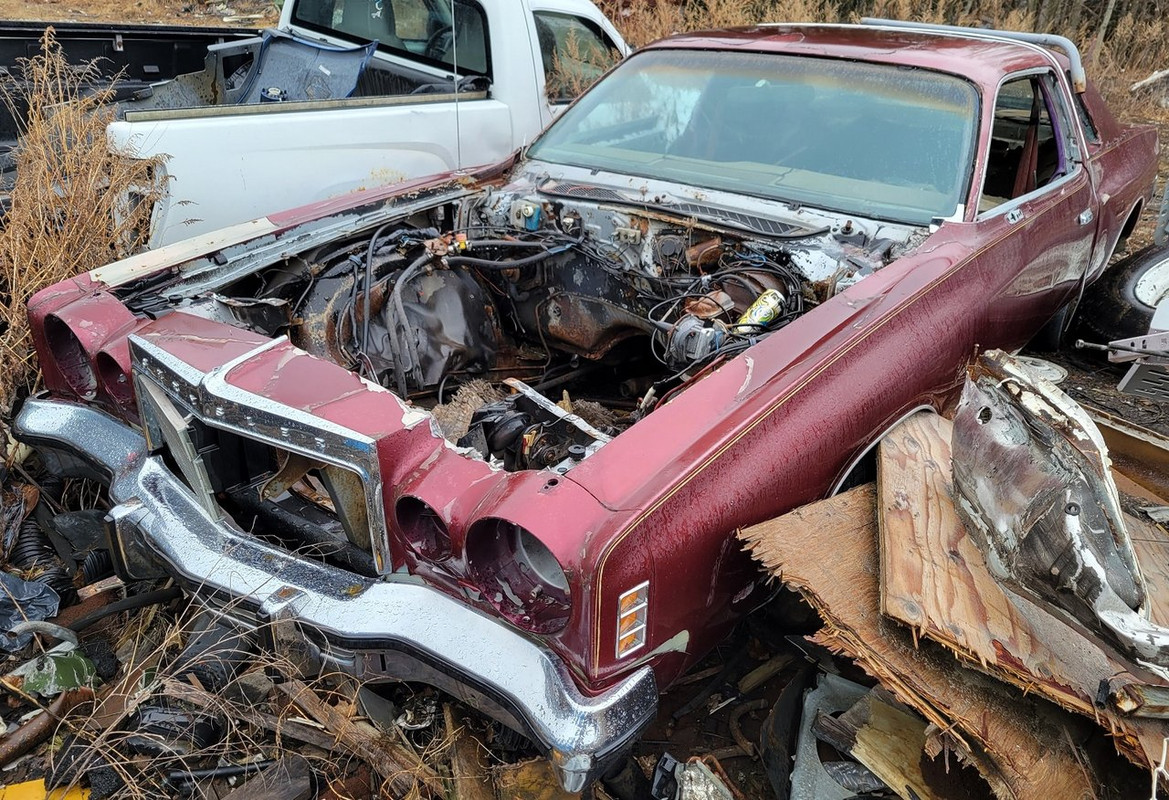 Above: The Donor car for our steering wheel - A relatively nice Cordoba Above: The Donor car for our steering wheel - A relatively nice Cordoba
Below: The steering wheel after a thorough soak and clean, and a few coats of SEM (also visible...the tiny "trim slots" in the horn pad and the tissue on the bottom spoke to keep the horn pad out, since I lost one of the 3 springs in the process...)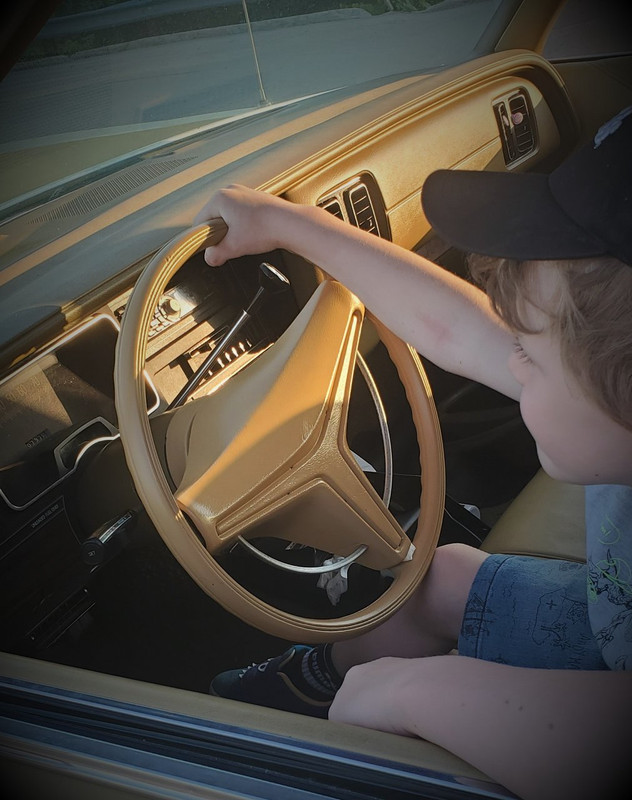 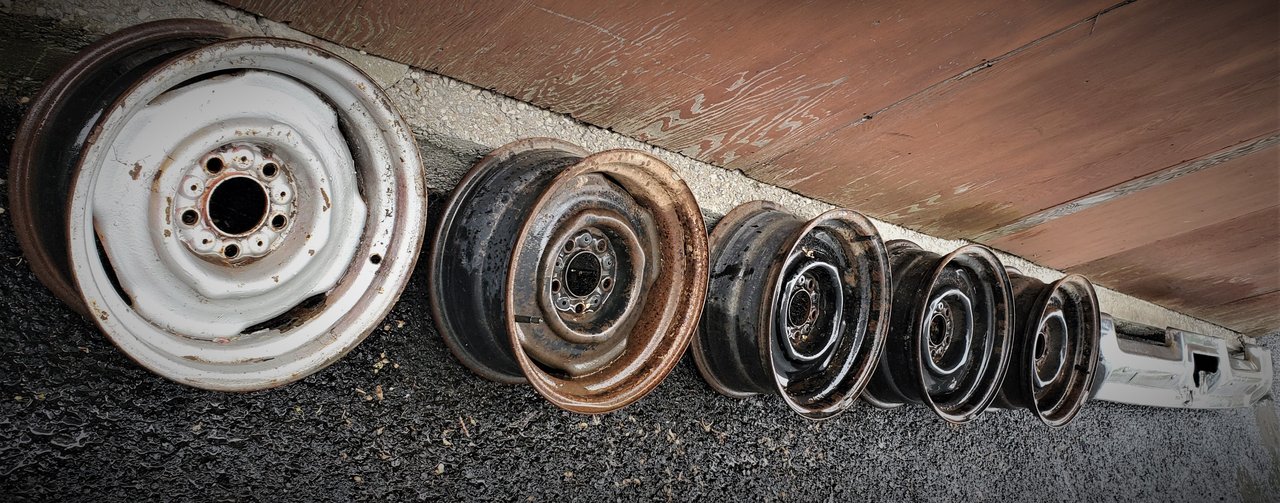 I found a junkyard less than an hour away that didn't only have 30s-80s cars in the back third of the yard, but they also let in customers UNDER the age of 18, so "Doctor Myles" and me went regularly to that yard (Newtonville). Not only did we find a St.Regis and a 75 Cordoba (that we took the movie-correct steering wheel from - for $40) but much to my ...cough...amusement...cough... my little guy found a stash of old Playboy magazines in a Dodge conversion van. He found it was hillarious, me too, mommy not so much after we brought one home.  Back to the steering wheel....there was an aluminum cover with wood print on the center that we took off carefully, but it left tab-holes in the horn-pad that are quite visible if you look closely. I might give this aluminum trim piece a good sand, re-install it on the horn-pad and paint it again. We dyed the steering wheel with SEM paint (and it's holding up great!) while having our 15x7 police wheels sandblasted. I can't recall any GM police wheel being THAT heavy, they really are solid. Back from the sandblasting, we immediately primed them and gave them a few shots of semi-gloss black, they looked like BRAND new.   In the meantime we found out that our C-Body always seemed to be magically drawn to photo-ops in front of churches... 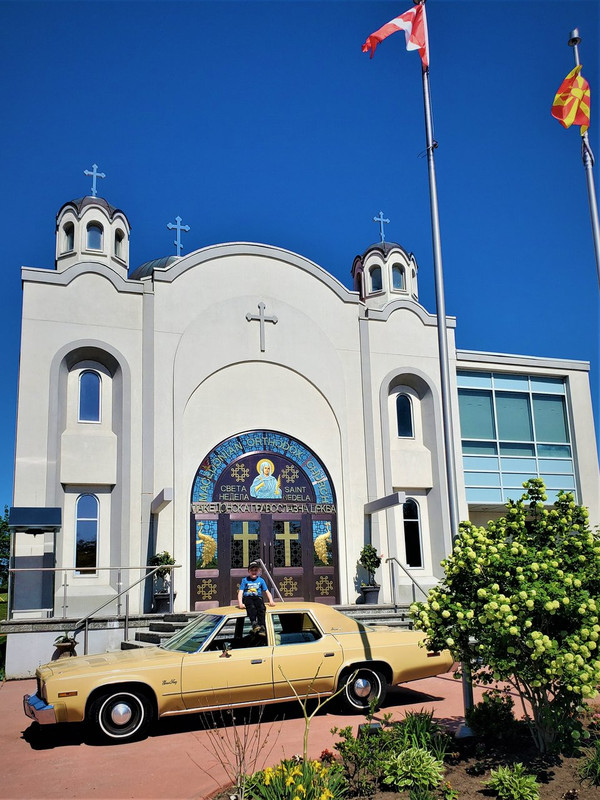
|
|
|
|
Post by 77granfury on Mar 15, 2022 17:32:33 GMT -5
We had the 15x7 police wheels wrapped in a set of 245/60-15 BFG Radial T/As I had laying around, and to give the "golden fawn barge" a few extra horsepower until the black and white tuxedo comes on, we had the raised white letters installed on the OUTSIDE, you know, that gives it at least a second in the quarter. It also looked significantly better than the 15x6/195-75-15 white wall pizza slicers we had on there before. We'll eventually do it right and get a set of 235/70-15ish to give it the correct look, but for now we're rocking these. 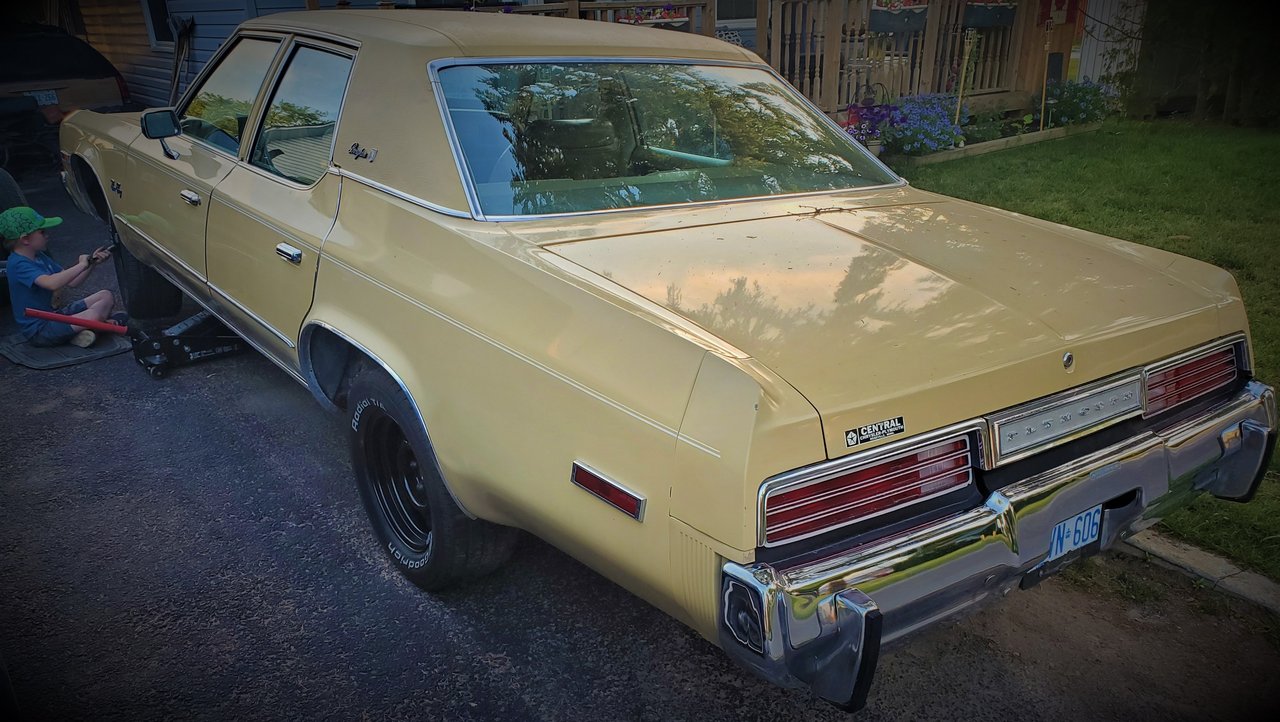 Above: Once again, child labour proved to be the most economic way to get those jobs done, where, you know, you have to bend over or go on your knees. All for 2.5 ice creams an hour? How can I say "no"! Also clearly visible: the "Brougham" fuel door. What once pointed out the top-of-the-line model, is just not the desired, hot item we needed to cover the secret fuel filler neck.   Next on the to-do list - finding a long enough 1/2" drill bit, installing the Unity spotlight, then de-vinylizing, de-trimming, header panel conversion and more. Stay tuned... |
|
|
|
Post by 77granfury on Mar 17, 2022 8:22:57 GMT -5
PART 4: The header panel.I did a lot of research to find out what is possible - and what isn't - and although information on Chrysler C-bodies - or Chrysler products in general is scarce compared to the wide variety of GM information that is all over the internet (I had a hard time finding out which model fuel pump bolts onto my 360 SB, as none of the parts stores - including rockauto - had ANYTHING. Mind you - I'm a GM guy and probably quite spoiled when it comes to availability of parts, used or in junkyards...). I found pictures on the Internet of a black "Furaco" - so it had to be possible. I have yet to find a "Furaco" with Monaco rear bumper/lights etc, but I know NOW that there's a lot more to it, but more to that later. My little man wanted to see results and kept talking about "buying a Monaco" when we see one, so the time has come for the header panel swap. I sourced the headlight brackets from a 74 Monaco coupe in Alberta that was sold in parts, I already had the grille, header panel and light trim, so off with the old....  ...and on with the new! It was honestly a lot easier than I expected, however, the Gran Fury fenders are shaped slightly different in the front, it took me more time to adjust the headlight brackets than anything else together. And yes, I'm not re-installing the "Dixie" horn into the Bluesmobile... 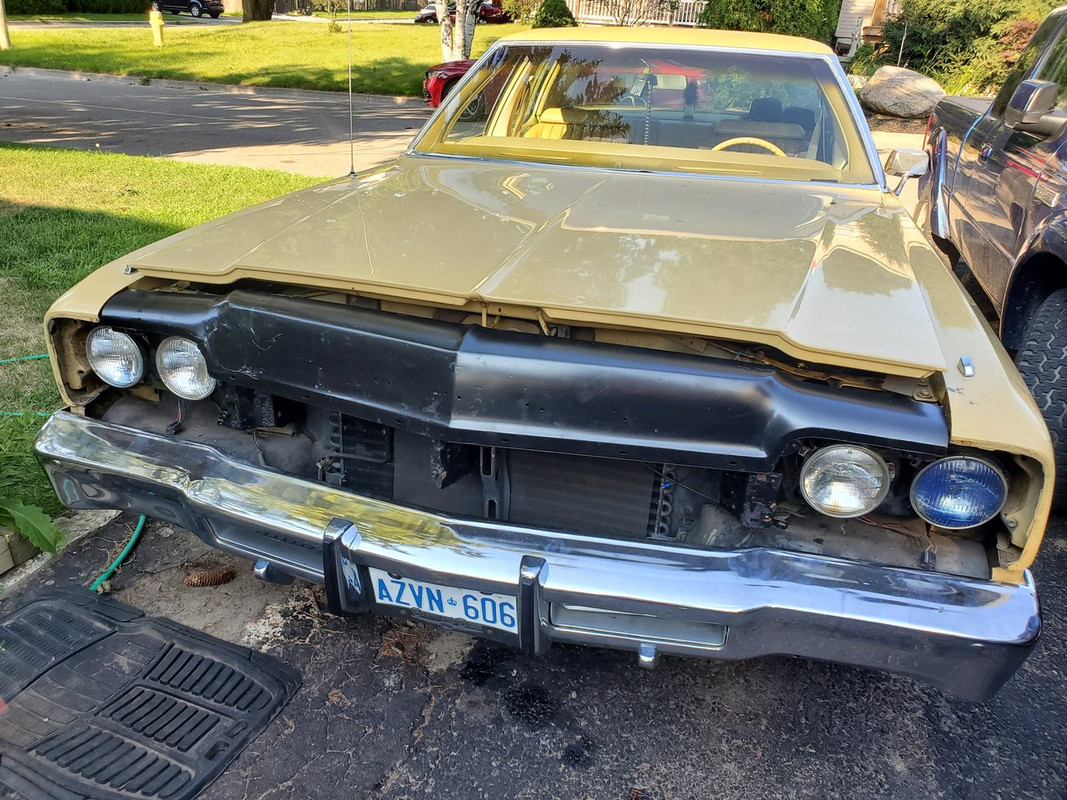  It's hard to believe what difference a simple "nose-job" can do. The only problem that arose was - now I had no marker lights, but more to that later - you might see my temporary solution in the avatar... I'll eventually have to change out the bumper and build/mount a push bar to perfect it, but for now the little man was so happy, he had a "Blues Brothers Shrine" put together on the living room table - minus the smoke, I added that...  I don't mean to brag, but isn't it awesome/cost effective when you get to buy your son for Christmas and his birthday the things that you've always wanted anyhow and everyone is happy? Win/win/win situation: you spend your hobby money on birthday gifts and the wife can't complain...talk about killing two birds with a stone or a few overpriced model cars :-)
|
|
|
|
Post by 77granfury on Mar 17, 2022 8:50:28 GMT -5
PART 5: the vinyl roof
Up to this point all changes I've done were somewhat reversible and I didn't have the feeling I'm ruining a really nice survivor. I was even considering to paint the header panel in Golden Fawn "for now" and go for the Unmarked Cruiser look, just to not have to do anything I'd regret later. As I mentioned before, the time has come where I asked myself what's more important to me, and "keeping a C-body in original, excellent shape, barely driving it to keep the mileage low and make sure the kids don't lean their bikes on it" or to have a hell lotta fun with my little man and create some memories he can always look back to. I had my answer. To get to this point took me months, now there was nothing holding me back anymore... ...but first: we need gas! 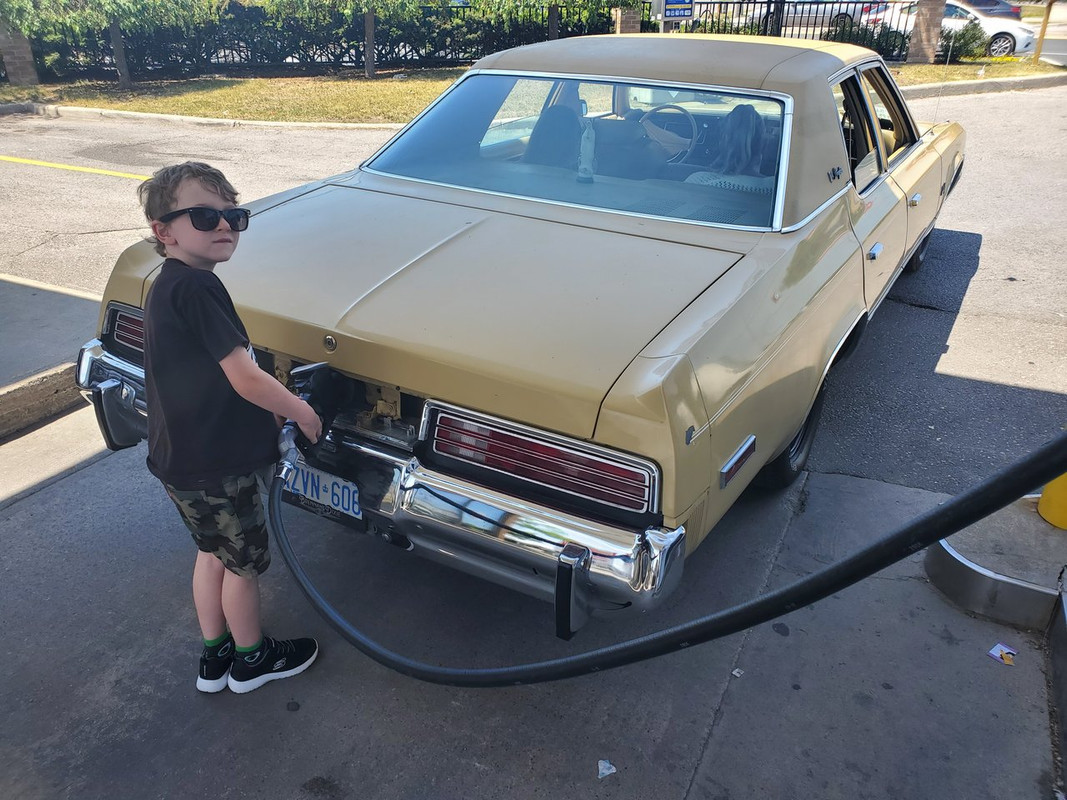  I had a lot of help from a kid that wanted a golden pleather jacket I believe  Here clearly visible: the more you strip the luxurious options off a car, the faster it looks and gets. Removing the vinyl top gave us for sure another 3/10s in a quarter. The glue was a very different story, while I researched different potions to soak in there for easier removal, my hard working assistant already stripped half the roof just by rubbing the glue off with his hands!  And we scored again...no rot! I may add, I've read many horror scenarios about "glue residue as hard as concrete" and more, I believe we had a relatively easy game as our vinyl top wasn't dried out and baking in the sun for years. This car came from Minnesota where it's only warm-ish for half a year - and is in Canada where the sun is known to be less of a roof-baker or interior-destroyer than in Florida.
|
|
|
|
Post by 77granfury on Mar 17, 2022 9:23:42 GMT -5
PART 6: the spot light.I had to work with a quite low and restricted budget, so after scoring the correct length shaft and spotlight for around $150US shipped on ebay, I was a happy camper. For the correct bracket I contacted Unity in Chicago, as doing shortcuts in that department could cost me a windshield - and that wasn't up for debate. What I didn't expect, was UPS ripping us off - although you don't have to pay customs for a product made in the US or Mexico as per NAFTA agreement, UPS charged me a total of $70US for shipping AND to fill out a form that states that the headlight bracket was US-made. Complaining doesn't help - just for future reference, I won't buy ANYTHING anymore that is shipped with UPS across the border.  77 Gran Furaco - now with white door! We're rocking the police car look hard. You can spot the pilot holes drilled for the Unity Spotlight bracket into the A-pillar, so far so good, installation seems to be a breeze...  Next problem that arose - you can't just use your half inch drillbit that you have at home in your toolbox, even if it's never been used and sharp as a razor. You need to buy one that is at least 10" long - and that's where the problems start. Here in Canada I was able to find one at Home-Depot for over $50 - online for around $35 plus $20 shipping  so that's another price to pay to add to the spotlight list...  At the end the whole spotlight ordeal set me back almost $500 Canadian - that wasn't planned for. To compensate we had to take the money from the wife's birthday budget, which is still sitting at -$50 after one birthday...:-) But: it was worth it. It looks awesome, works great - as you can see you can even annoy your older sister by illuminating her room from the outside to chase possible male suspects away.
|
|
|
|
Post by 77granfury on Mar 17, 2022 10:41:20 GMT -5
PART 7: bodywork and paintWhen you live in Ontario - or anywhere in the rust belt - where salt covers most of the streets and your car for almost half a year, you learn one thing quickly: bodywork and paint is the most expensive thing on a car. It's so labour intensive that any budget just disappears in days/hours/minutes. That's where I had to make an executive decision: Child labour is the way to go.  Over the course of the hottest weeks of August in Summer 2021, we prepped and painted our pride in the driveway. We had to fill all the old emblem holes as well, but the car was super straight. It was a constant "getting up early to lay on the paint before it's too hot" and wet-sanding in the evening when all the bugs came out so that we couldn't paint. During the day, as it showed, the paint baked on nicely. I sprayed the doors white first, then took a few days for the black before focusing on the white roof.  That looked SO MUCH better! The roof is still golden bondo fawn, it came last. The barrel nuts for the Monaco emblems I bought from Alberta finally arrived, so we put the correct '74 emblems on, too. In the meantime I was on the market for stencils and decided against the "worn look" ones or vinyl decals, I wanted to age them myself and paint them on, I was also a little concerned that the common Monaco front fender stencils/decals would look too small or large on the different shaped Fury fenders, so I ended up ordering stencils from a company in California that custom made them for me for under $100 shipped, and they were GREAT!  The essential test drive to quick-dry the paint... Also visible on the last picture is the non-Brougham Plymouth fuel door I found on ebay. My original fuel door was like an emblem itself, with large embossed PLYMOUTH letters, all chromed out. I was happy to find the base model fuel door for a Fury/Gran Fury from seller "406" (who is by the way awesome to deal with, really reasonable shipping to Canada - it seems like he's crossing the border once a week and ships from both countries to save the buyers on shipping cost - and lots of C-Body cars he's parting out) and measured/drilled the holes for the appropriate "DOGE" lettering. The Dodge Monaco fuel door is surprisingly a good 3 inches narrower - although the Monaco taillights are narrower, too!
|
|
|
|
Post by spyphish on Mar 17, 2022 17:27:50 GMT -5
Very nice project. I have an extra restored 14o speedo (Holy Grail) but is probably worth more than you have in car. Phish
|
|
|
|
Post by 77granfury on Mar 18, 2022 1:27:50 GMT -5
Thank you, Phish. I doubt I'll be in the market for a 140mls speedo or the oil/coolant temp gauge anytime soon then but you can always PM me, maybe I'm thinking wrong and you're not talking 4 digits?
|
|
|
|
Post by 77granfury on Mar 18, 2022 1:54:45 GMT -5
PART 8: the graphics/stencilsI wanted to paint my graphics on - and give them some wear with different grit sandpapers etc for a more authentic look. To me personally, the ebay decals look "ok" but I wanted to go with stencils - and a custom size in the front to make sure it doesn't interfere with the contours of the Fury body lines vs. the Monaco fenders. I found a stencil company in California and after some great conversation, the owner made the stencils for me, spaced them out correctly and even sent me some extra pieces to practice with - turns out, it's not hard at all and now I have a few spares. Stencils were on in no time, a few newspapers and coats of paint, done.  I started with the "To Serve and Protect" with three coats of white, then the Police stars with a couple coats gold and black, then the P1 and tail numbering with a coat of white and a couple coats of gold on top, then I wetsanded with the exception to the Police star, i took a rag and rubbed the wet paint partially off...what a mess... I think I've only ever done something like that by accident, like when you lean at that freshly painted post or slip and fall forward when painting a hood (jk)  After weeks of sanding, painting, wetsanding, again painting, again wetsanding, polishing (and let me just throw this in: I bought a "DA", a random orbital polisher - what an investment. I had some orange peel in some parts of the paint, and instead of wetsanding with 1000 grit or more I used the DA and some of Meguilar's Ultimate polishing compound, I couldn't believe my eyes. That thing didn't only take a lot of the orange peel out after only one pass, it gave the Bluesmobile a never expected shine (the picture below is before using the DA and you can see the lack of shine and rougher patches of paint)  Either way, once they were all done, the "Doctor" was happy, but what a difference! With the stencils on, there wasn't too much left to make it look authentic (besides the front push bar and a few more details...)
|
|
|
|
Post by 77granfury on Mar 18, 2022 2:12:37 GMT -5
PART 9: the missing marker light/blinker issue
Safety issue! After swapping my '77 Gran Fury header panel for the '74 Monaco panel, I lost my orange marker lights in the front - and therefore I had no indicators in the front. Not so safe, (it's not like driving around without taillights is much better, but that was for temporary enjoyment in between coats of paint only - you know, you want to REALLY bake these coats on by driving in the sun) so I had to come up with a temporary solution until I had a Monaco front bumper with markers. The quick solution came on ebay - from China - delivered within 2 weeks and boy that looked nice... On the shot below you can get a better picture what paint after the use of a "Random Orbital Polisher" looks like - definitely not like a roughly $300 paintjob anymore - or so I wish to think...  I like the look even if it's not 100% stock Bluesmobile, and when you have them glowing amber at night, it reminds me a little bit of the evil-ish look of the new Challenger.  I might have to re-wire them, at the moment my daytime running lights are white until I switch on the blinker, then all hell breaks loose and the car suddenly has two different eye colours and looks like a crosseyed guy starts flirting with you, I'm thinking I really have to rewire for orange only - or just orange on the inside lights...? Send me your ideas/comments - is is blasphemy? 
|
|
|
|
Post by cynot on Mar 18, 2022 6:33:40 GMT -5
I love watching your build unfold...great pics and commentary. Keep up the great work!
|
|


 so that's another price to pay to add to the spotlight list...


