|
|
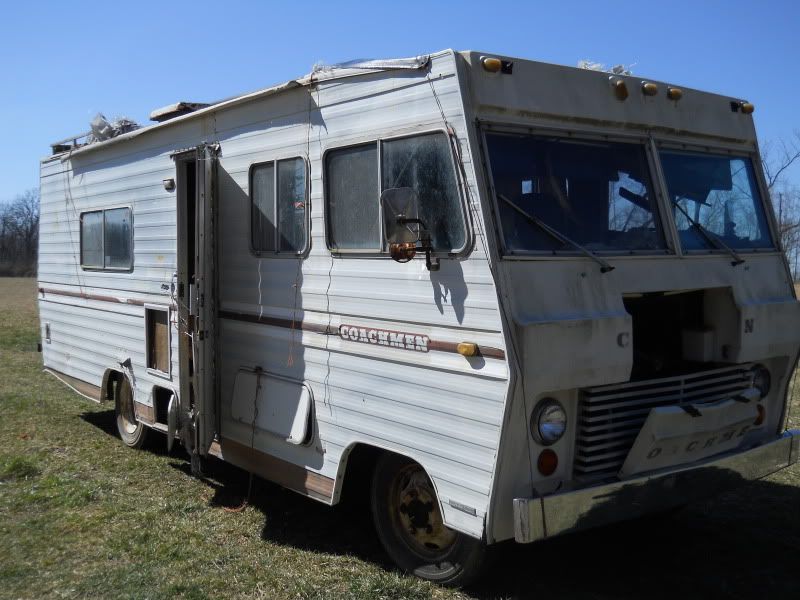
Post by AZBlues on Feb 17, 2015 17:52:03 GMT -5
People must drive old Mopars like they do in the movies. Three of my wheels were out of round, all with runout on the rear bead seat area. I fixed them as follows: Put the wheel on a front rotor, spin it around by hand, keeping an eye on the bead seat. 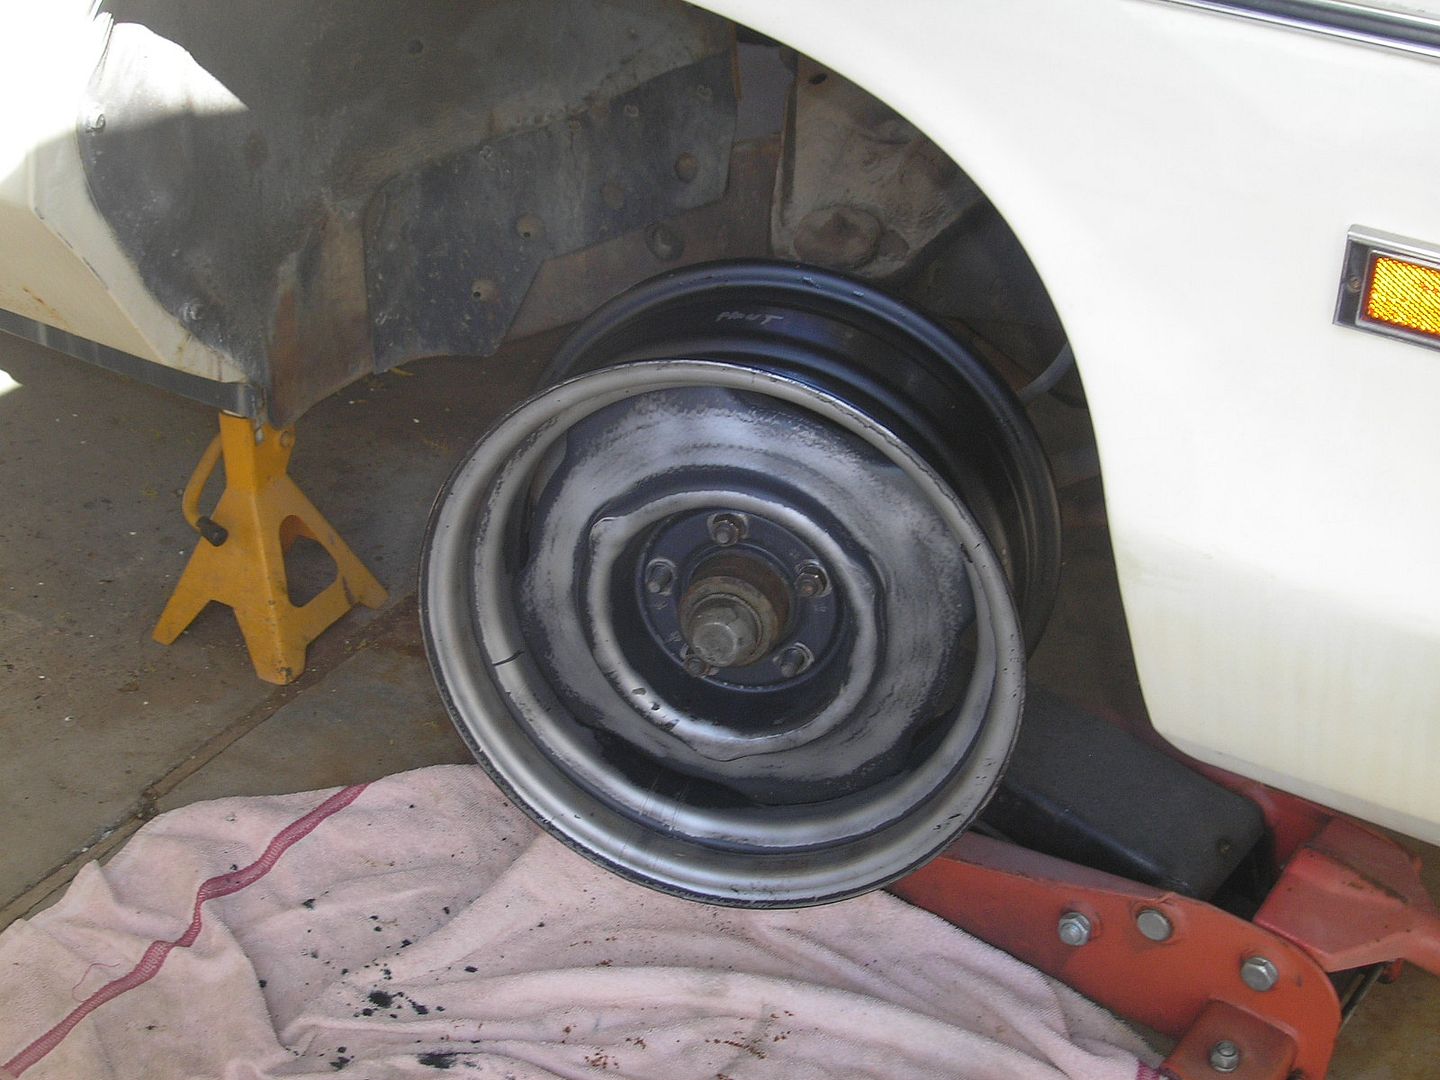 Find the low spot, mark with tape. 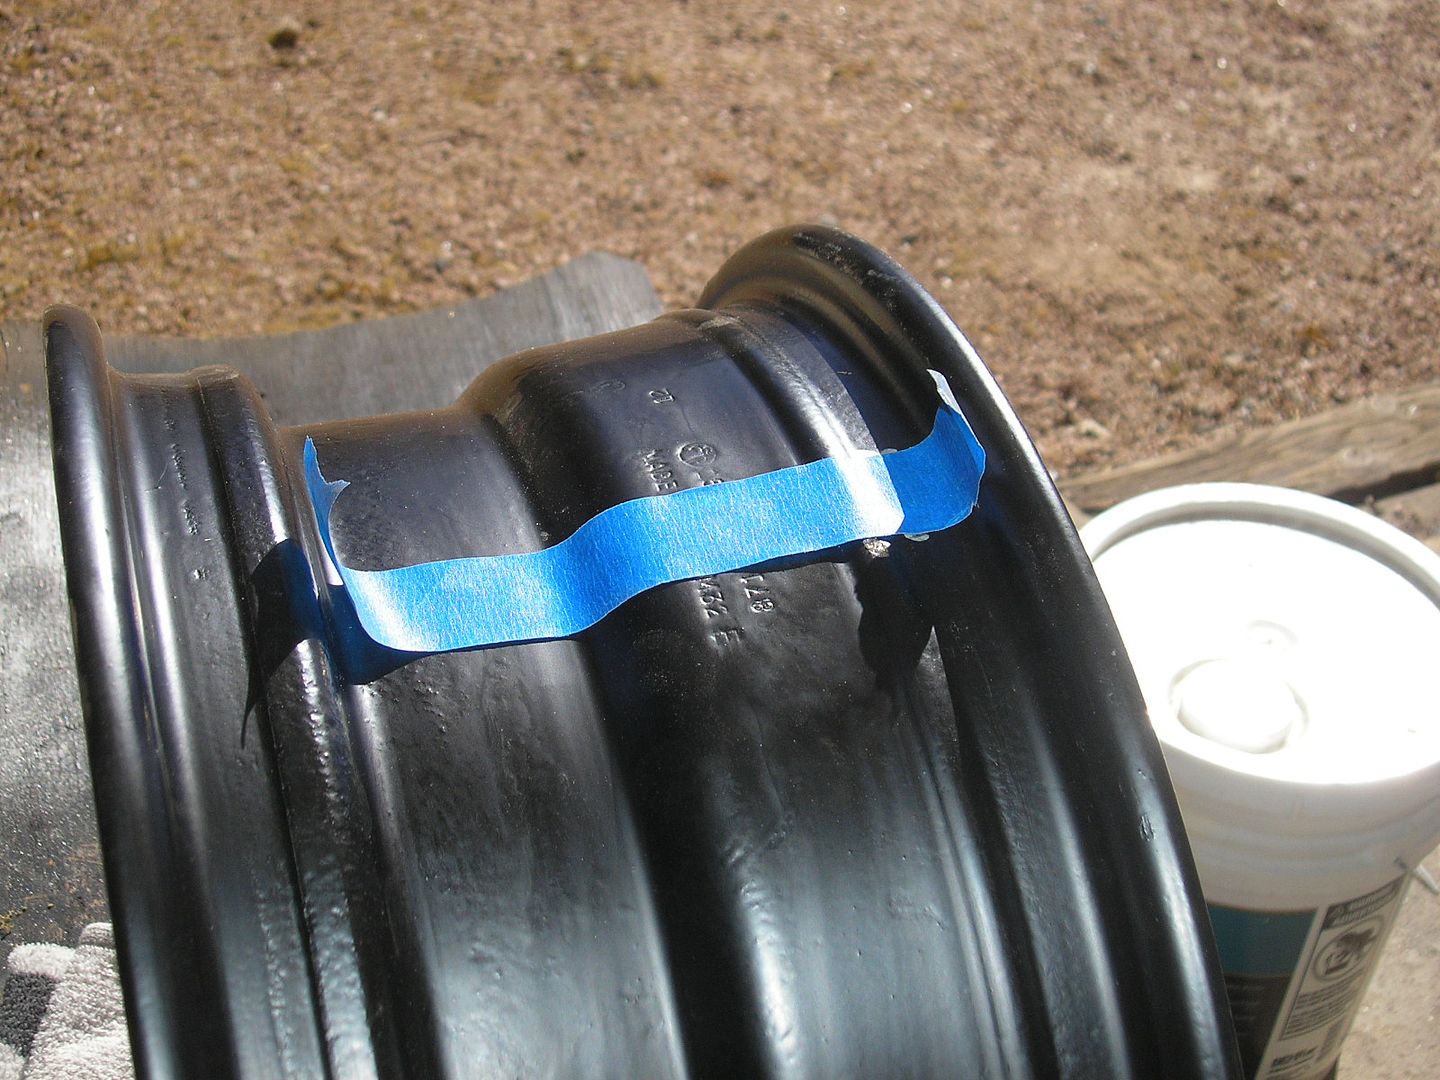 Position a heavy duty bottle jack in the wheel, put a wood block at the bottom so it doesn't move that side. Put the ram tip under the tape. I borrowed this jack from my press. 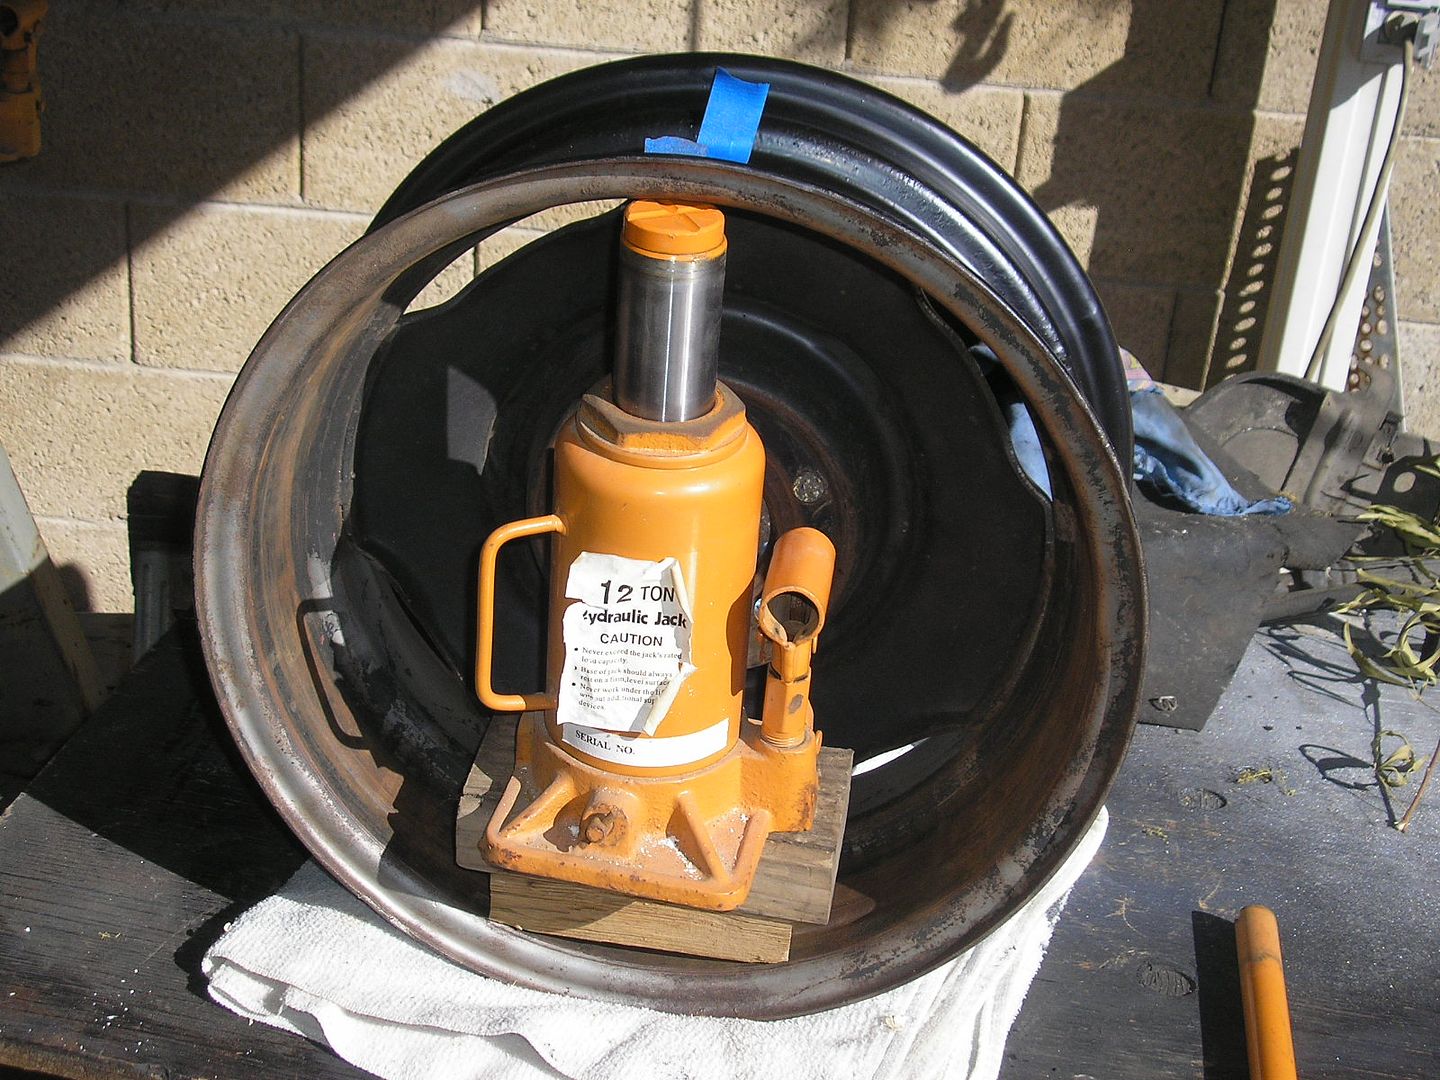 Measure the wheel with jack in place before you apply pressure. Add another 1/4 inch or so to remove most minor (0.200-0.300) runout. Put it back on the car, spin it again, repeat as necessary. I got the last one round on just two adjustments. -AZB |
|
|
|
Post by cynot on Feb 18, 2015 8:06:58 GMT -5
Very clever!
|
|
|
|
Post by AZBlues on Feb 20, 2015 17:44:22 GMT -5
New 235/70 Cooper Cobras. I never get tired (get it?) of the smell of brand new rubber. 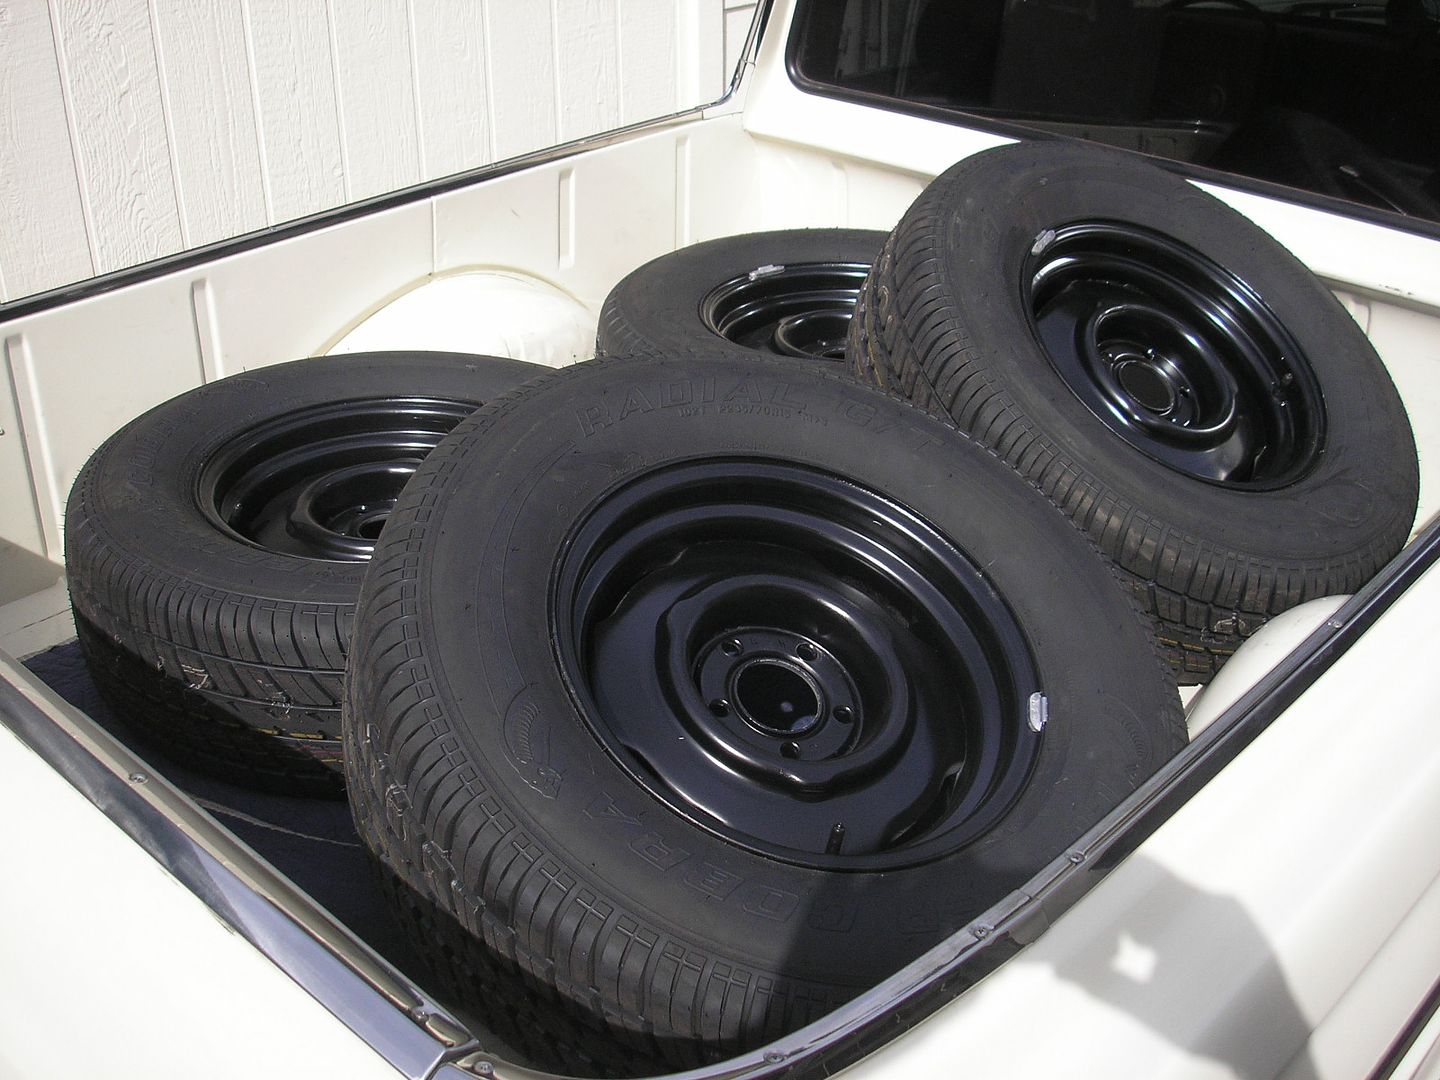 Looks nice'n'beefy on the car. |
|
|
|
Post by spanks79 on Feb 21, 2015 15:15:02 GMT -5
Wheels and tires look great. Why did you choose 235/70 vs 235/75? I'm just asking because i will be buying a set of tires within the next 2 weeks.
|
|
|
|
Post by AZBlues on Feb 22, 2015 14:43:03 GMT -5
I compared them side to side at the tire store. The 75 is taller and narrower at the tread, which gives it a less substantial look. To me it looked too tall and narrow. The 70 aspect ratio tire has a more squat look to it with a wider tread. And being a 235, it's plenty big in all dimensions. I think it fills the wheel well nicely, and better handling comes along for free. 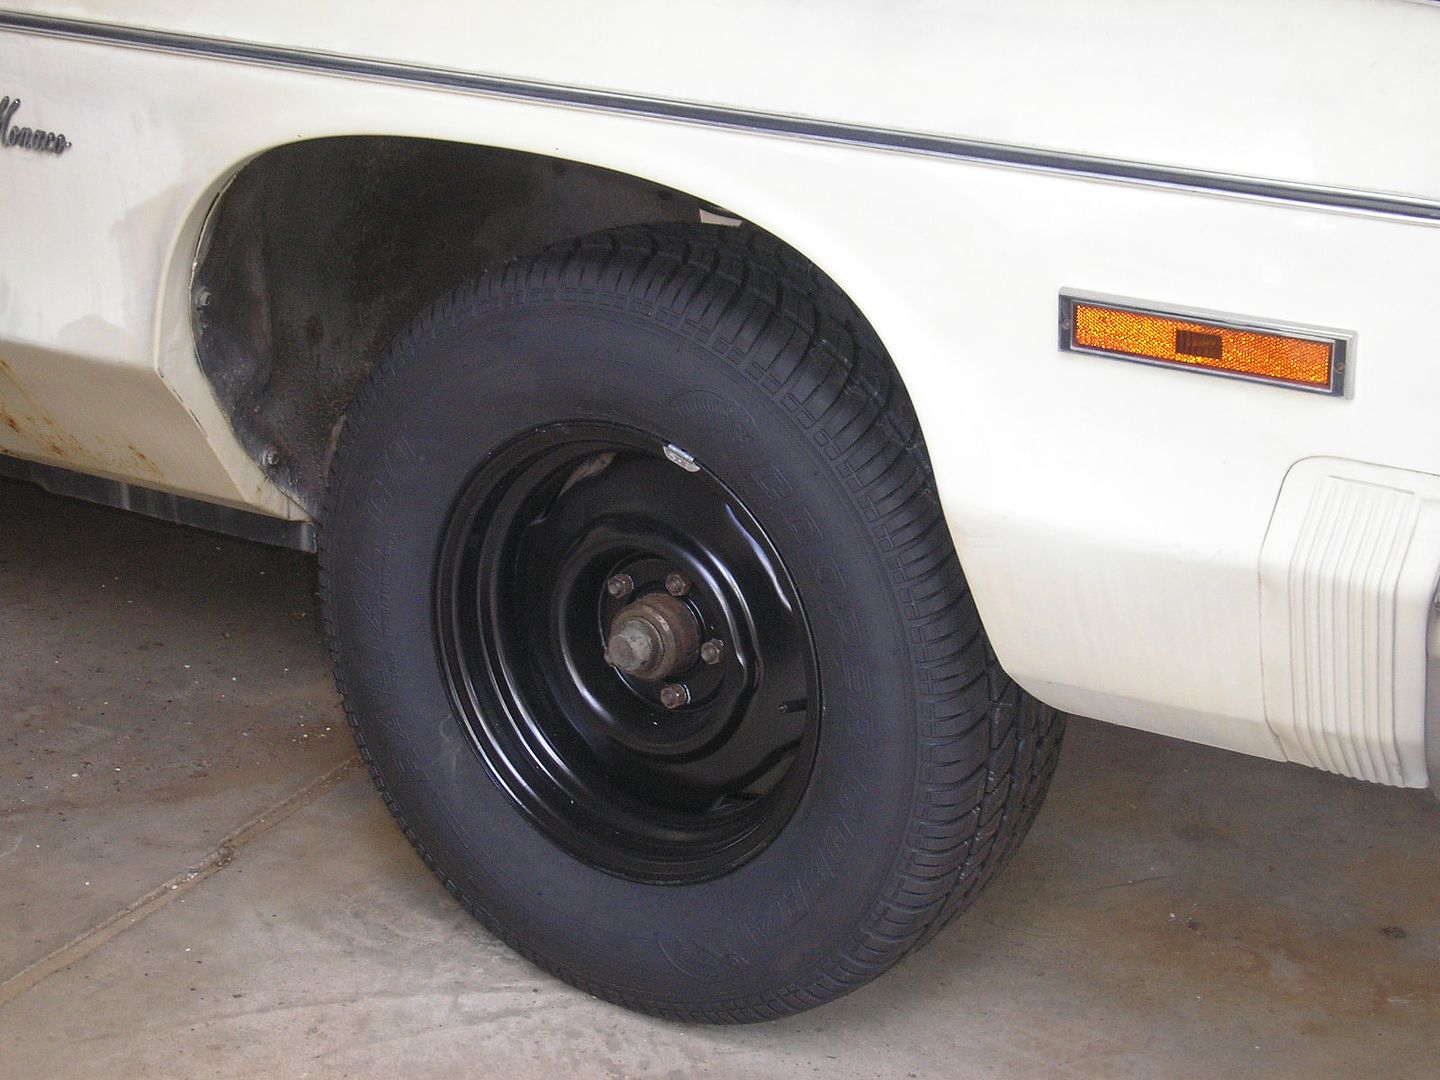 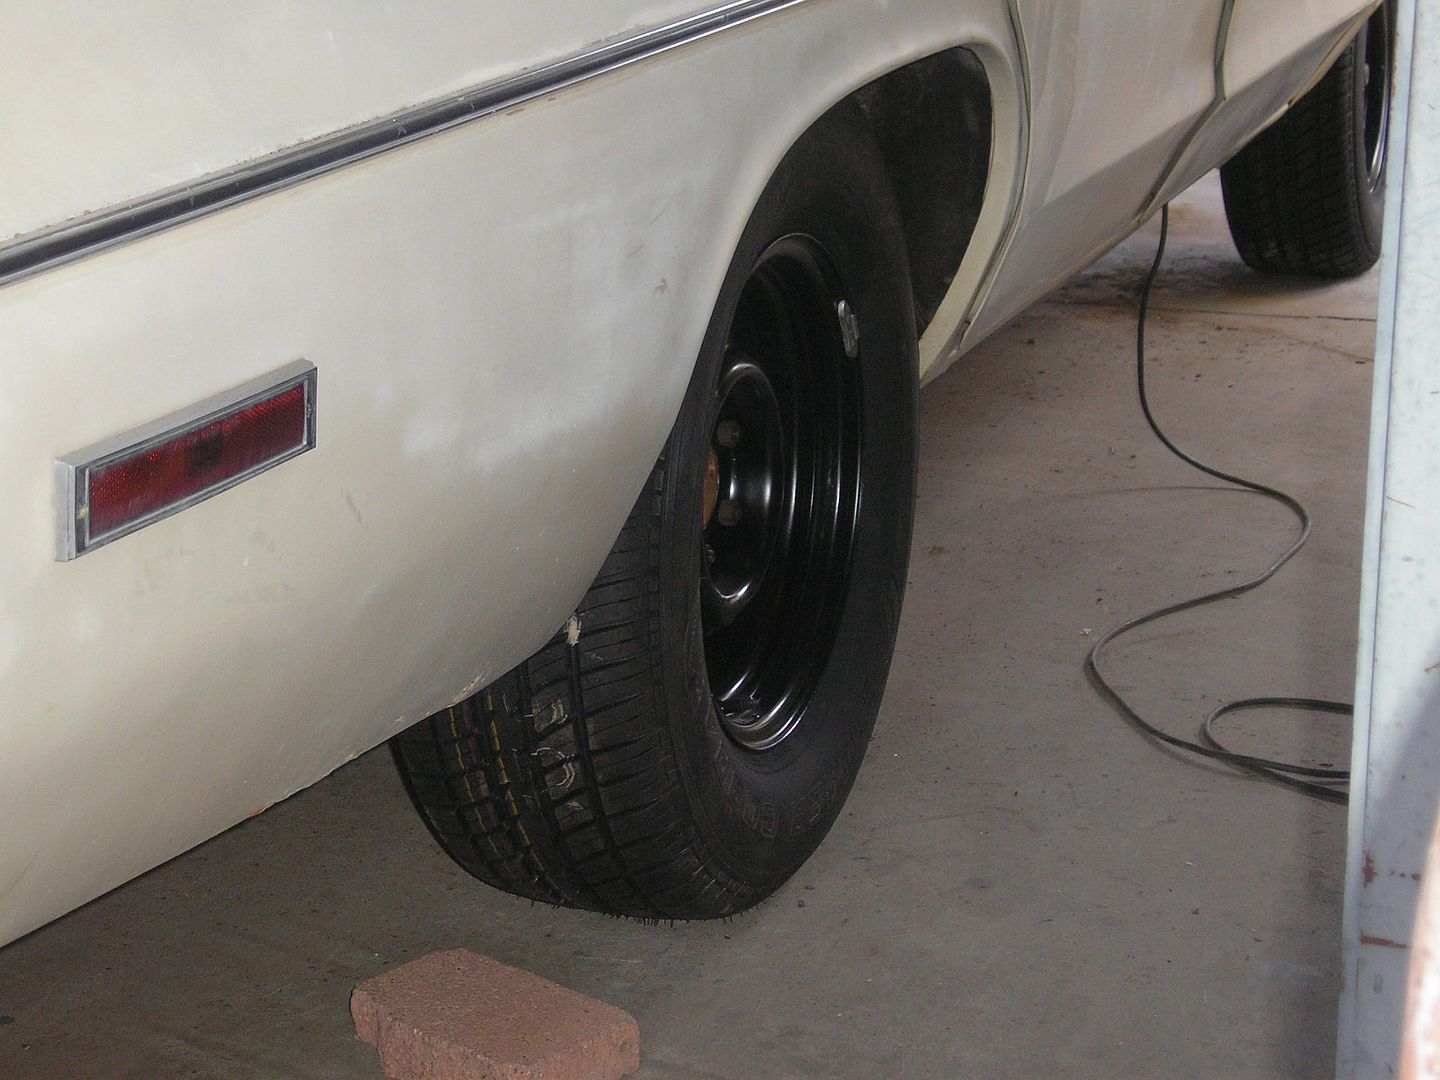 -AZB |
|
|
|
Post by cynot on Feb 23, 2015 8:17:56 GMT -5
Those tires look like they will smoke REALLY nice!   |
|
|
|
Post by AZBlues on Feb 28, 2015 21:34:14 GMT -5
I wire wheeled the surface rust away, vacuumed the floor, and coated the areas that had surface rust with POR-15. 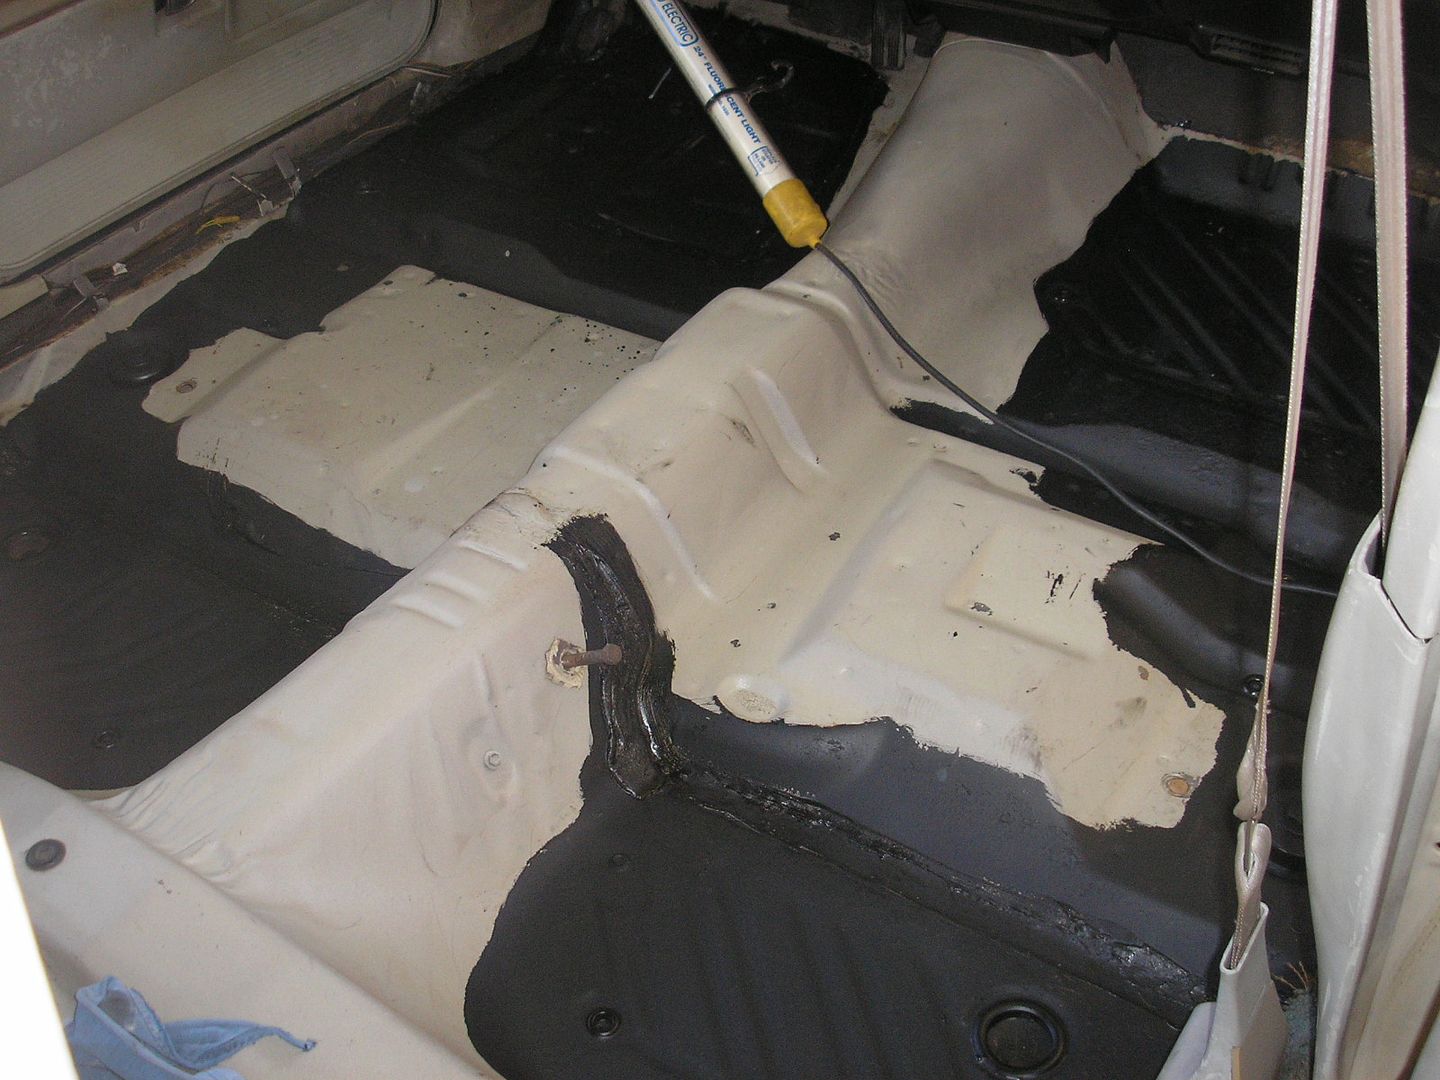 The passenger front pan had a few thin areas with some mild perforation, but it wasn't bad enough to replace. A good coat of POR-15, 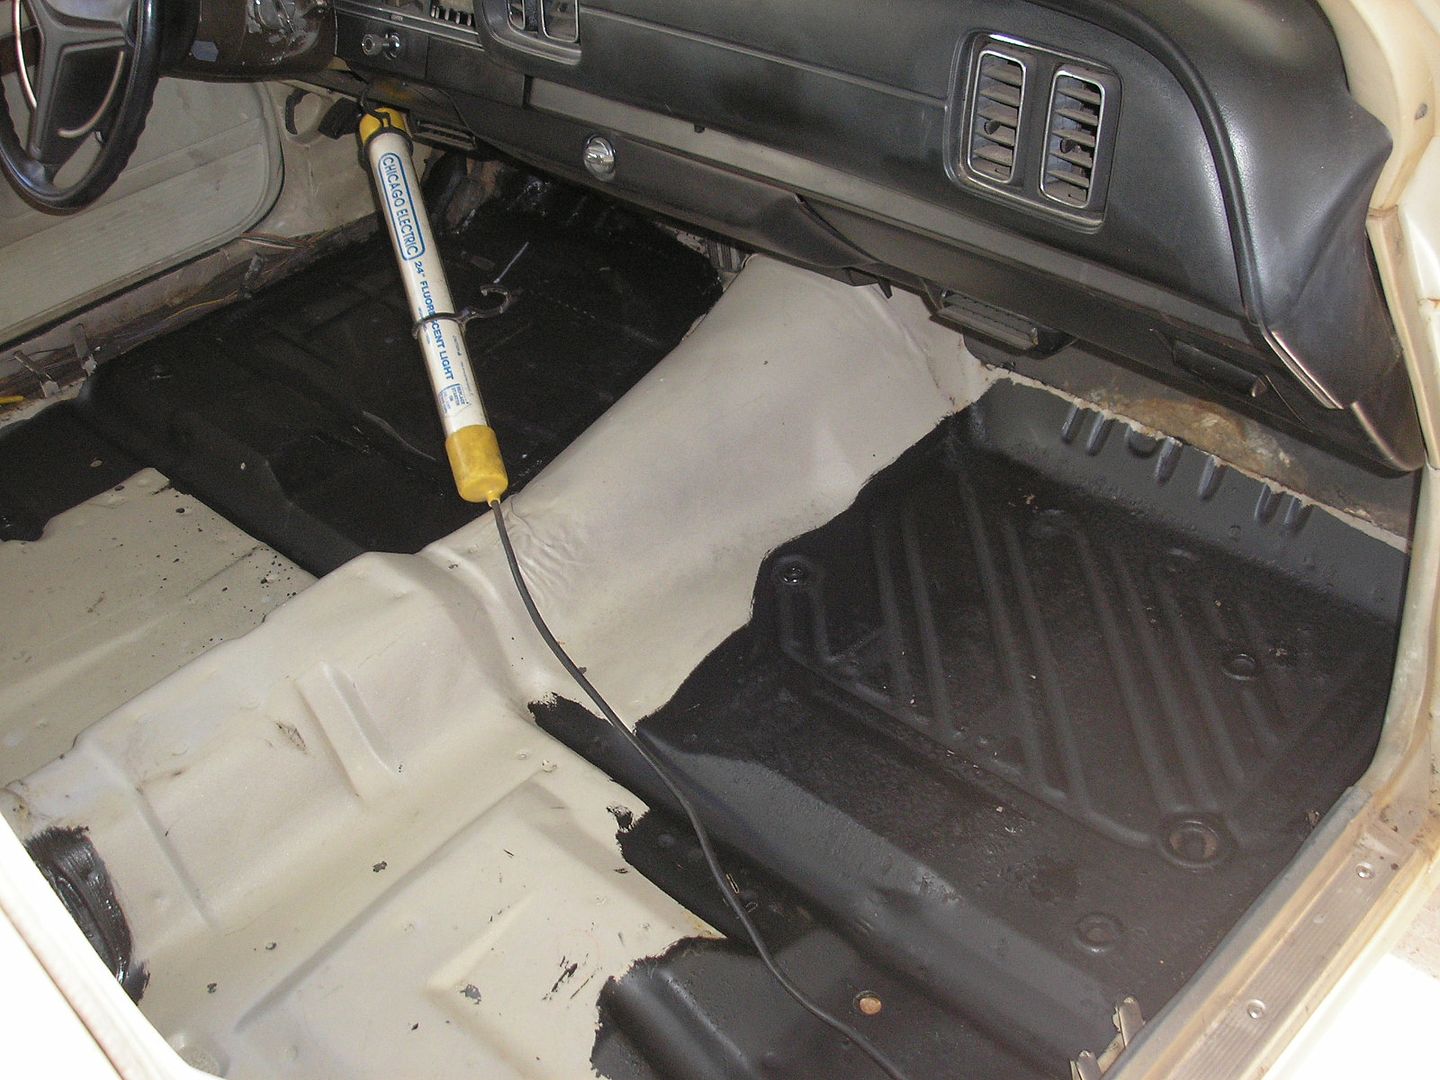 Wait one day, then fiberglass. I used small pieces of weave over the perforated areas, then a large piece over the whole area with plenty of resin. 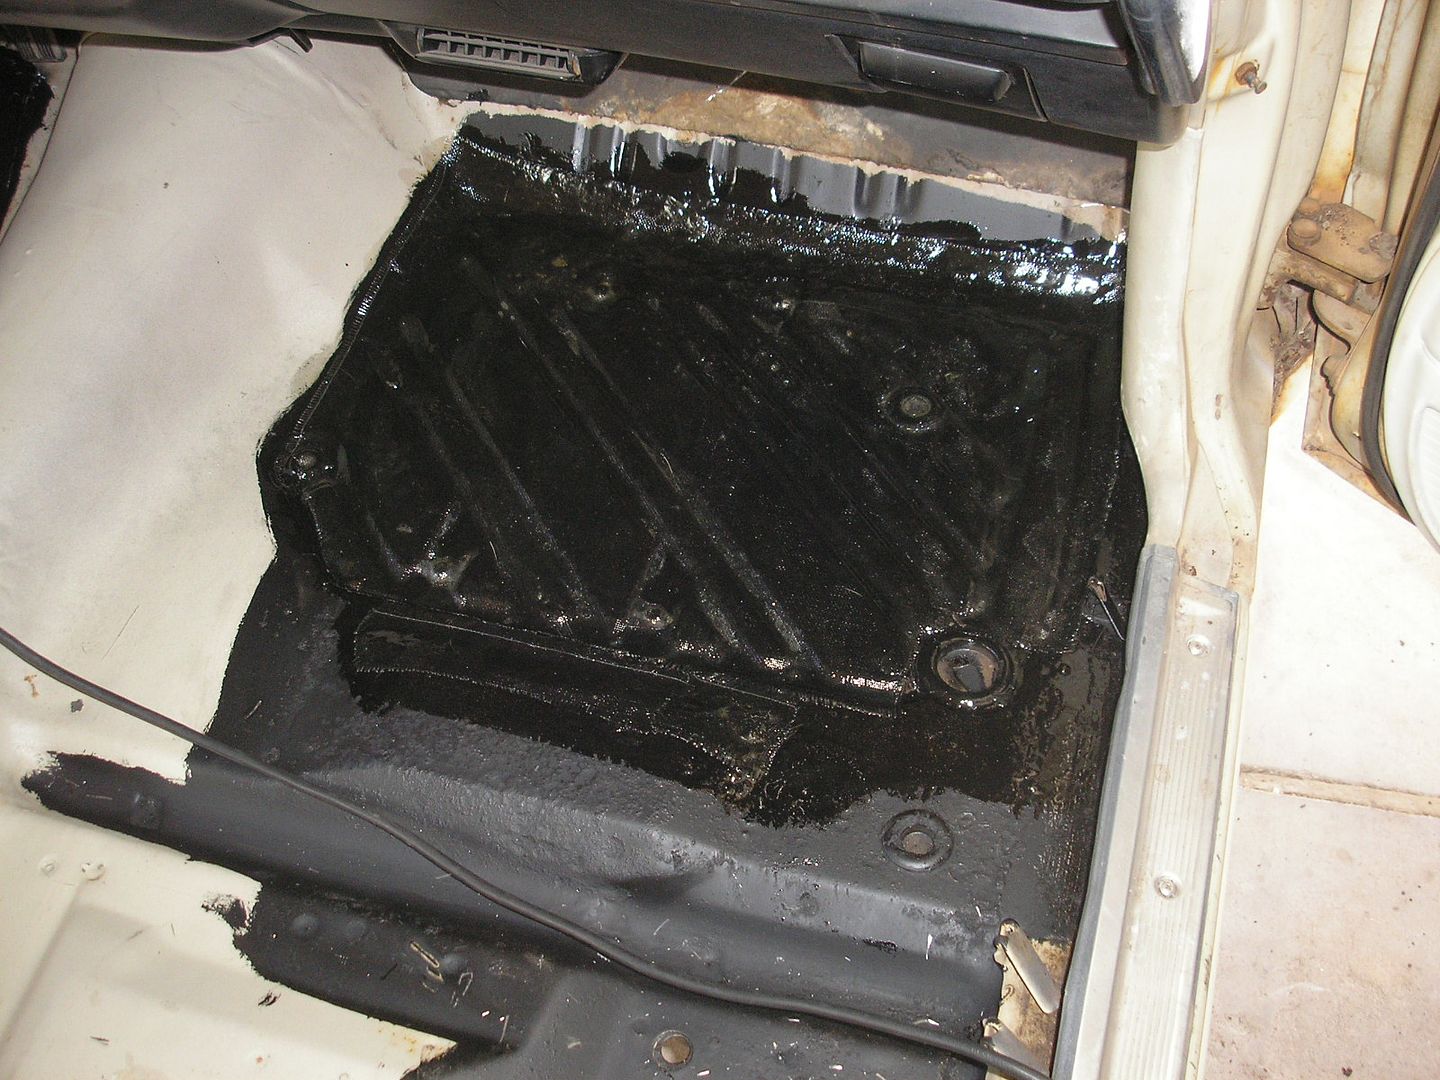 Wait another day, then a thick coat of POR, and now it's rock hard through the magic of chemistry. 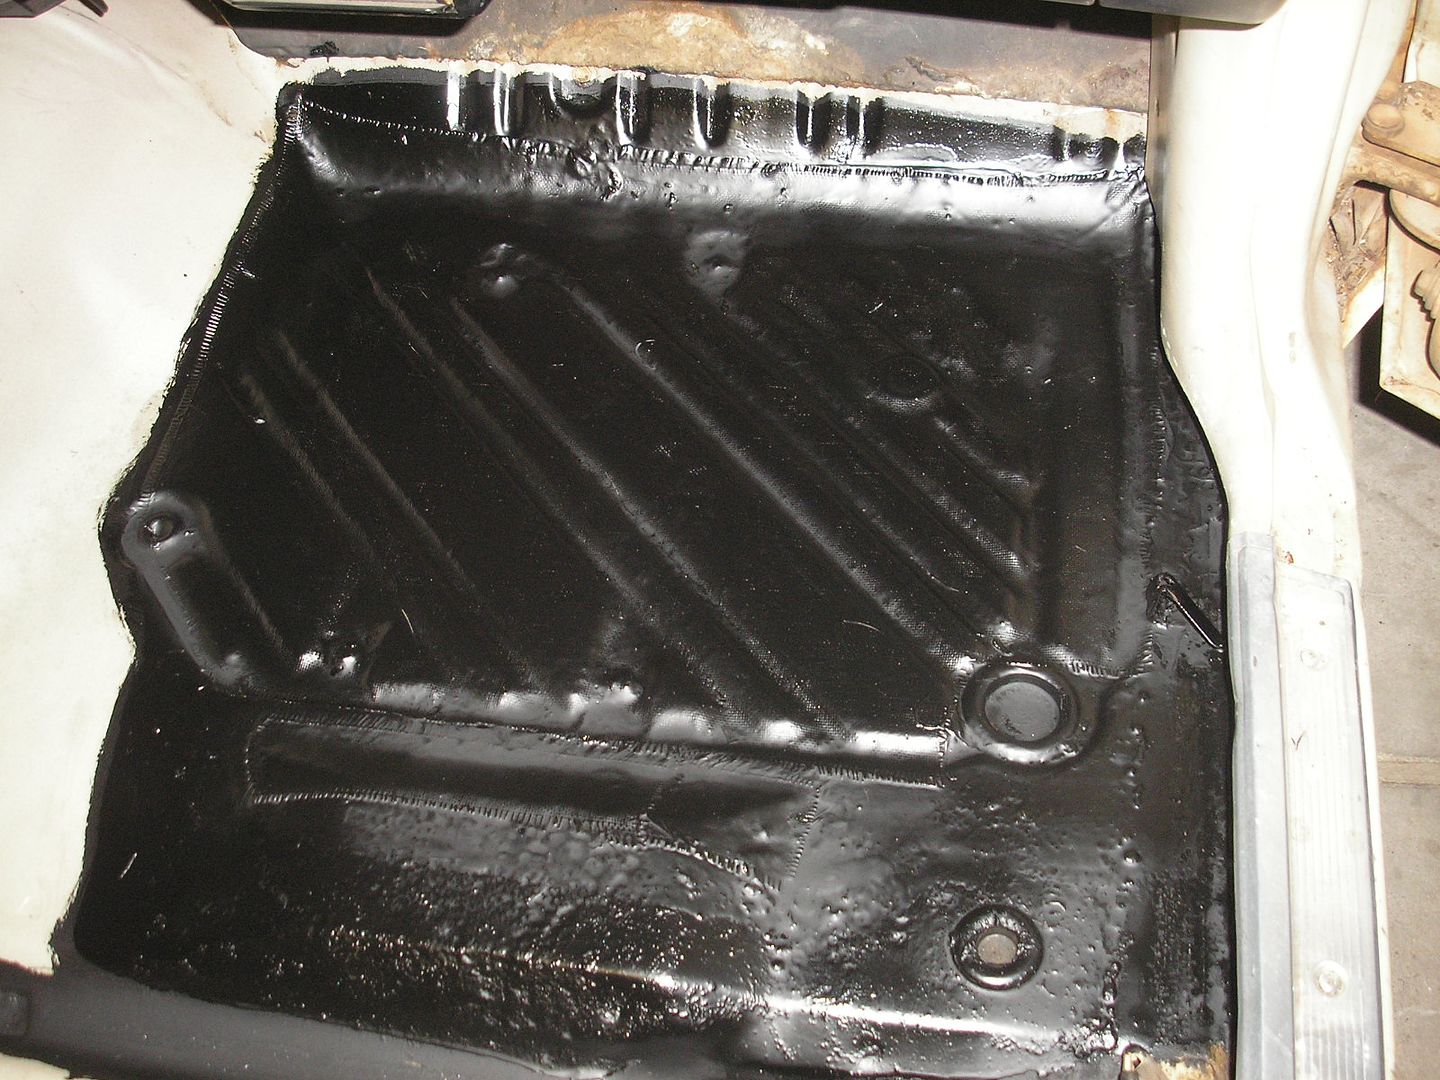 -AZB |
|
|
|
Post by AZBlues on Mar 6, 2015 18:15:16 GMT -5
Sketchy or missing welds in the engine/steering box mount area. 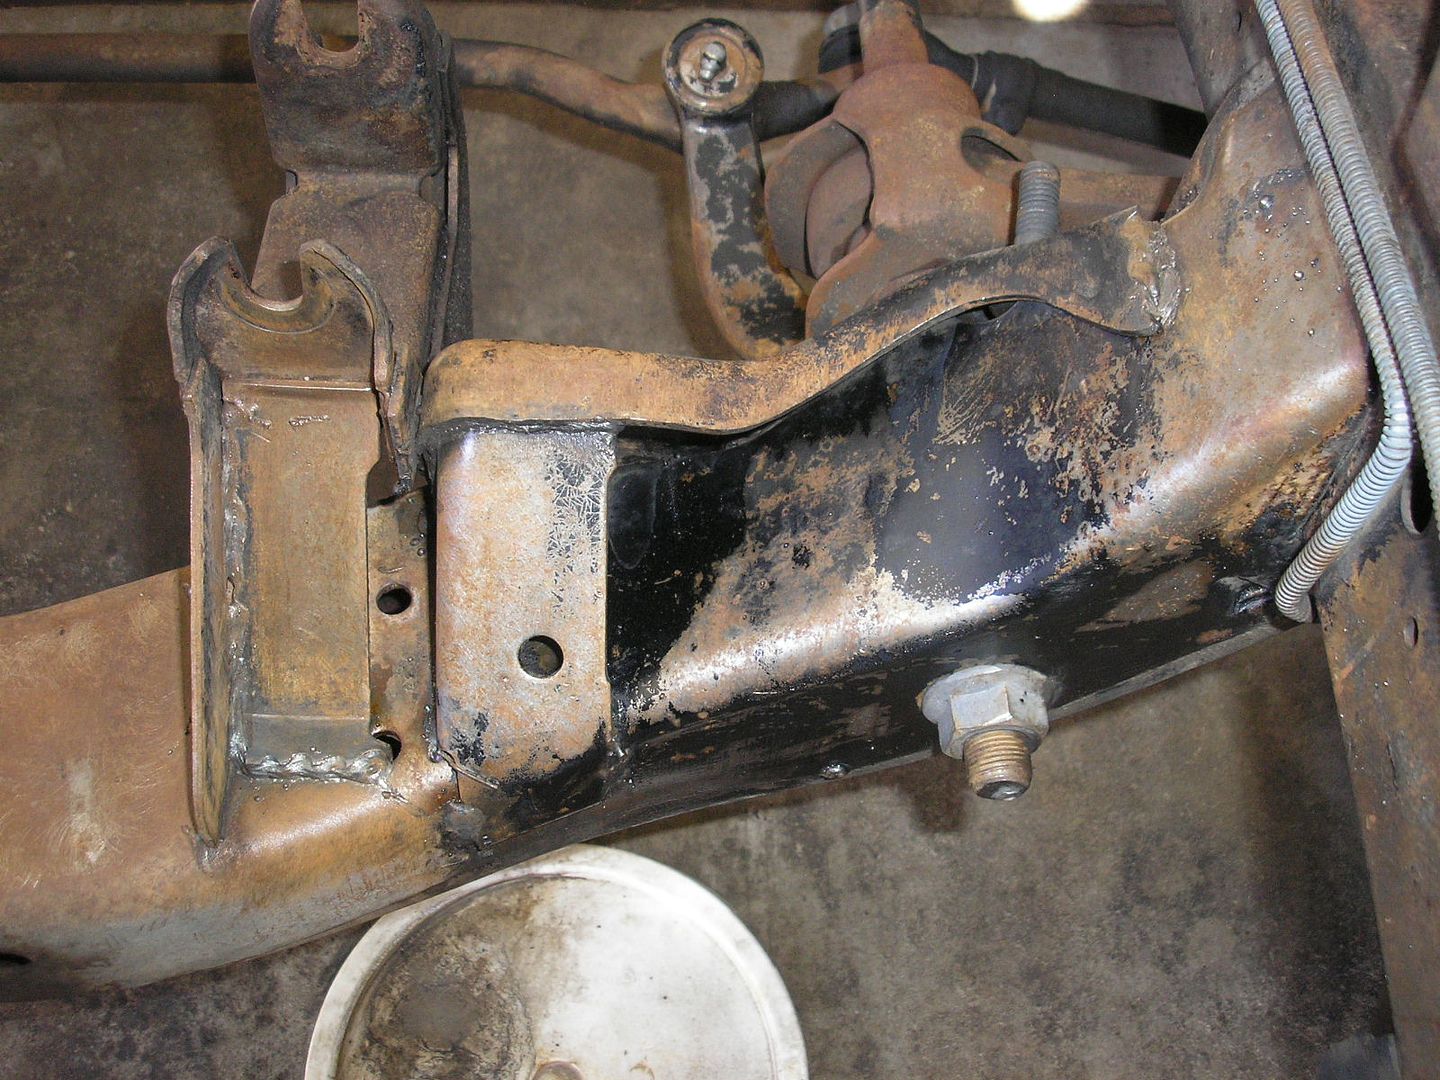 Touched up. 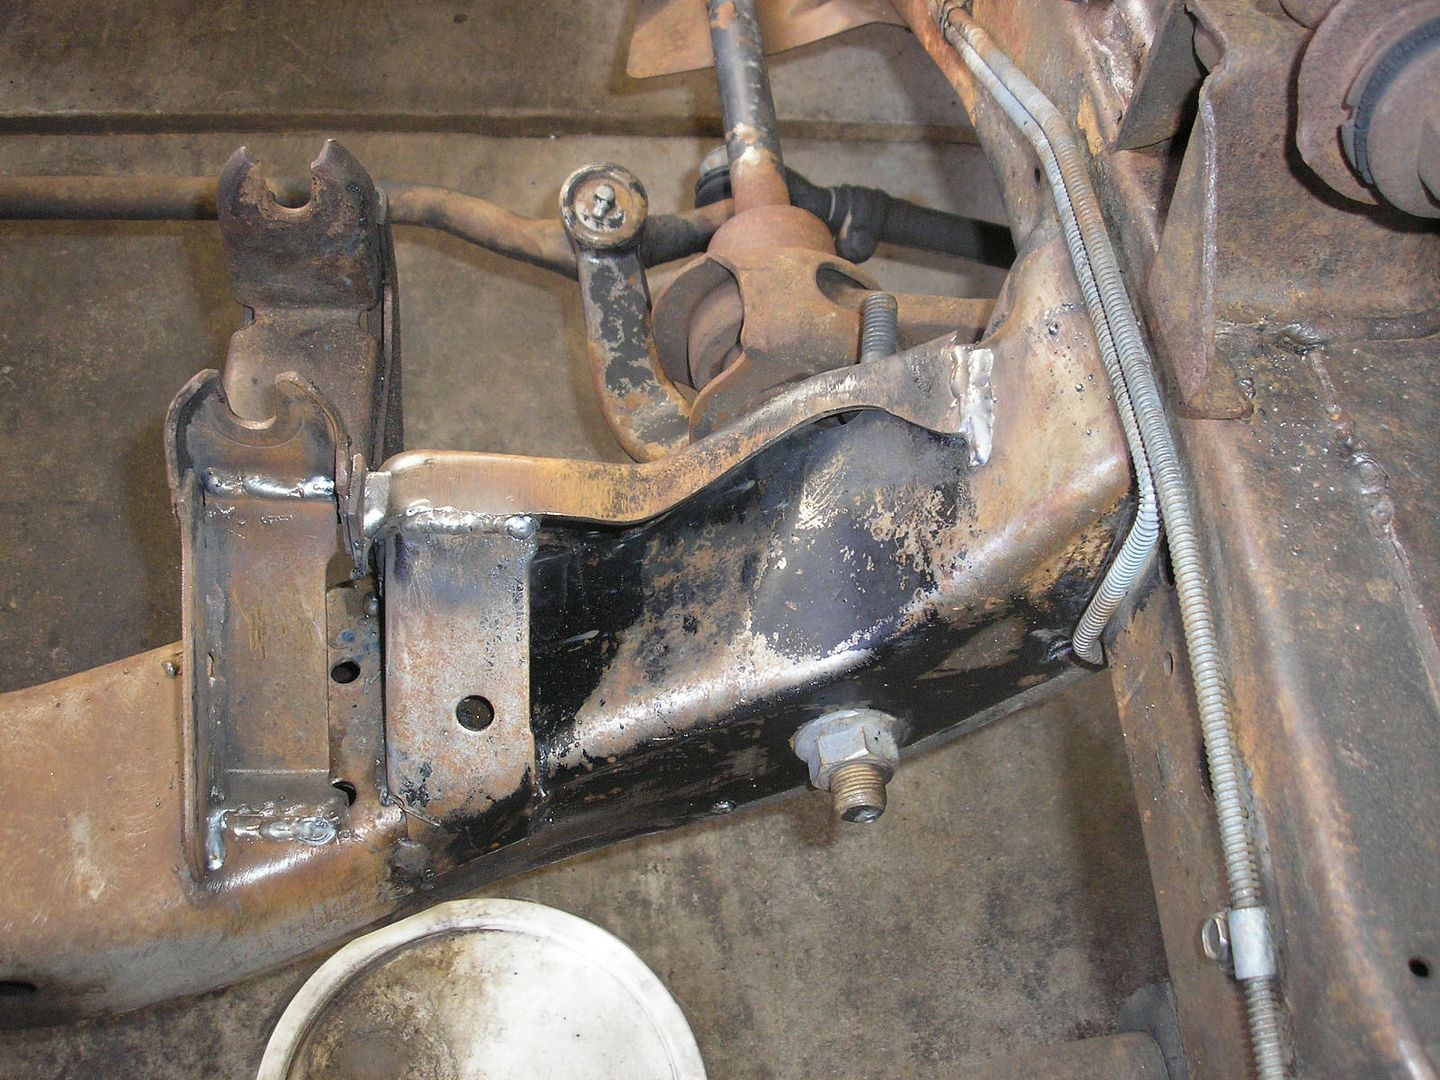 -AZB |
|
|
|
Post by spanks79 on Mar 6, 2015 21:25:20 GMT -5
Been there, done that! Lol! I found the hardest part was trying to scrape off 40 years of grease and grime before I could weld.
I never understood the half ass approach to welding that was taken on these frames.
|
|
|
|
Post by AZBlues on Mar 7, 2015 0:11:45 GMT -5
I never understood the half ass approach to welding that was taken on these frames. And apparently, most of them! |
|
|
|
Post by AZBlues on Mar 11, 2015 17:07:58 GMT -5
Next up was to modify the left engine mount per the directions in the Schumacher conversion mount kit. Measure 11/16" down from the bottom of the U where the through-bolt goes, drill a pilot hole.  Break out the big drill, and take it to 9/16, front and back. 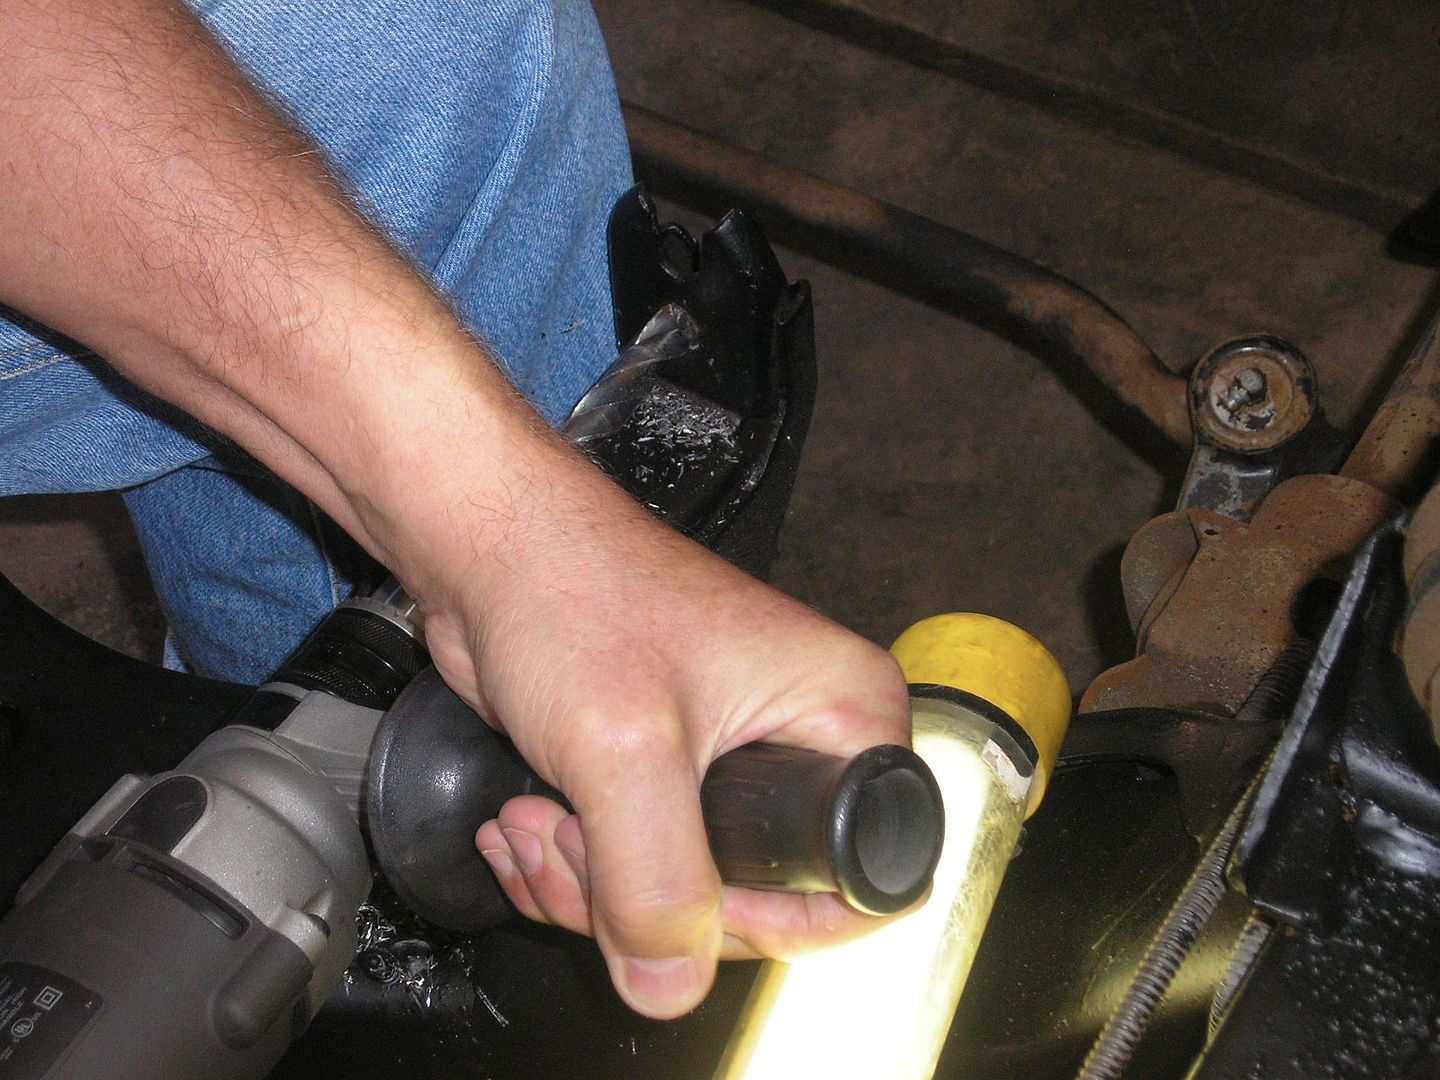 Trim the tops off: 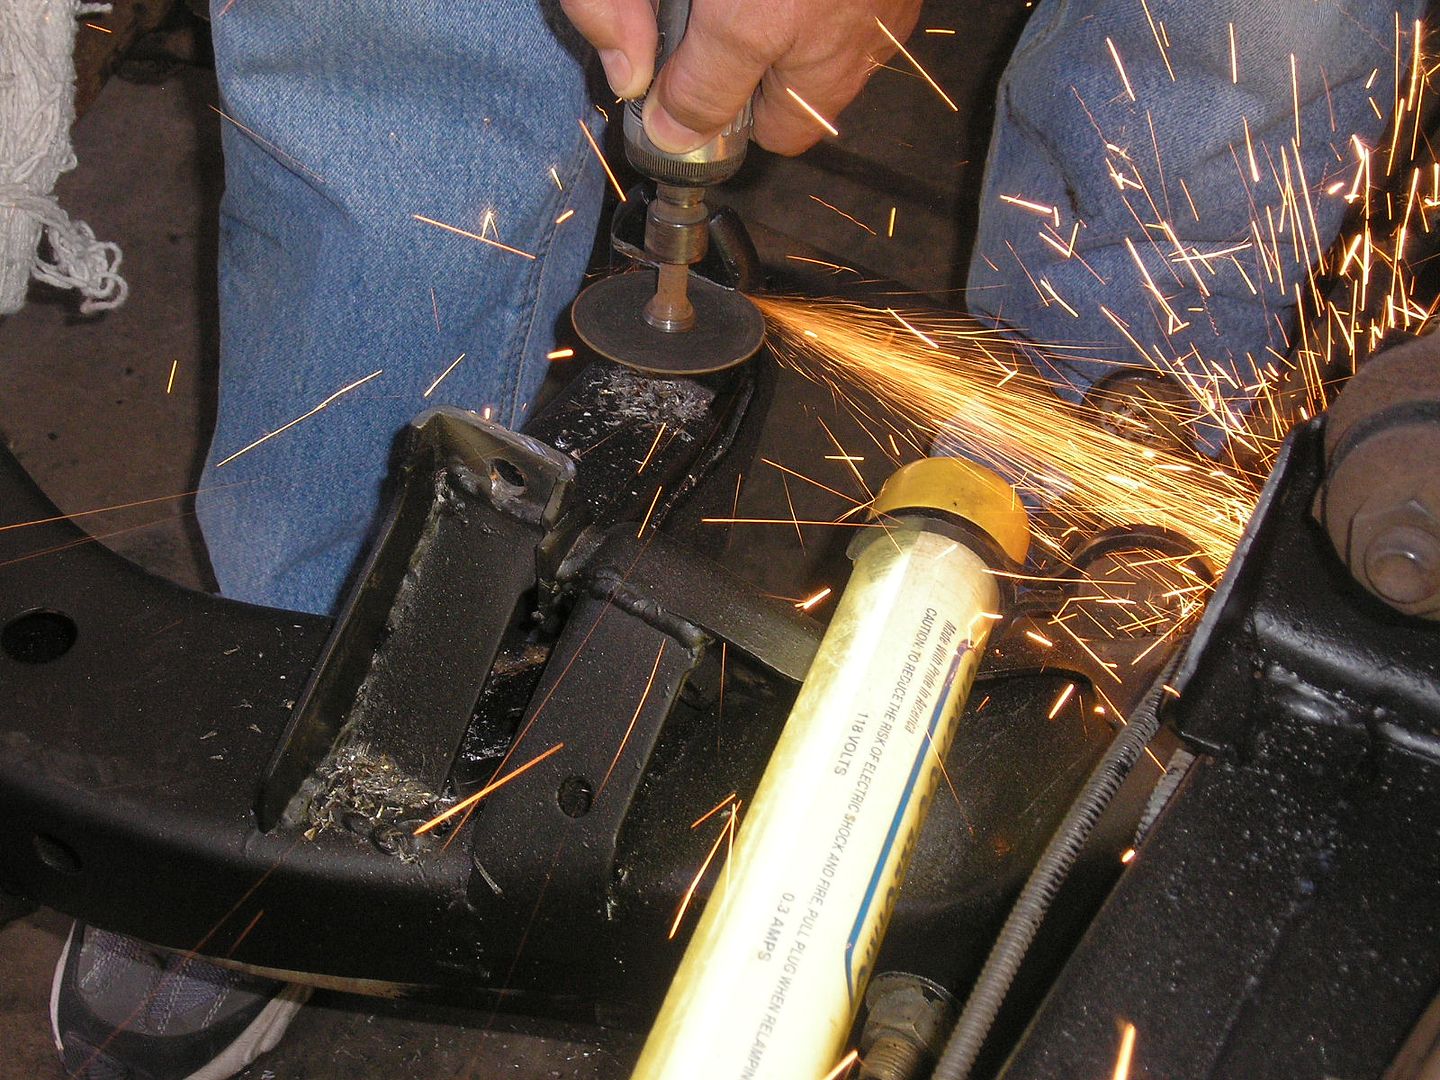 Dress with an angle grinder. I still can't believe that my camera stopped the flap disc spinning at 11,000 RPM so you can read the label. Praise be Olympus. 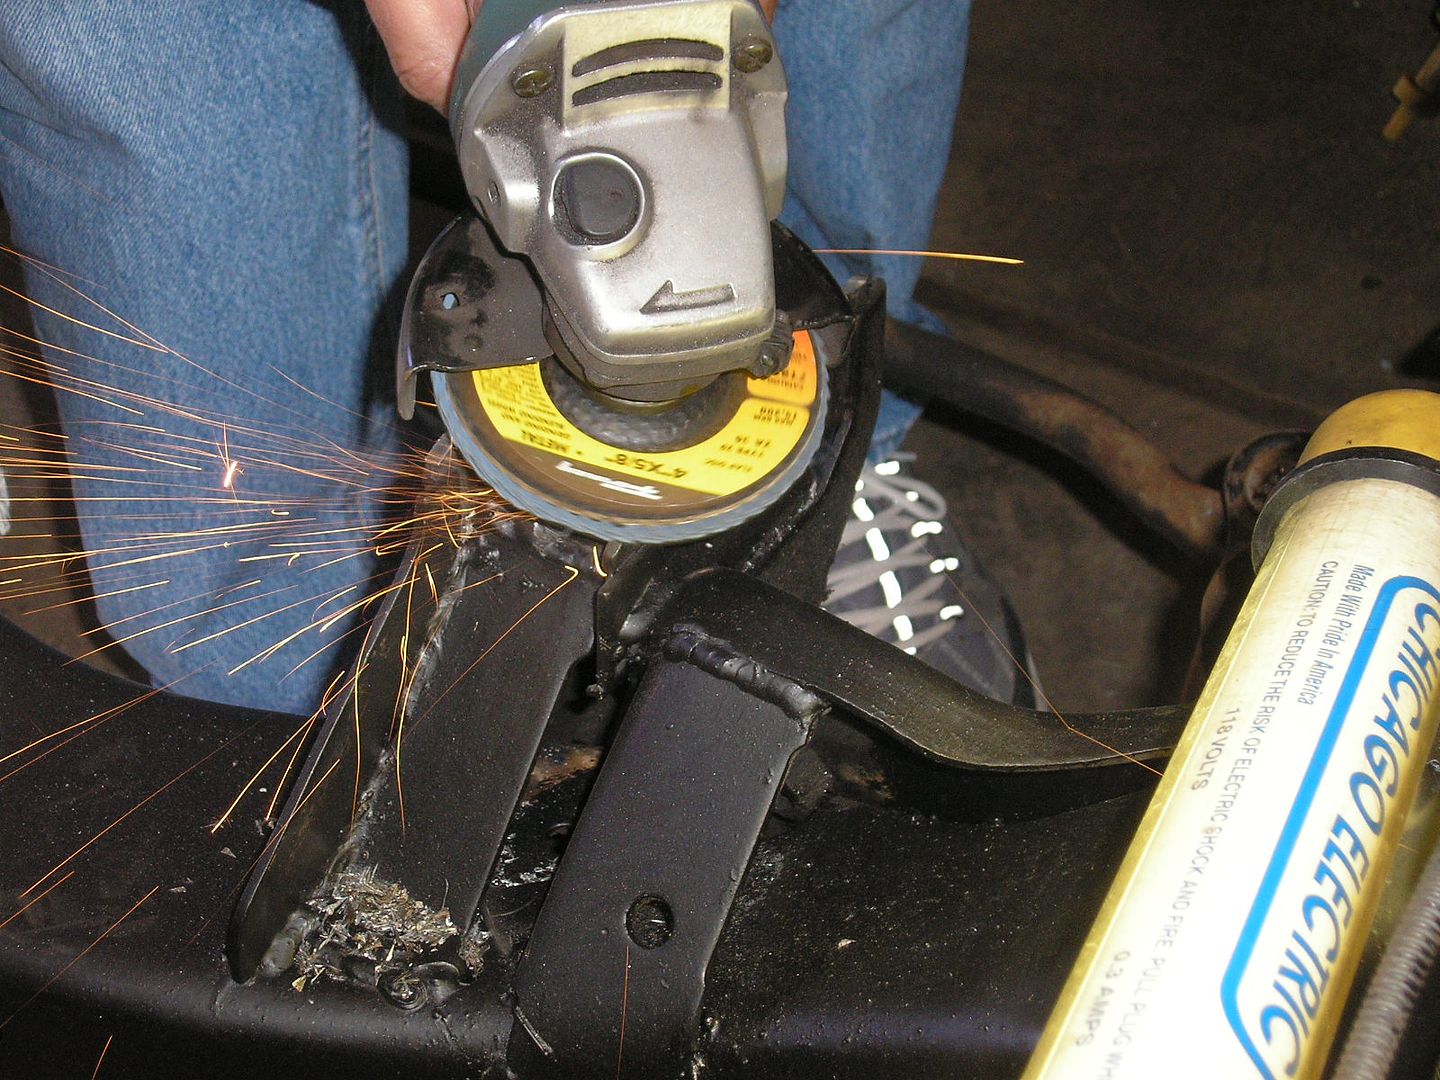 This should do. 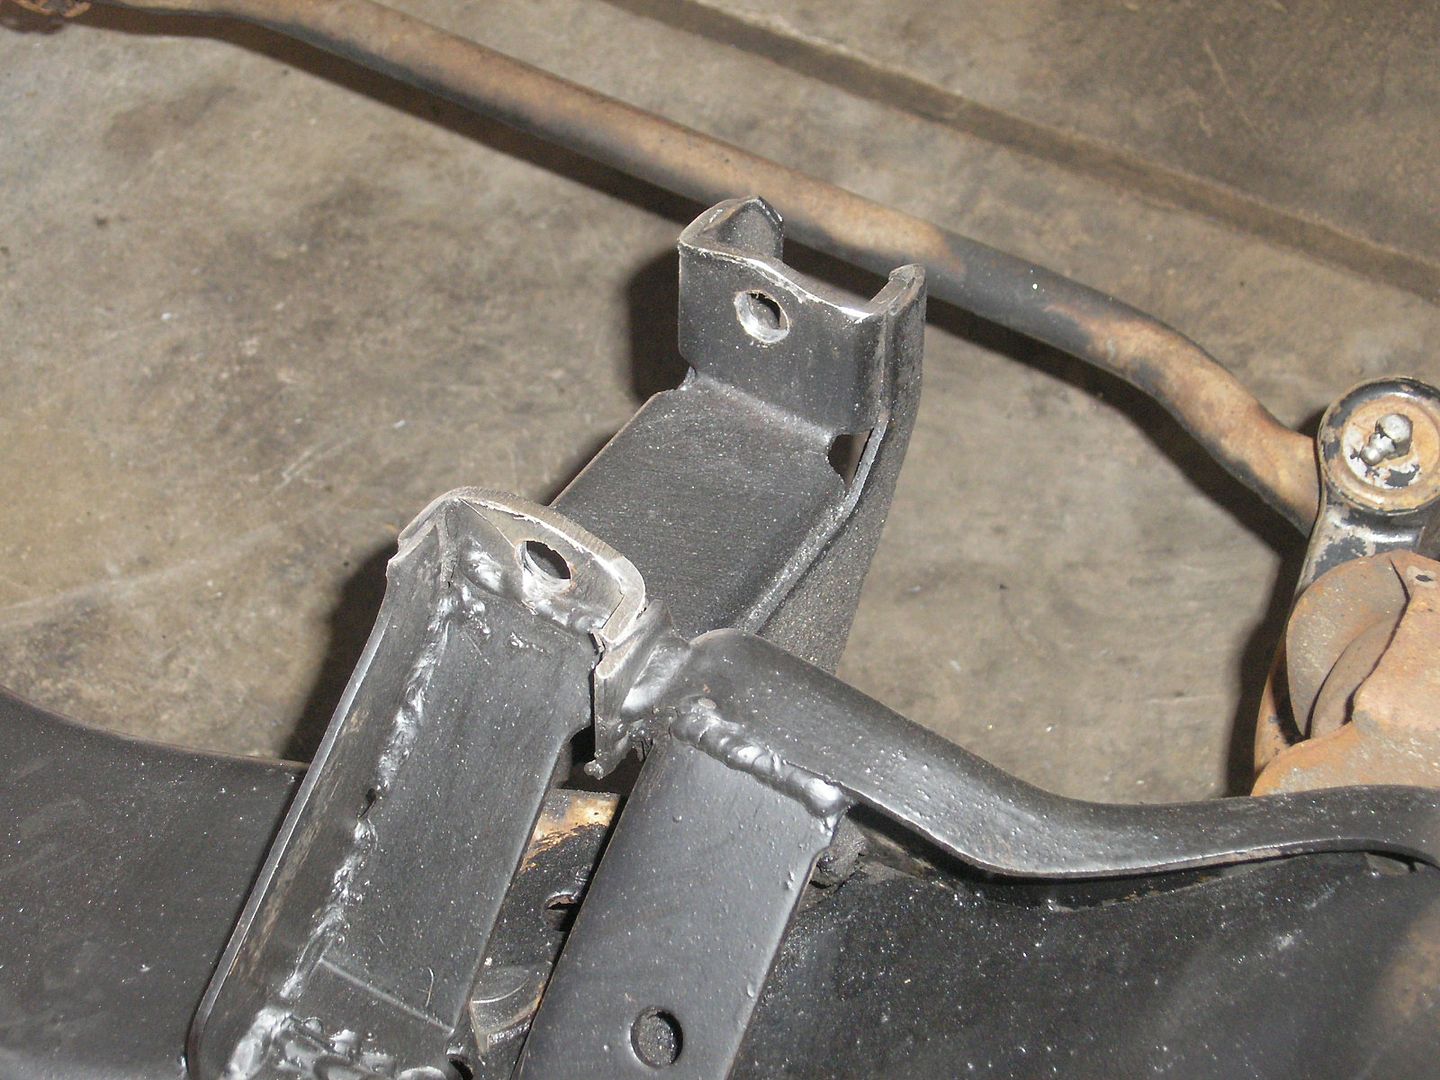 More trimming may be necessary when the engine is test-fitted, we'll know more in a couple days. -AZB |
|
|
|
Post by spanks79 on Mar 12, 2015 7:31:32 GMT -5
This is interesting. At a glance your frame mounts look no different than mine 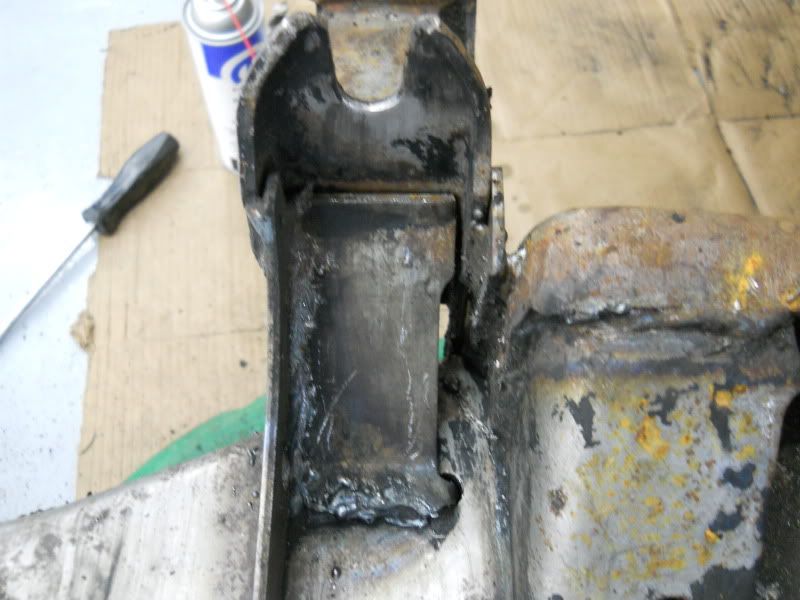 Looking closely you can see how the small block mount is slightly higher than the big block mount. If I had it to do over, I would have ground out the U slot about 1/4" deeper just to get my engine slightly lower. I am running an Edelbrock Performer RPM intake and although it fits under the hood it is TIGHT, a 1/4" would make a difference. |
|
|
|
Post by AZBlues on Mar 12, 2015 16:57:03 GMT -5
This is interesting. At a glance your frame mounts look no different than mine Looking closely you can see how the small block mount is slightly higher than the big block mount. If I had it to do over, I would have ground out the U slot about 1/4" deeper just to get my engine slightly lower. I am running an Edelbrock Performer RPM intake and although it fits under the hood it is TIGHT, a 1/4" would make a difference. You can probably pull your mounts, slot the holes where they bolt to the block, and gain that same 1/4". Yes, the small block mounts do look the same, but they are about 5/8" higher and 3/4" further forward, so the Schumacher mounts compensate in both directions. The steering intermediate shaft was rebuilt using this kit that I got from ebay: 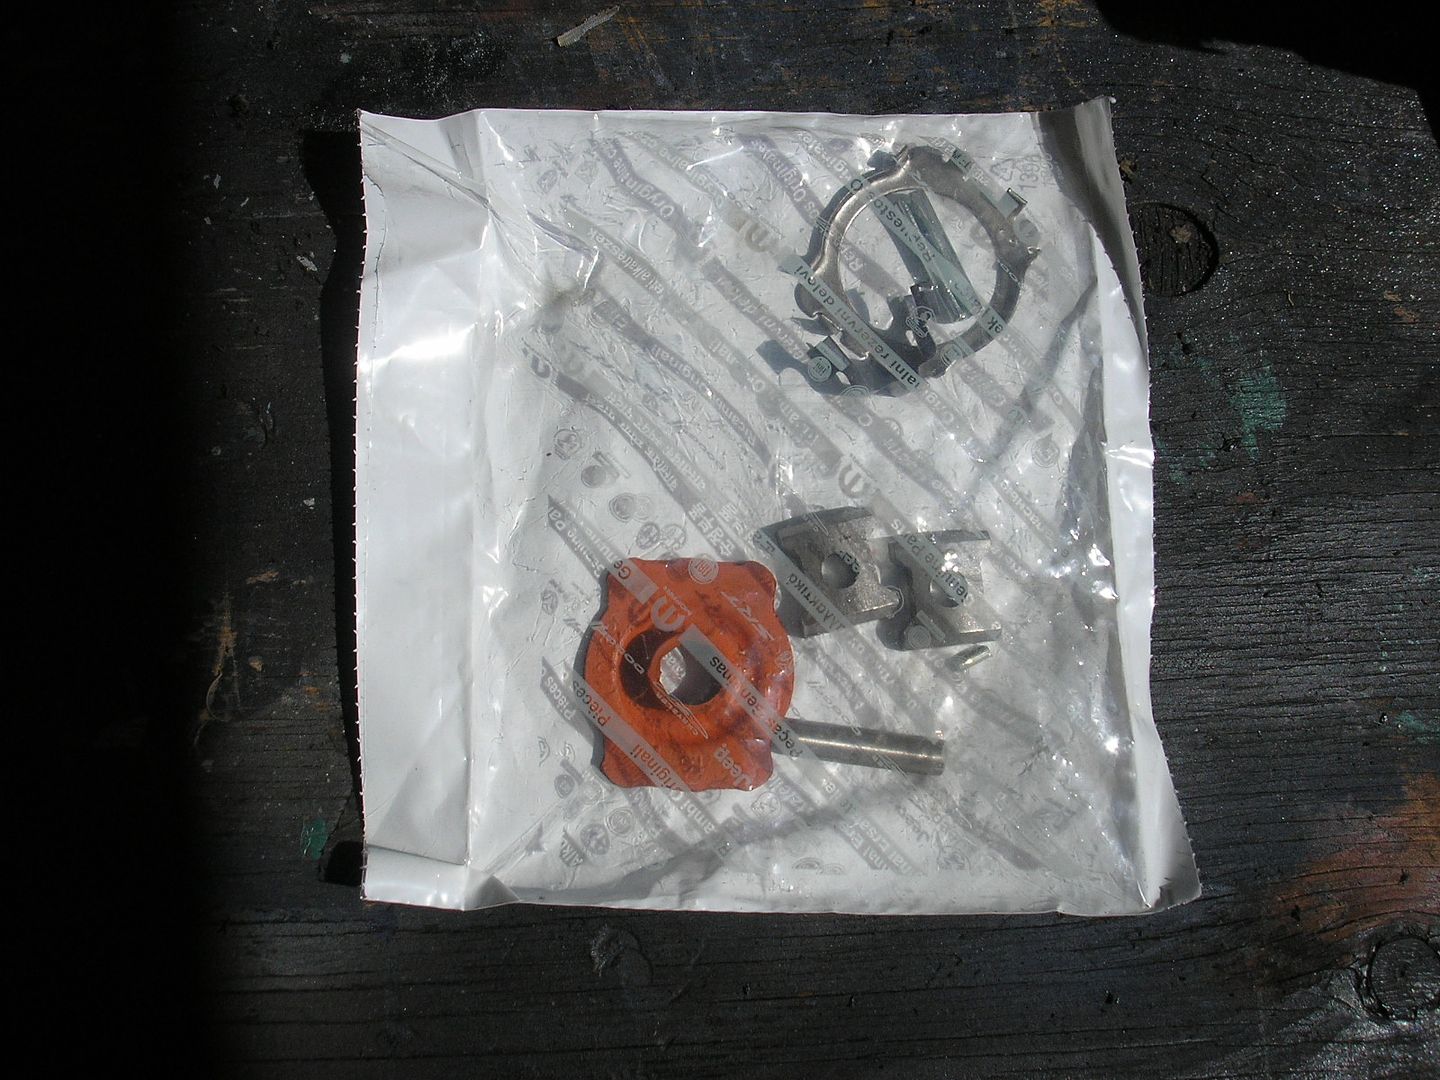 A press in necessary to replace the pin that the shoes go onto inside the sleeve. 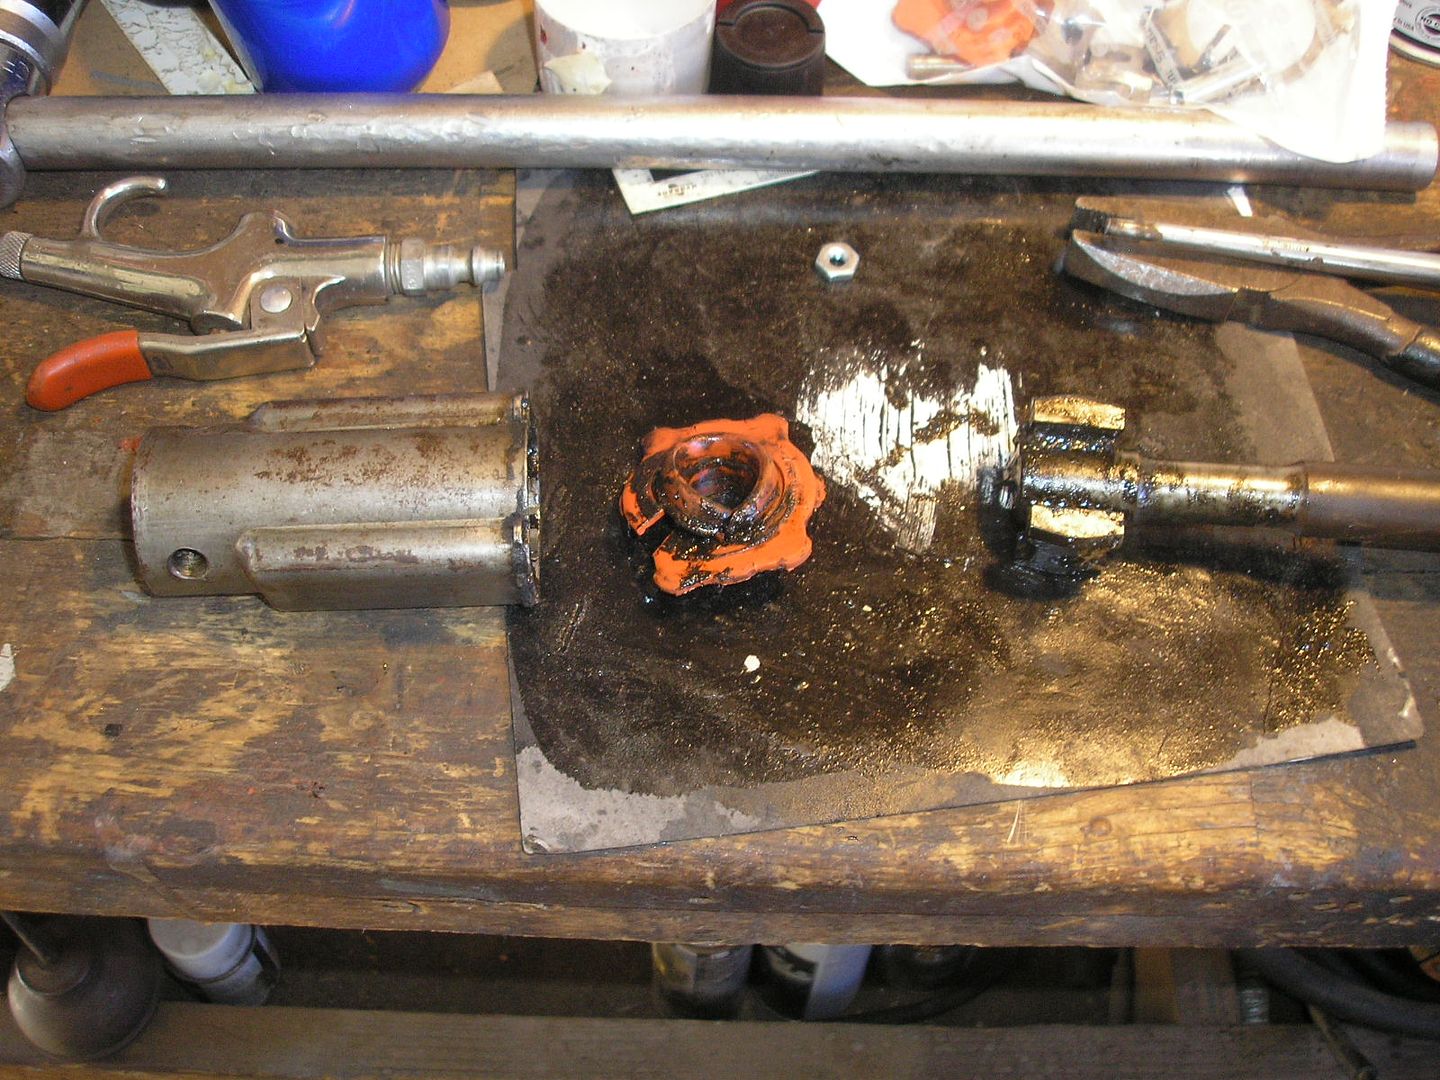 If your car has over 150K miles or it didn't have enough grease in this coupler, you probably need this kit. Mine was well packed, but the orange rubber seal was torn, and it did have a little bit of play, so the kit really tightened it up. I like nice, precise steering. Parts bead blasted, repainted, new pin, shoes, spreader spring: 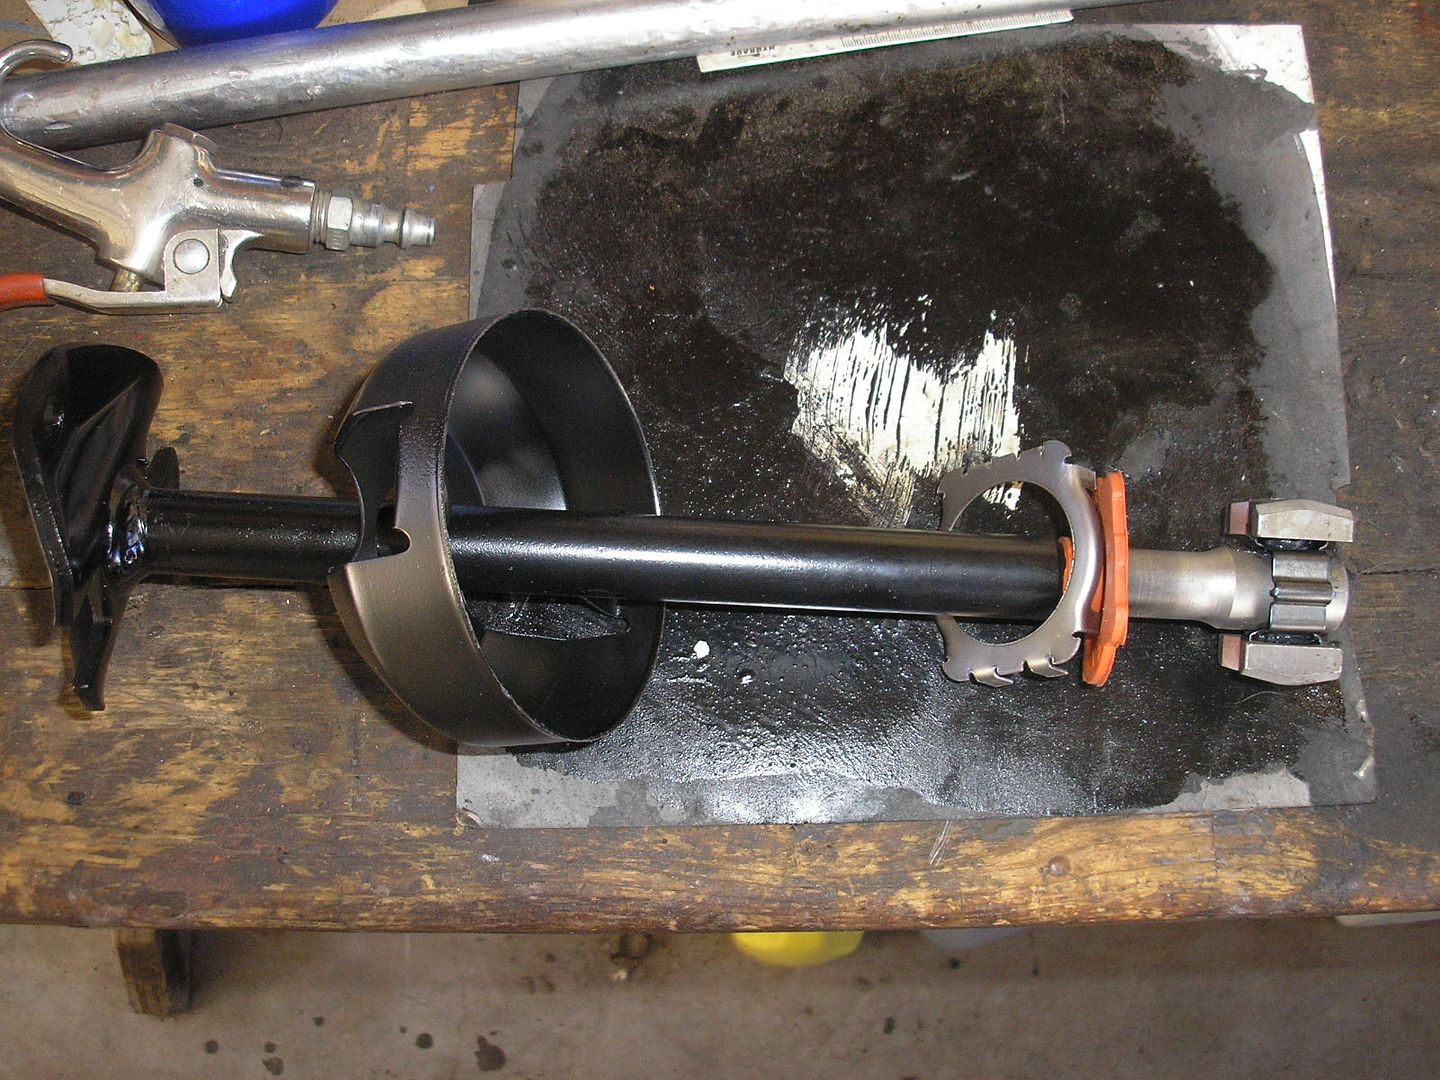 All together: 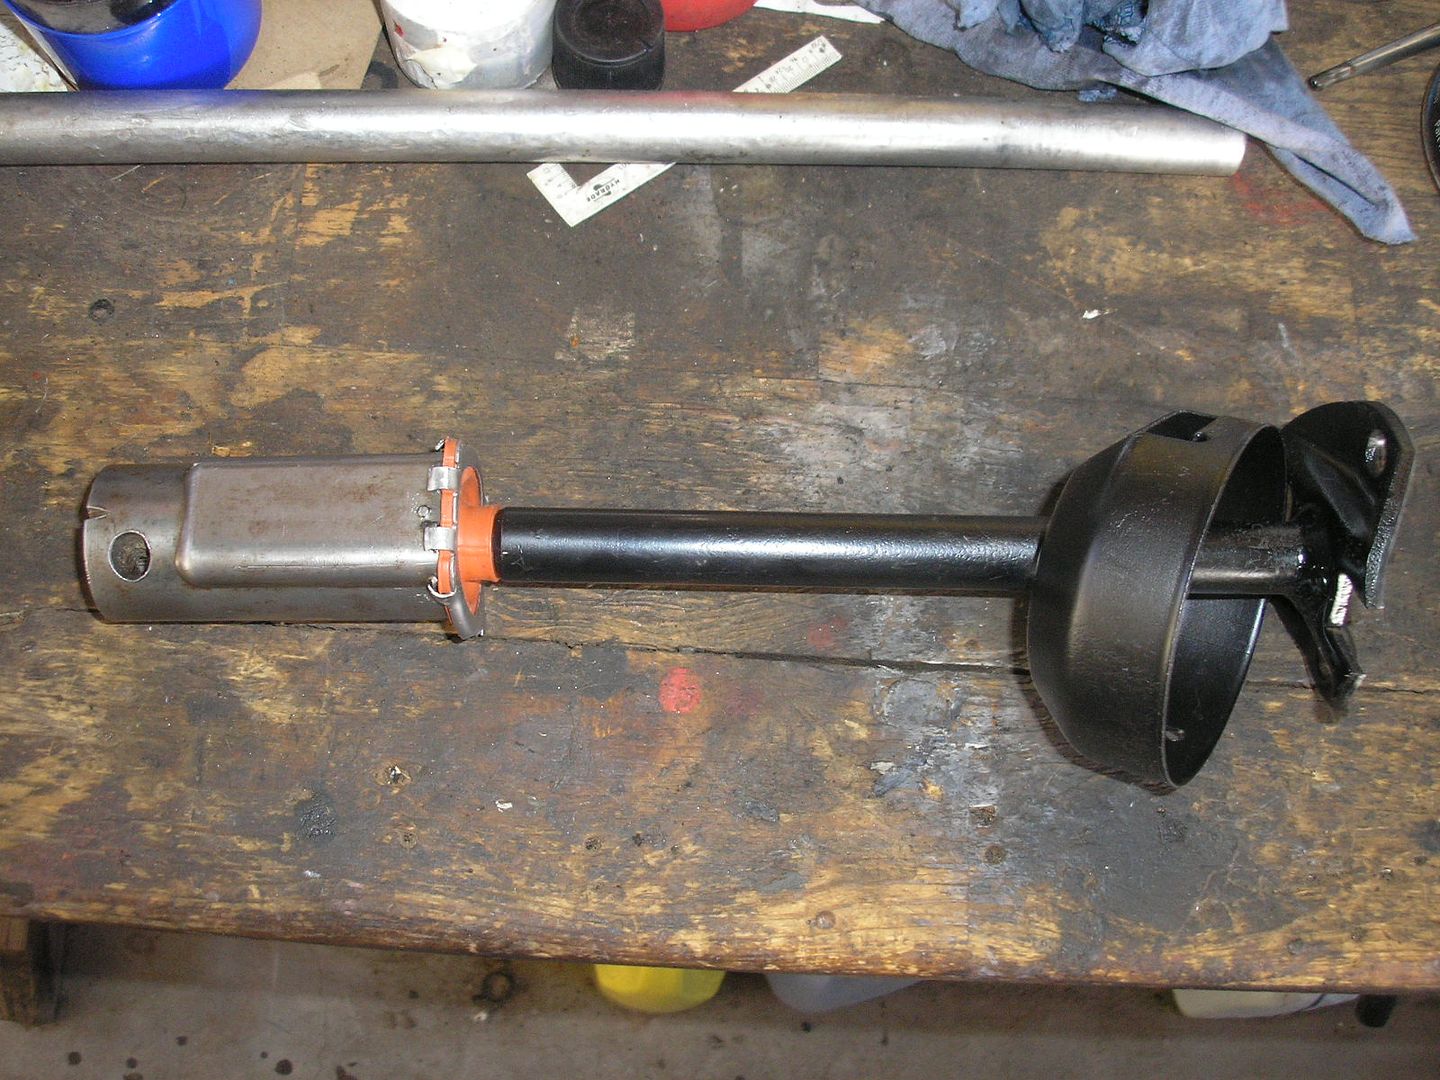 Installed with re-manufactured CarQuest box, I took the ID tag from the original box and put it on the reman; the nut that holds it was sealed with green cement so if it was taken apart - bam, no warranty (great) so I attached it to the threads sticking out of the nut with a radio shaft nut, drilled and tapped for the right thread. Much easier getting to this box without the engine in the way. 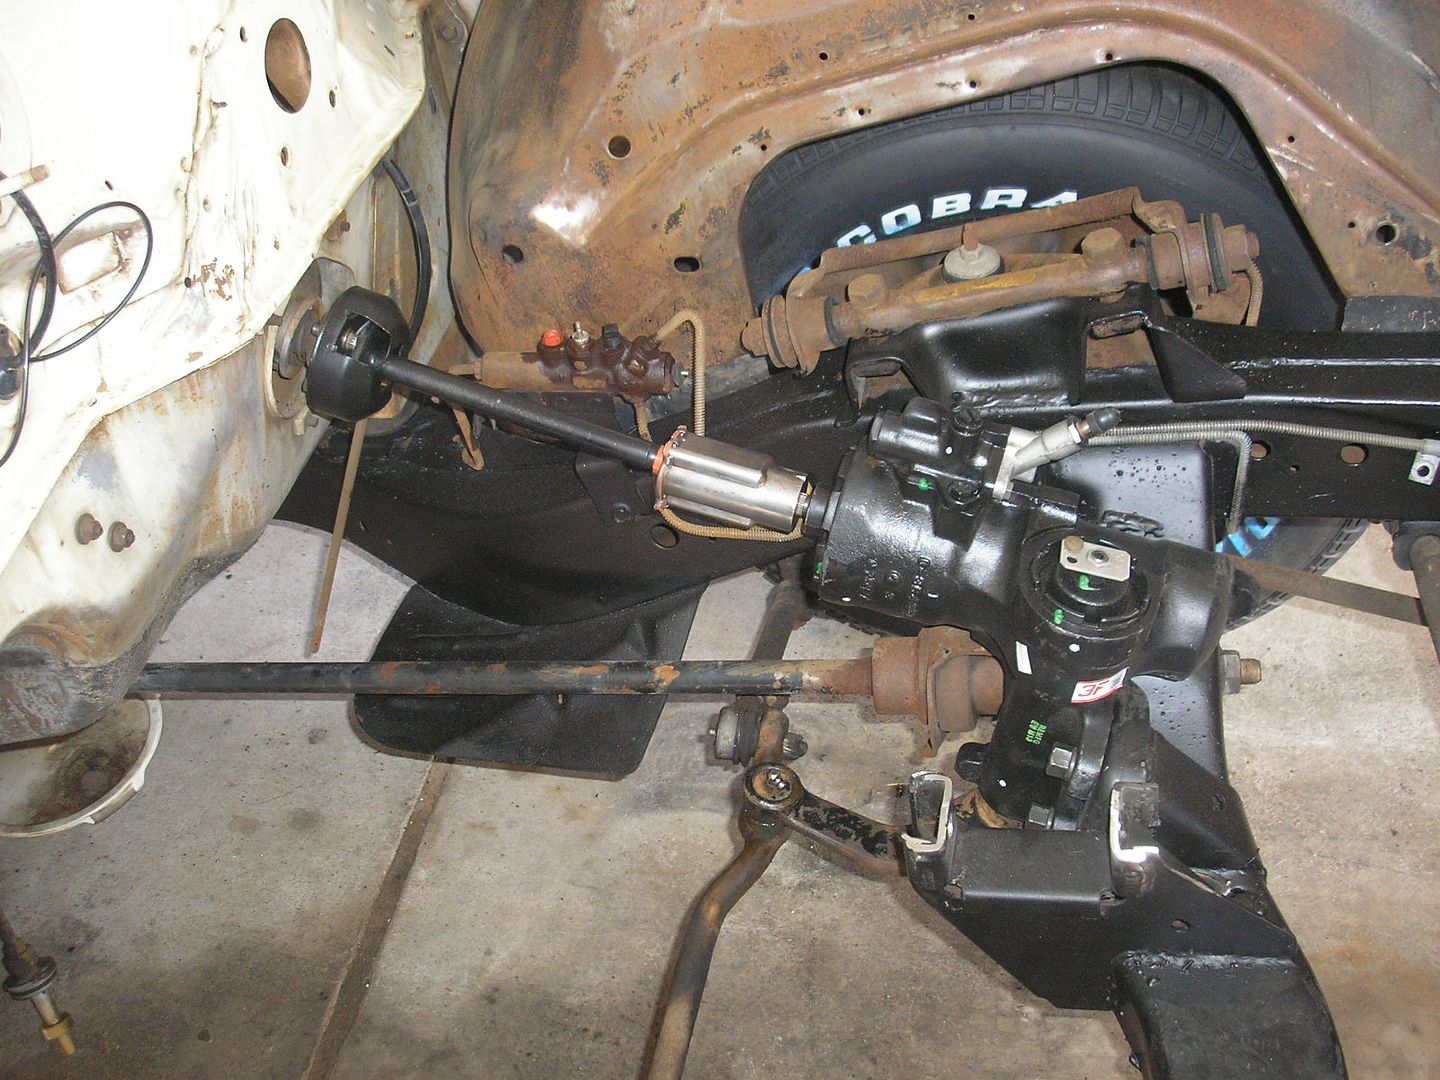 The rest of the steering parts feel OK for now. I'll rebuild the front end as necessary when it's running and driving so I don't have too much taken apart at one time. Space issue... -AZB |
|
|
|
Post by AZBlues on Mar 13, 2015 17:34:15 GMT -5
A test fit of the engine determined that this much had to be trimmed from the mount for oil pump clearance:  When that was done, the 440 dropped right onto the mounts and was already level.  Right side has a mile of clearance for bolt access: 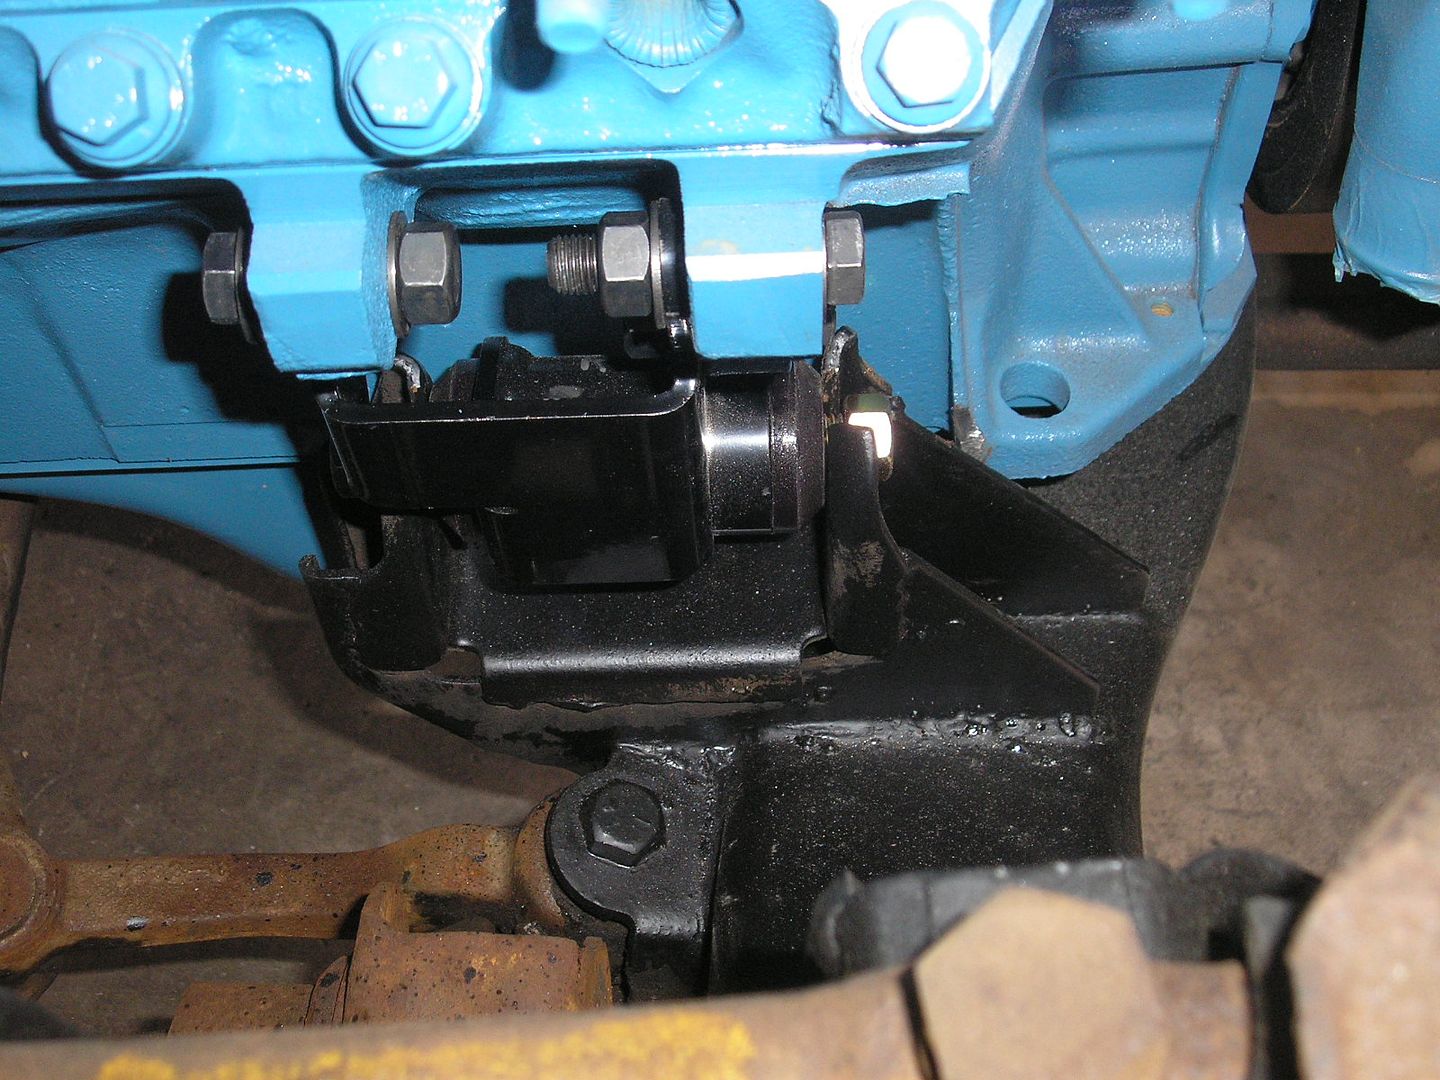 Left side not so much: 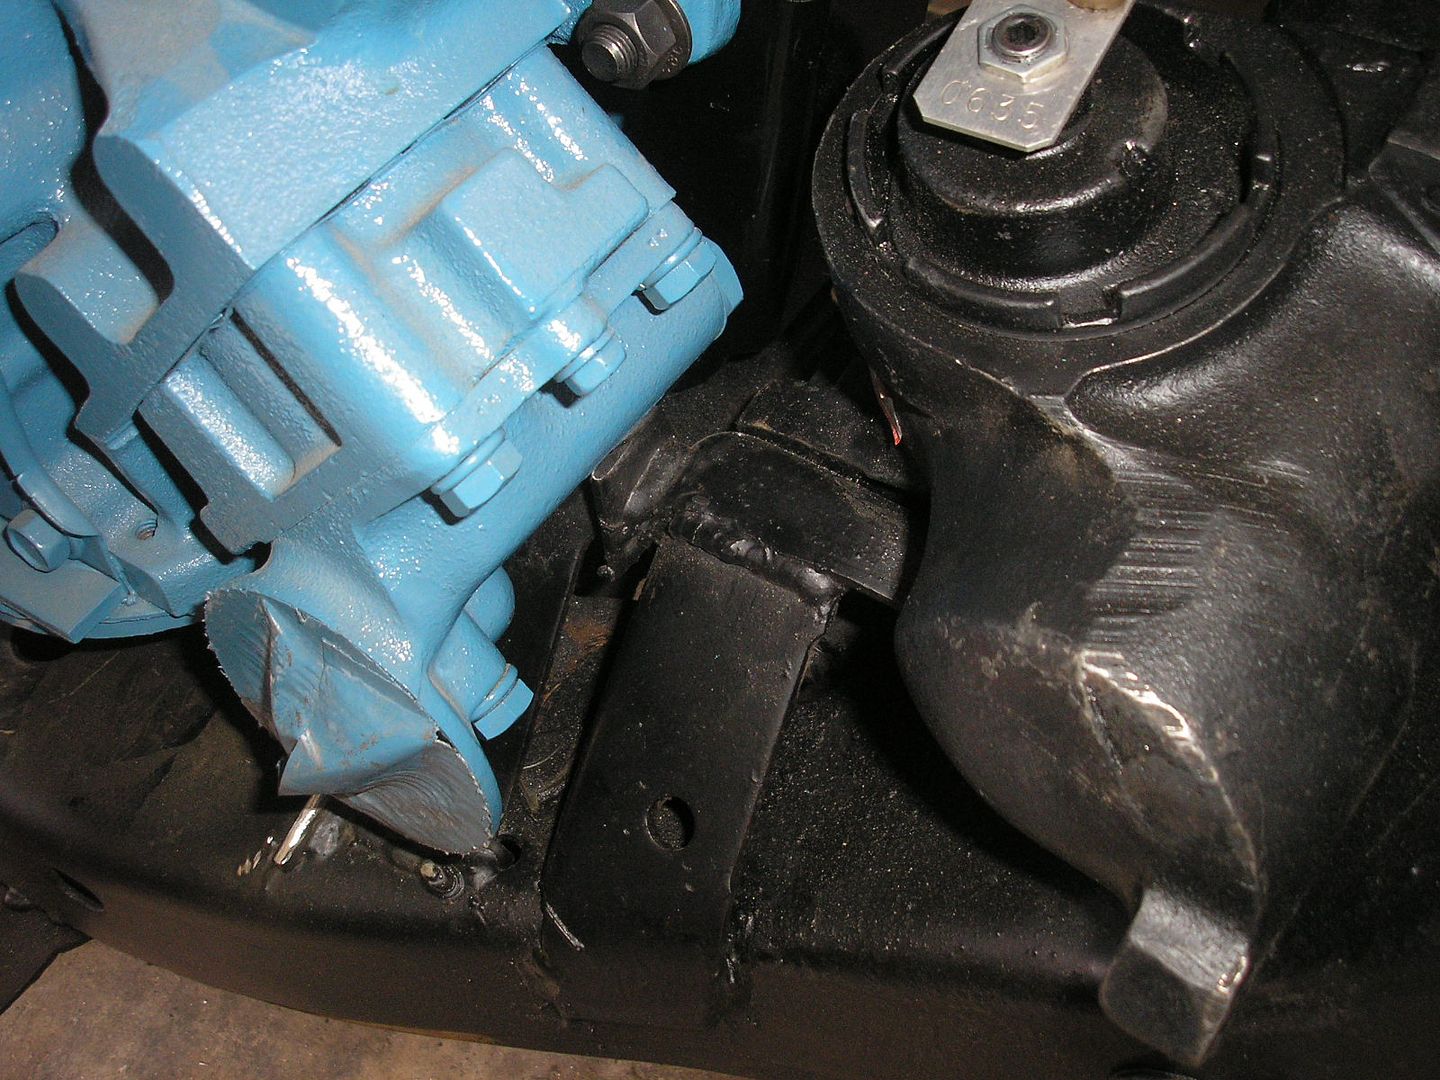 Oh, good luck getting that nut and a wrench on the front for the through-bolt. 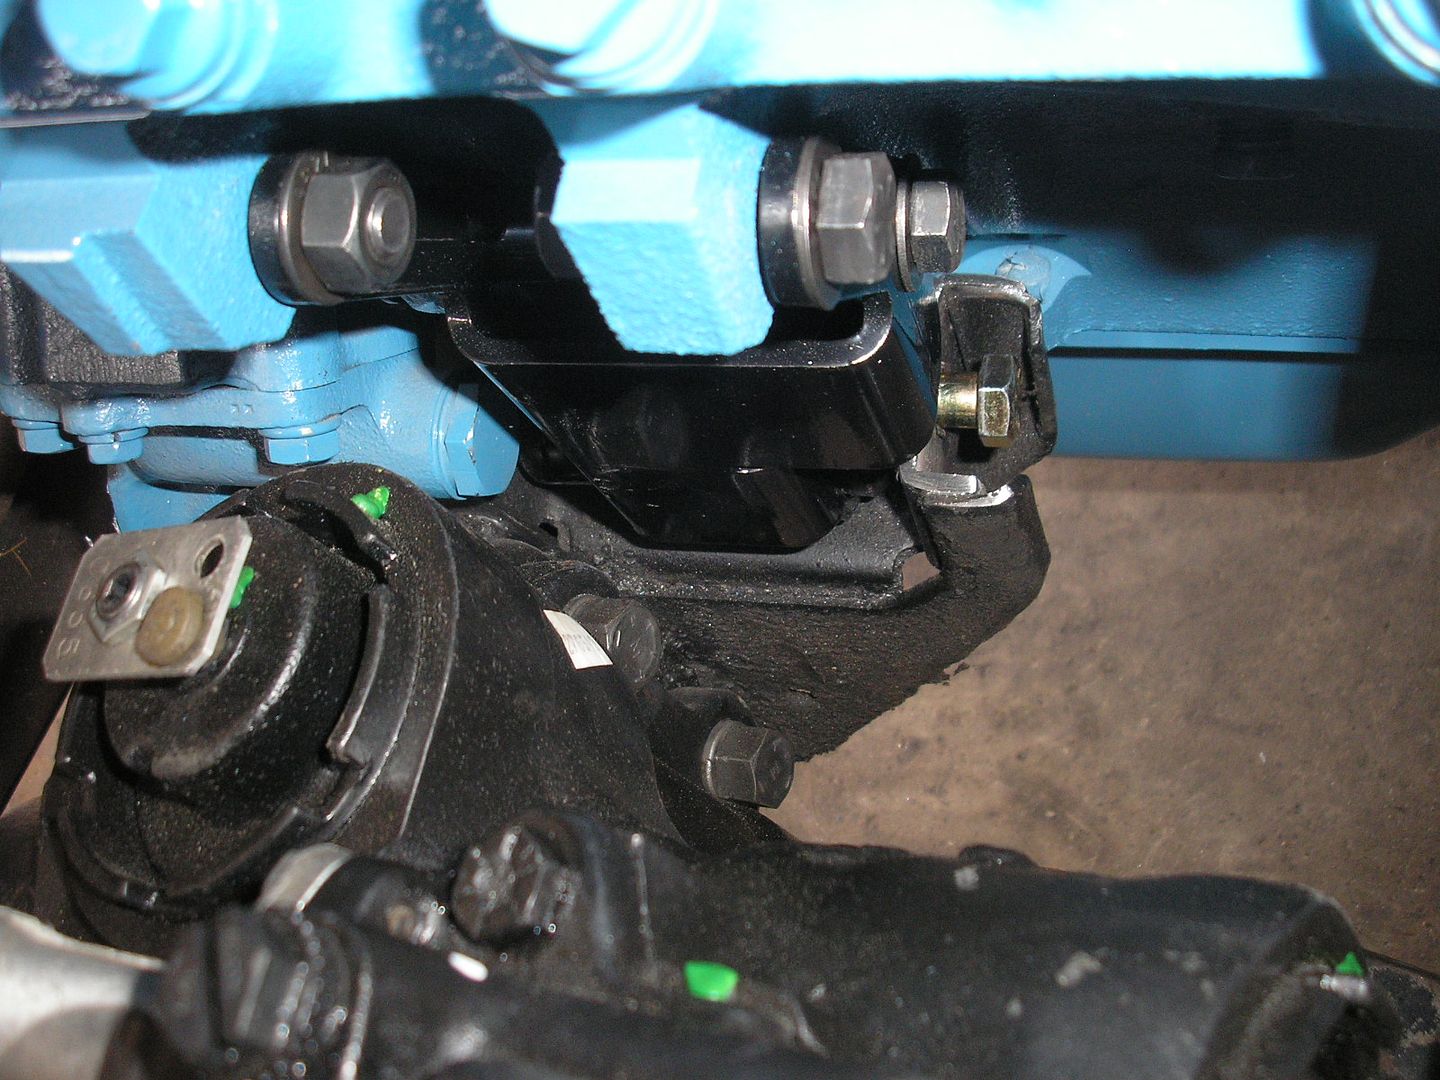 You can barely get a finger in there with the Melling pump, so I welded the nut to the mount. 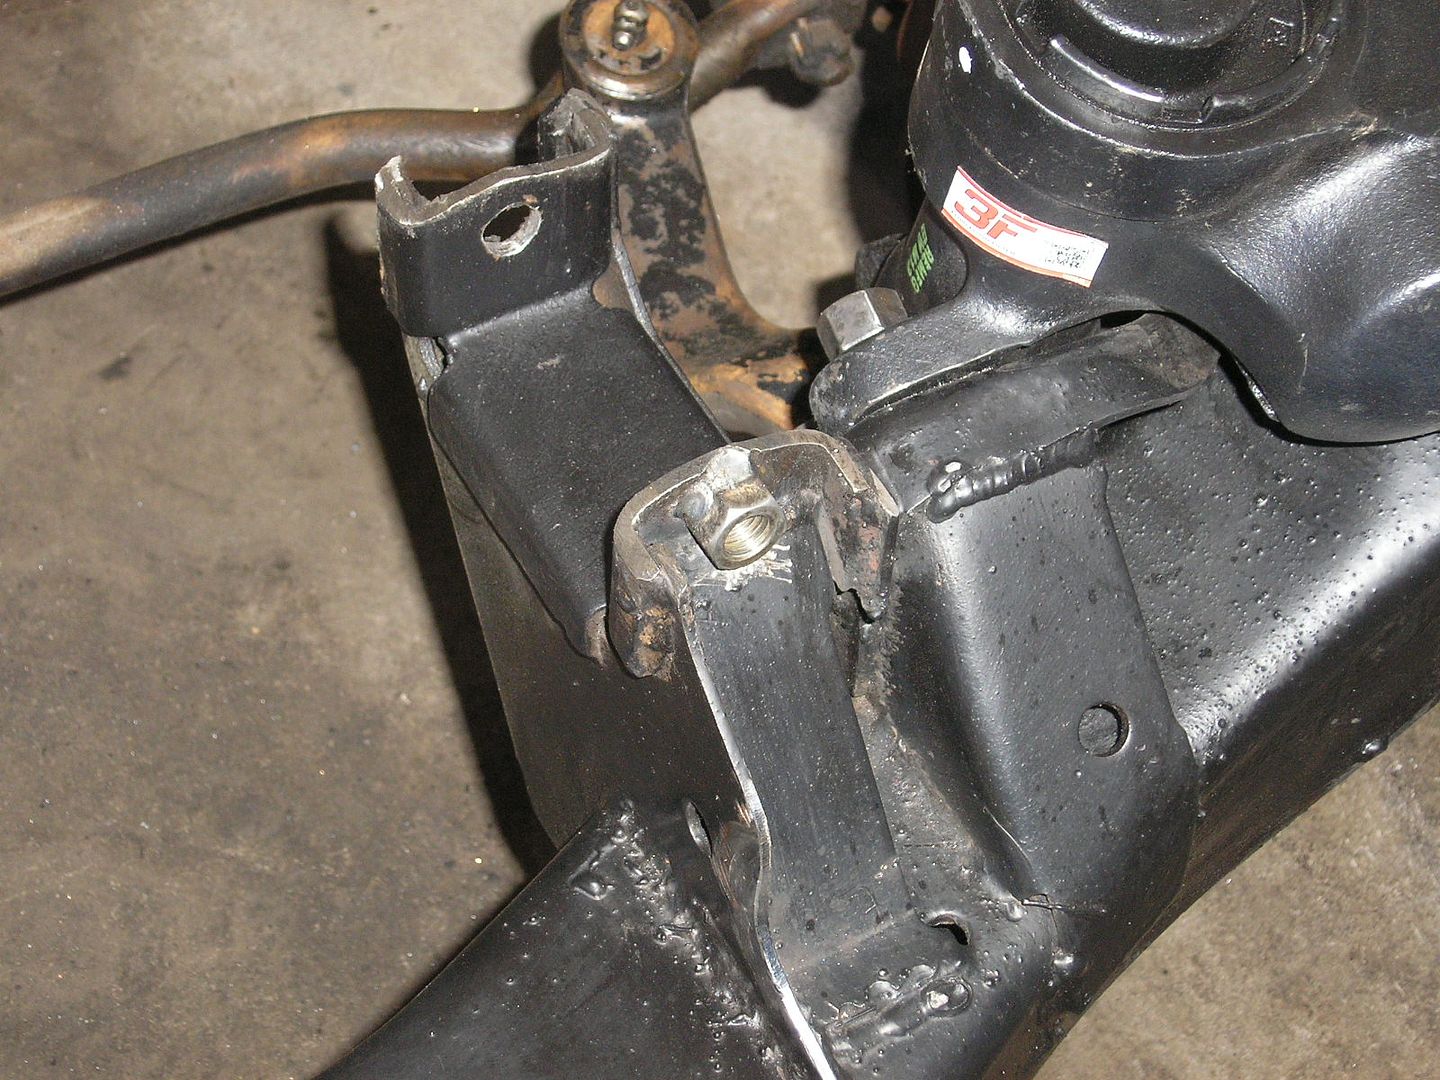 Another gratuitous engine-in-the-car shot. 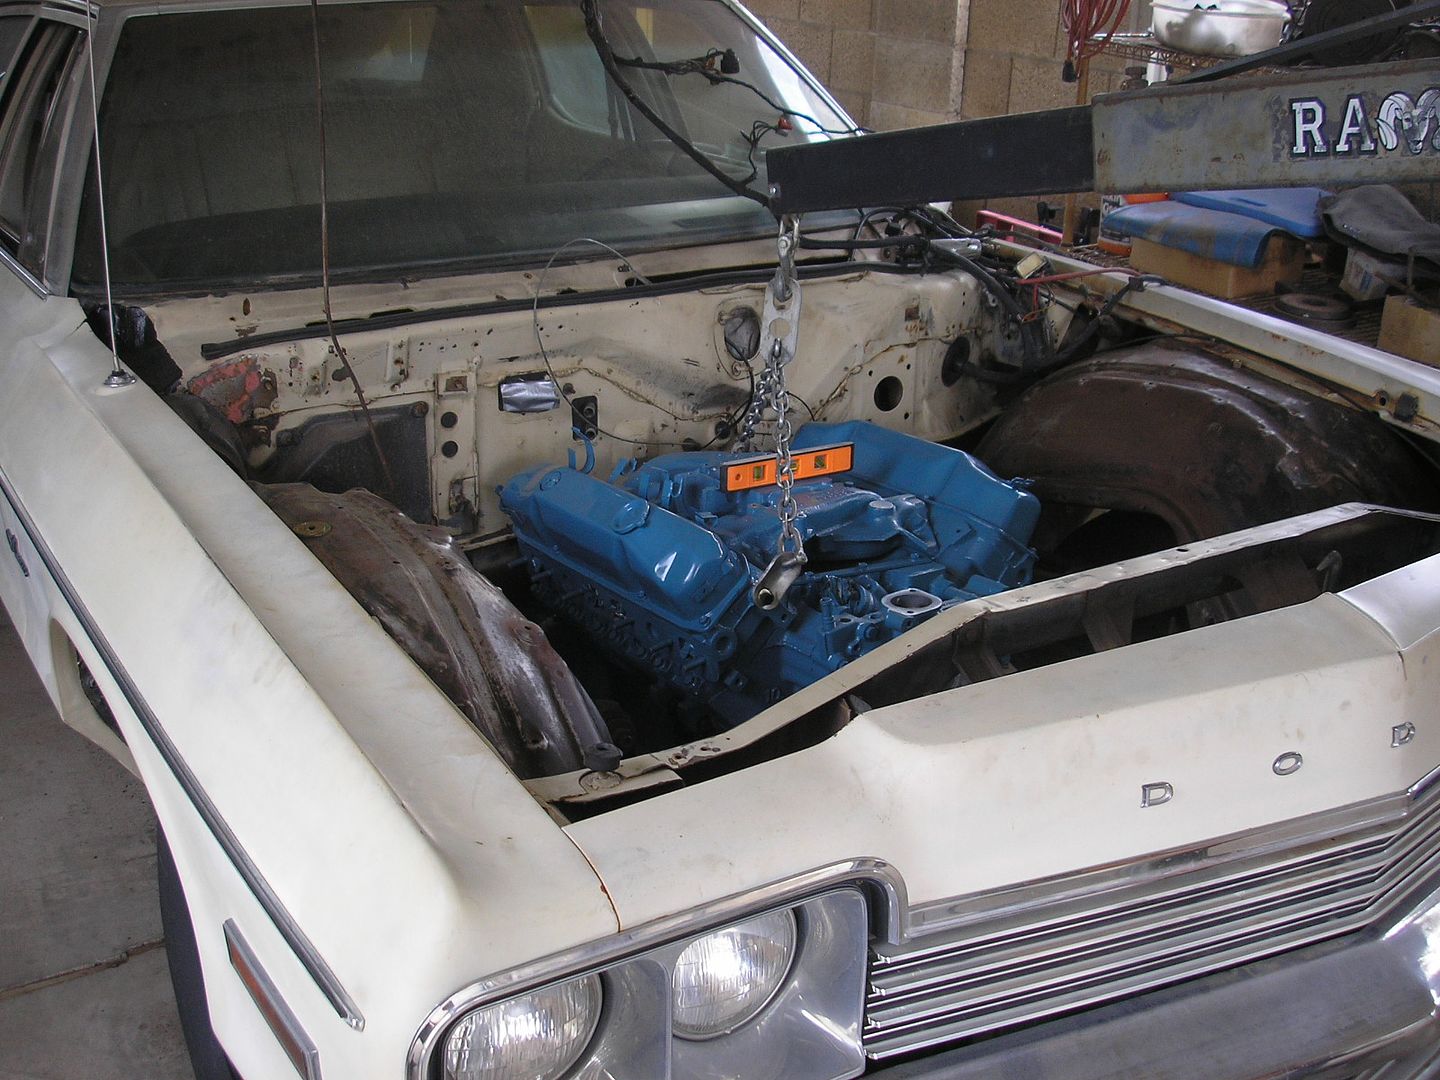 -AZB |
|
|
|
Post by Ghostbluesman (Ghostsoldier) on Mar 13, 2015 18:02:37 GMT -5
Niiice. Rob |
|