|
|
Post by countrybunker on Nov 19, 2012 18:28:13 GMT -5
When can I take delivery of my car spanks?? I'm getting antsy!
She is coming along man! I hear you on needing to take a brake. Need to get away and clear the mind once in a while. I want a set of those bilstiens badly!
|
|
|
|
Post by spanks79 on Nov 20, 2012 20:48:33 GMT -5
Thanks guys. Zac, come get it......just don't forget your check book.  It will be cheaper to just put some Bilstein's on your car. $100 per shock is a bit steep, but I have installed Bilstein's on a number of cars, I have never been disappointed. Arthur, for me I think it is more the nickle and dime stuff that keeps adding up to dollars than the shear amount of work. Dollars are tighter now than they were a year ago when i got really serious about this project. I don't even want to think about your nickles, dimes and thousands. Lol. I got lots to do, overhaul a steering column, work on wiring, install a heater box assy, build an engine, find interior, fix a speedo...... Speaking of speedos, my doom and gloom over the junk yard 140 speedo may be all for not. I made significant headway with it this morning. I have been soaking this piece 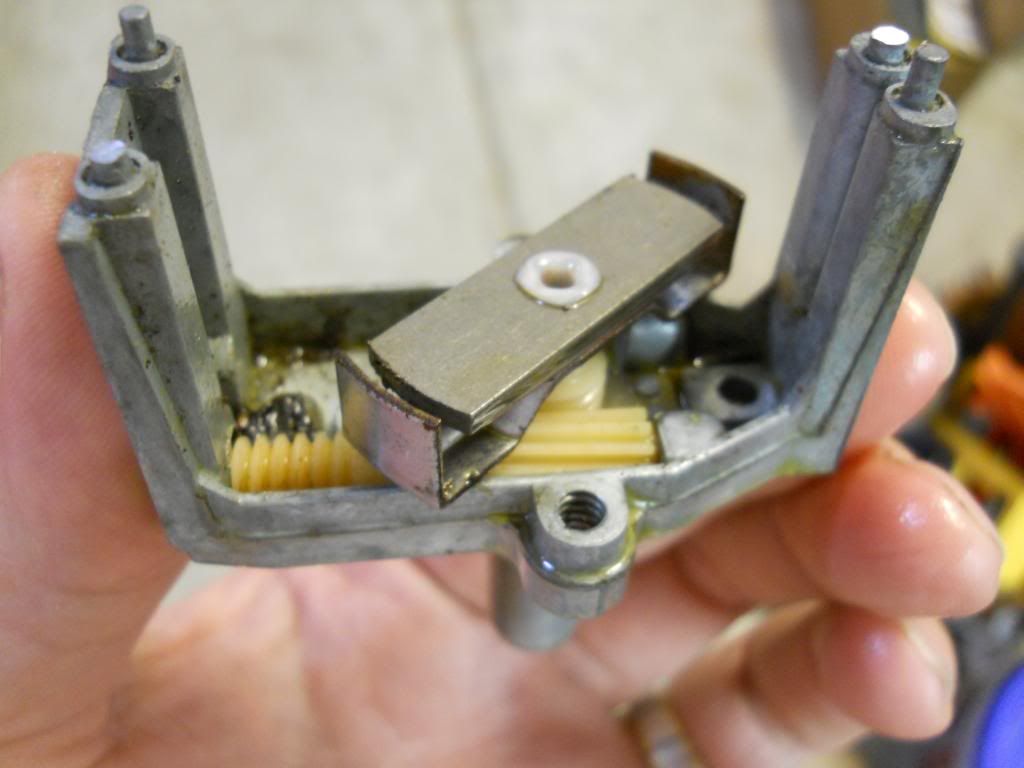 In PB blaster around the clock since Saturday afternoon. At first it was totally frozen, Sunday it started to move a little bit, a couple degrees each direction, but I was afraid of breaking it. I eventually got a few complete turns out of it. Monday I had it turning but it still had way too much resistance for a speedometer cable to ever have hope of spinning it. This morning it had freed up a fairly significant amount more, so I decided it needed some exercise. I came up with this rig in the mill. For some reason the sound did not make it but you get the point. I let it spin this way for a pretty long time while applying more PB Blaster and different oils. In the end, I think it might actually work! I was also thinking about the fact that it is not a 14o speedo, I should just use the 140 and figure out how to reproduce the door jam sticker that shows it has been replaced. Not screen accurate however that carries a better story than just saying I took it out of a 76 or something. |
|
|
|
Post by sigmfsk on Nov 20, 2012 20:56:42 GMT -5
I was also thinking about the fact that it is not a 14o speedo, I should just use the 140 and figure out how to reproduce the door jam sticker that shows it has been replaced. Not screen accurate however that carries a better story than just saying I took it out of a 76 or something. I have one of those stickers. It came in the box with a replacement speedo. I can scan the sticker for you if you go that route. But I think eventually one-day you'll have a 14o, and when you put that in, you won't want the replacement sticker on the lower a-pillar. So maybe just consider the 140 a cool cop placeholder for the ultimate 14o? |
|
|
|
Post by spanks79 on Nov 20, 2012 22:13:44 GMT -5
Ahhhhh, Arthur you know me too well. You are correct, some day I will likely end up installing a 14o speedo just because every time I get in that car and fire up the ole 440 I will look down and see those big 0's and it will bother the hell out of me.
Much like, deep down I want to gather all the hardware needed to install a 74 crazy headliner as opposed to the much simpler one piece headliner.
|
|
|
|
Post by Ghostbluesman (Ghostsoldier) on Nov 20, 2012 22:44:36 GMT -5
Are those "cop shocks"?! ;D
Rob
|
|
|
|
Post by JennyBlues on Dec 1, 2012 6:09:05 GMT -5
Very very nice Spanks! your car is looking awesome!
|
|
|
|
Post by spanks79 on Jan 31, 2013 0:56:28 GMT -5
Finally getting back at it after a little break for the holidays. I got my junkyard 140 speedo finished up and I think it looks pretty damn good. I ended up using the housing, fuel and amp gages from my civi 120 speedo and installed the restored speedo mechanism and face of the 140 unit. I also reset the odometer to 00000, just for kicks. Before 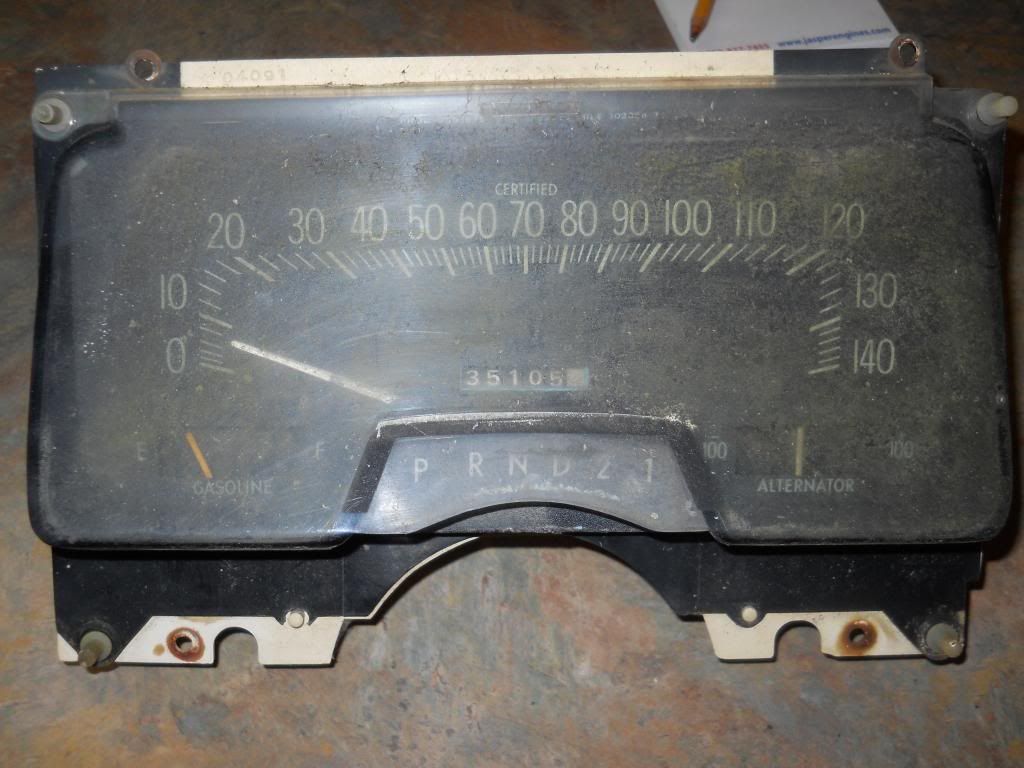 After  I figured my next task to tackle on the car was to get the dash and wiring started. I want to install the heater box, dash harness, get the main engine compartment harness thru the firewall and installed, and start to build the dash out before installing any sound proofing, insulation or doors. So I have been slowly picking parts off of the NC donor car and cleaning them up. I am finding some of my donor parts at pretty rough. Check the heater box.   This thing is nasty. The cowl on my donor car is rusted pretty bad and as a result water has been leaking in and has gotten the heater box components all rusty. The blend doors were all rusted in place and the "plastic" the box is made of is very fragile. Not to mention the family of mice that had been living in there. I plan on taking some cues from Bluesmbl's build to restore the box to working order. If anyone has a decent heater box assembly they would be willing to part with cheap I would consider buying it so I had a bit more to work with. Let me know. Finally some clean shiny parts to end with tonight. I like installing parts on the car I know get to stay on permanently, it feels like an accomplishment. I installed the defroster duct assembly! It took about 2 min. But hay it's progress!   |
|
|
|
Post by spanks79 on Feb 8, 2013 0:15:55 GMT -5
Its been a good Monaco week, we have been slow in the shop so I got some more stuff done. Funny thing is, good Monaco weeks are typically bad work weeks (no money  ), and good work week (money ;D) makes for bad Monaco week (no time). Life isn't fair that way. I got the heater box completed and installed. That is a huge relief, I was dreading working on the thing. I have to admit its not my best work, but it looks good enough for something that will never be seen again by anyone but me, and it works well.  I found a replacement heater core from O'Reilly Auto Parts for $40 and it fit great. I took a page from Bluesmbl's build and made sure to pressure test the heater core and evaporator core in water to ensure no leaks. I reused the evaporator core as there are no replacements available. All I did was clean it with some acid based coil cleaner and rake all the fins out and it looked great. By the way, that thing is large enough to cool a small house, probably 3 times larger than an evaporator core in a modern car!    I covered all the internal doors with new foam tape to ensure a tight seal. I never removed the two doors from the lid of the box, the nuts attaching the adjusting arms were rusty and I was afraid I would break them if I forced the issue, so I just cleaned everything up as best as I could. I had to repair the plastic / fiberglass box in a few places as well with some two part adhesive. Also the steel bracket that holds the temp control cable in place was rusted in two pieces, so I had to repair it and pop rivet it back onto the box.    I gave the fresh air box the same treatment.  After that I installed it all in the car. I used some strip caulk between the box and firewall to seal it up because most of the original foam seals were pretty crispy.   Then finally, I finished up with the blower motor housing. I installed a new blower motor and cleaned up the rest again using more strip caulk to seal the housing to the fire wall.  In the end not as bad as I expected, but I am happy to move on. The next step is to tackle this,  And actually within an hour, I ended up with this  I plan on cleaning up and blasting most of the steering column parts and repainting. Here is a question though. Has anyone determined what color tan to use on the column? Can I use the same SEM dye that is used on the steering wheel? I'm on a roll and need to figure this out. |
|
|
|
Post by sigmfsk on Feb 8, 2013 7:43:48 GMT -5
When you tear a column down, you tear it down! Can I use the same SEM dye that is used on the steering wheel? Yes. Here's a "how-to" use SEM on metal: www.bluesmobiles.proboards.com/index.cgi?board=blumohowto&action=display&thread=313Has anyone determined what color tan to use on the column? Anytime I need to paint/dye something blumo-tan, I use SEM Camel, so I think it would be great for painting your column. For my blumo, I originally planned to use SEM camel on the steering column, but I'm now planning on using a stock tan column from 76Bluesmobile's 76 monaco. I'm going to have a lot of things SEM camel, but several things will be stock tan color (such as the visors), and having a steering column a stock tan fits in with all that scheme. |
|
|
|
Post by spanks79 on Feb 8, 2013 8:55:00 GMT -5
When you tear a column down, you tear it down! Thanks Arthur. I thought about just cleaning it up and spraying it but all these parts are so nasty it is almost easier to do it this way. With as rusty and dirty these parts are I would almost guess this car was in a flood or something. But again the cowl was so rusted lots of water just ran right in for a number of years all over the under dash of this car. The good news is the column if pretty simple, it looks way more complicated than it is, espically being a non tilt wheel. Tilt wheel columns can be a bit more challenging. Thanks for the heads up on the color. I see "camel" being used a lot but then I see the stock tan and get confused. Would it be safe to say that the "camel" is a darker redish brown, where the "stock tan" is lighter / yellowish, almost sand color? I see where Blusmbl used Duplicolor Medium Beige HVP113 for his dash pad, it looks lighter than the Camel. |
|
|
|
Post by blusmbl on Feb 8, 2013 22:15:54 GMT -5
Hi Spanks, you are making great progress! I cringed when I saw your photo of your heater plenum box, it brought back some bad images  The heater core just let go in my truck today, so I will be swapping it out this weekend  I'm glad you tested your heater core and evaporator and restored the door foams, that will save you headaches down the road. I did paint my steering wheel and column Duplicolor HVP108 Desert Sand and the dashpad is Medium Beige. I thought it might look funny if the steering wheel matched the dash and other interior colors, might be to much of the same color. The headliner is desert sand as well as the visors. It always seemed like Ma Mopar never quite matched everything or at least maybe the panels faded differently based on what they were made from. I don't know if there is a right or wrong on what you want to go with as far as color, you can always paint it and see how you like it and change it up if you need to. I will have to pull the cover off of mine and fire it up, I haven't had it out since the beginning of December, need to keep the fluids circulating. ;D Stay wrenching, my friends.... |
|
|
|
Post by spanks79 on Feb 10, 2013 23:30:53 GMT -5
Thanks Blusmbl! Hope the heater core job in the truck was easy.
Thanks for the input. I have been collecting tan dye colors and preparing for a test. I like your thoughts about the different shades. Right now I am torn between painting the steering column and wheel light, as you did, with Desert sand, or go with the SEM Camel to get a closer match to the 76 parts Arthur has from his parts car. I don't think I can go wrong either way, it's just about picking something and going with it.
|
|
|
|
Post by spanks79 on Feb 12, 2013 7:58:30 GMT -5
Quick update. Same pile of steering column parts, just freshened up a bit.  Hopefully Ill get it all together this week. |
|
|
|
Post by sigmfsk on Feb 12, 2013 17:22:23 GMT -5
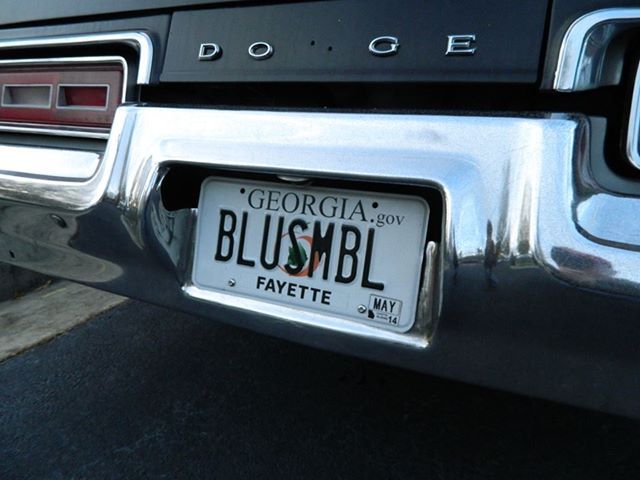
Same pile of steering column parts, just freshened up a bit. Man, that looks good. And the blumo-riffic bumper in the background adds a nice touch! |
|
|
|
Post by spanks79 on Feb 17, 2013 0:17:03 GMT -5
Man, that looks good. And the blumo-riffic bumper in the background adds a nice touch! Thanks Arthur. That bumper is one of the key items of this build I won't let out of my sight. |
|


 ), and good work week (money ;D) makes for bad Monaco week (no time). Life isn't fair that way.