|
|
Post by spanks79 on Mar 9, 2015 21:41:15 GMT -5
Got a bunch more done in a little over a week. Here's what I crossed off the list. Way behind with pictures and updates. Hope to get caught up this weekend. Yesterday was the first time in 3 years we had nothing to do on the car. We are held up, waiting on parts. Waiting on tires to be delivered (hopefully today) so they can be mounted and car aligned. Waiting on windshield moulding clips before front and back glass can be installed.
Waiting on seat belts before the remainder of the interior can be installed. Waiting on Unity 216 mount before spotlight can be installed.Waiting on insurance agent to look at car and insure before it is sent to the exhaust shop. Waiting on a front license plate bracket.
Waiting on AC lines to finish the air conditions and under hood. Waiting on stencils from TK so the exterior paint markings can be completed.
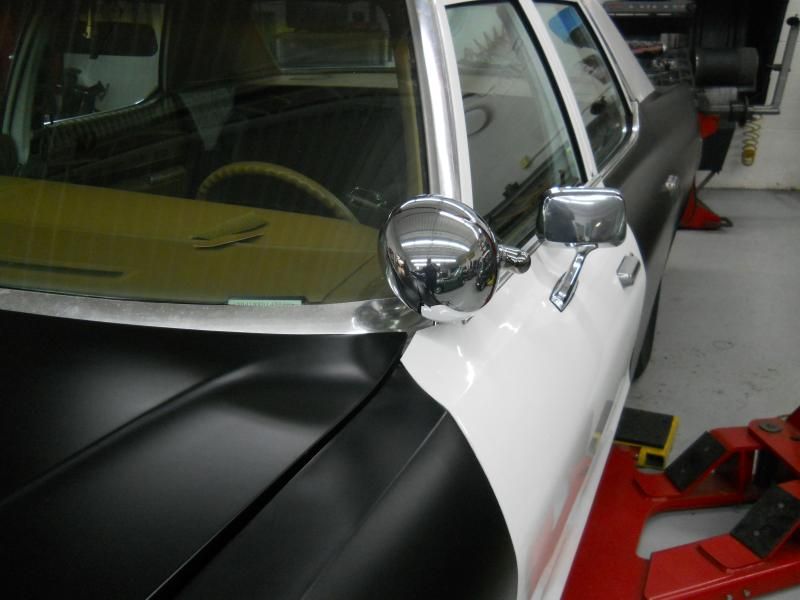
I'm not really worried about all of the above because we have parts on order and work is in process. What I need more than anything is a FRONT SEAT! I'm getting worried. I have nothing in the works here. I'm ready to buy a car simply to get the seat. Going to try and hit some older junk yards I know of and see what they have but I don't have a lot of confidence that will pan out. Fingers crossed a seat pops up soon. Got the Unity spot light installed. Used the 216 mount and a new 325 light I got off ebay. Install was fairly simple. 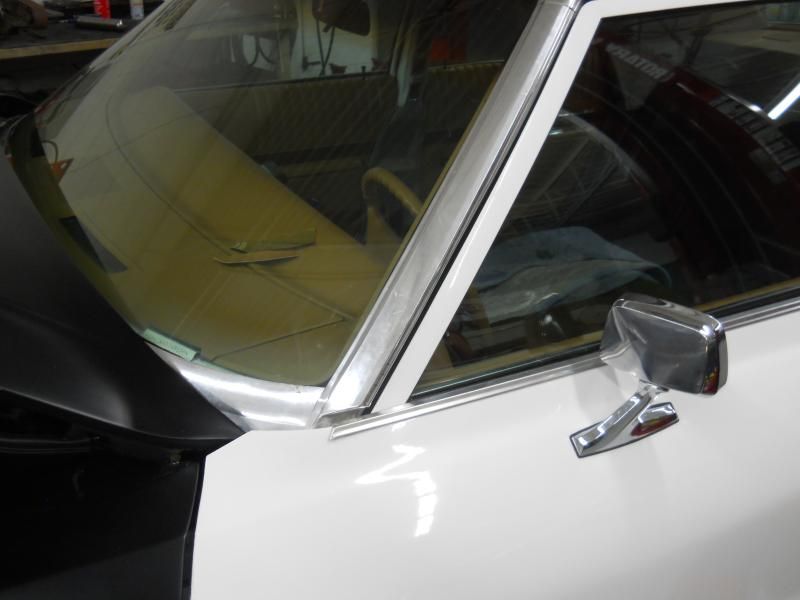
Position the mount. I went 1/2" higher than where Unity recommended. 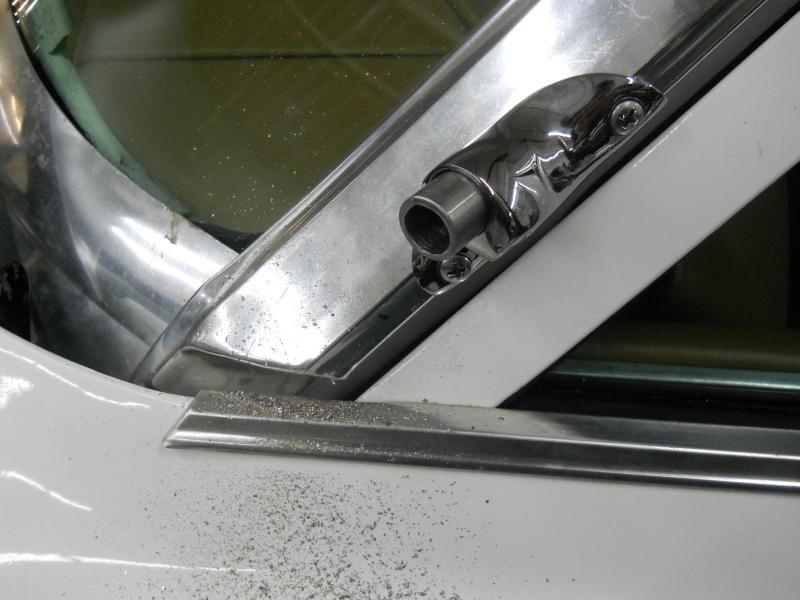
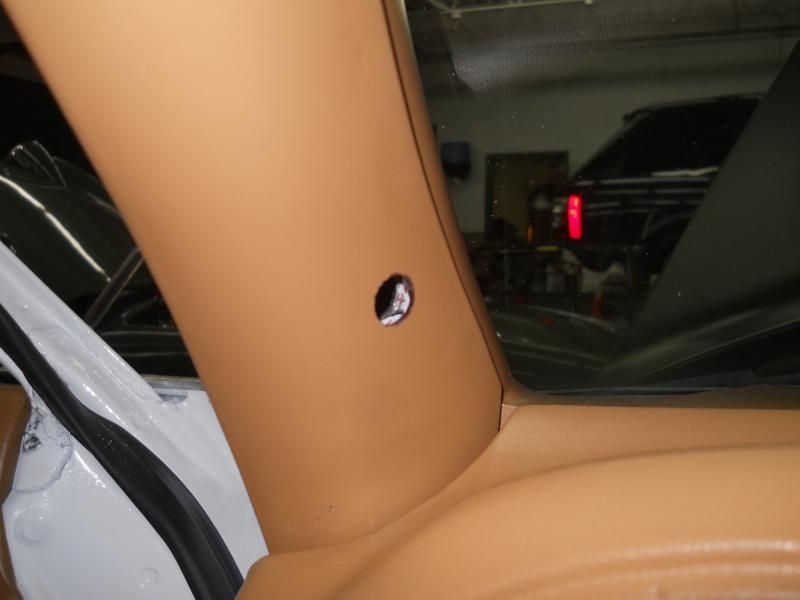
Then drill a big ass hole. That is ass hole, not asshole. 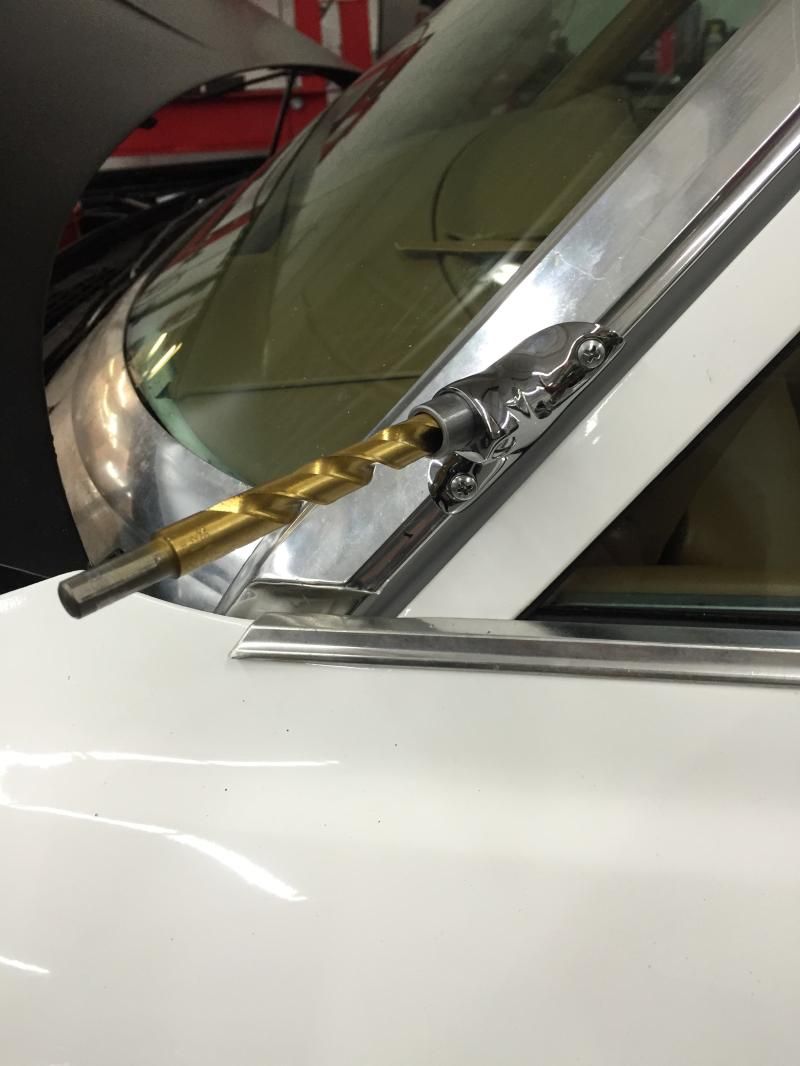
I found that at some point my 1/2" drill bit needed some Viagra! It wasn't long enough to go all the way thru the A pillar. I chucked the bit as shallow as possible but once you are that far thru you can remove the drill bushing to finish up, that gives you the last 1/4" or so needed.
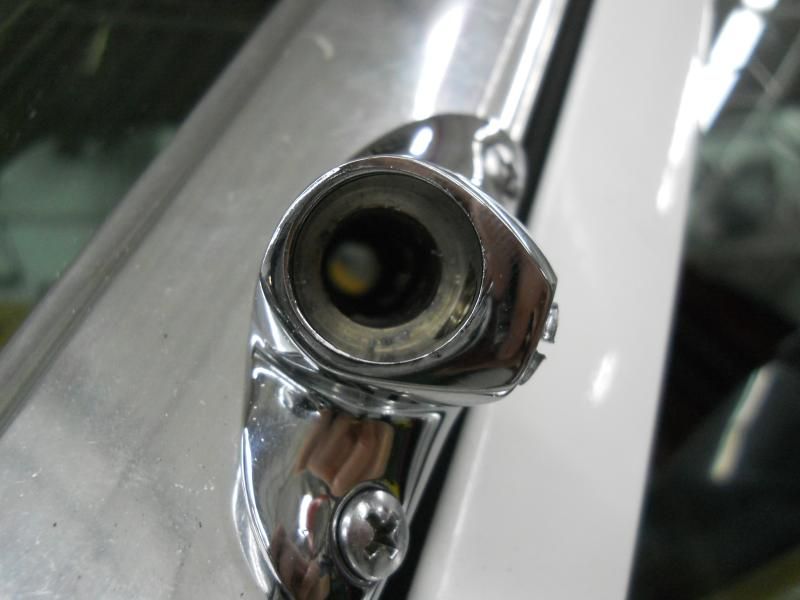
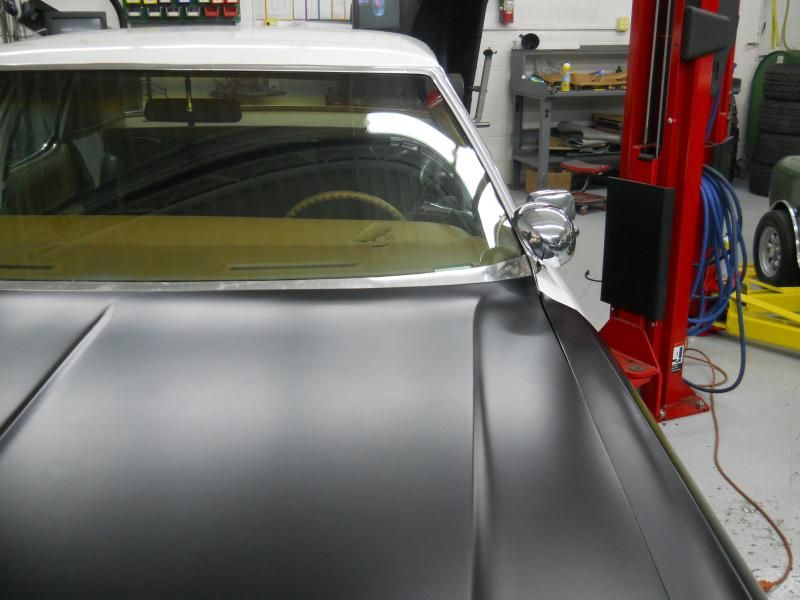
Finished product
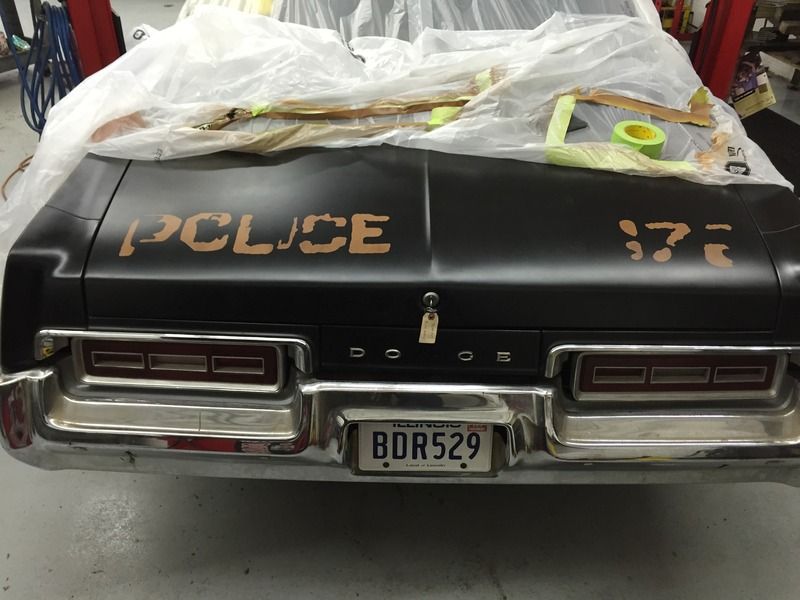
TK's stencil kit showed up as well. I started getting into this but honestly I am so nervous that I'm going to screw it up I don't know if I should $hit or puke! 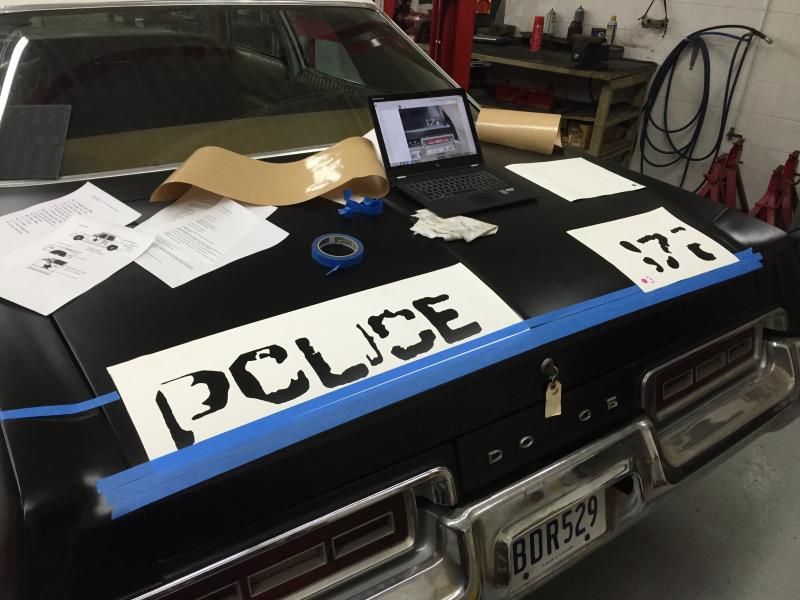
And best of all I have a seat in the works! Stay tuned for seat updates soon!
|
|
|
|
Post by flcl64 on Mar 10, 2015 14:54:37 GMT -5
I'm curious as to how the stencils would turn out if instead of spray painting, you used a sponge.
|
|
|
|
Post by 58hemifury on Mar 10, 2015 18:31:35 GMT -5
One thing I want to try on the next one I do, if there is a next one, is spray a very light dusting of flat black over the white before removing the stencil to dull the white down and give it a tan/transparent/worn/dirty look. Just a word of advice, if you are using Krylon as I did on the lettering, mineral spirits cleans up edges that bleed, overspray, ect. really nicely without damaging the automotive paint, have some handy.
|
|
|
|
Post by spanks79 on Mar 11, 2015 7:18:52 GMT -5
One thing I want to try on the next one I do, if there is a next one, is spray a very light dusting of flat black over the white before removing the stencil to dull the white down and give it a tan/transparent/worn/dirty look. Just a word of advice, if you are using Krylon as I did on the lettering, mineral spirits cleans up edges that bleed, overspray, ect. really nicely without damaging the automotive paint, have some handy. Thanks for the tips. I was also thinking of hitting the white with a grey scuff pad before pulling the stencil off, just to thin it out a bit. I'll plan on dusting with flat black as well. The sponge application idea may work well on the door stars. |
|
|
|
Post by AZBlues on Mar 15, 2015 18:08:56 GMT -5
Who knows what these pieces are for? 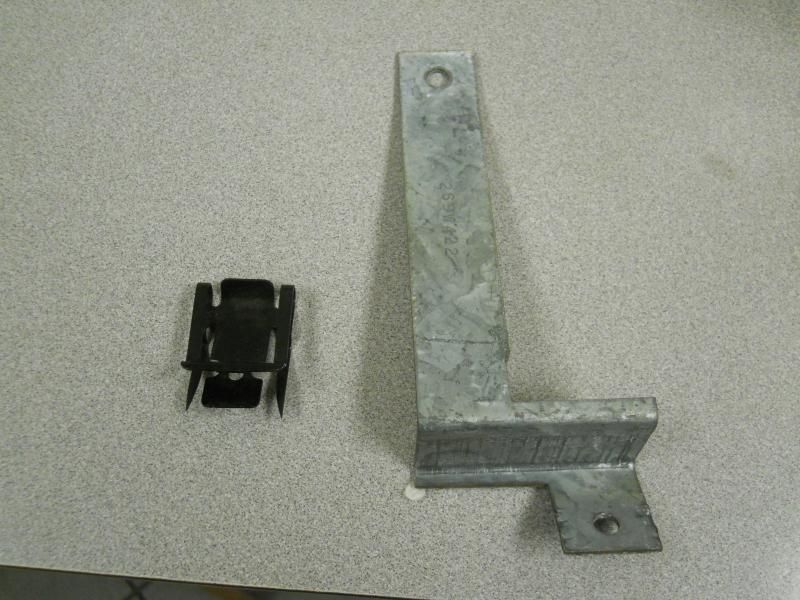 I think I just found it, that loose bolt is what holds it in. Mine looks like it's bent a little differently. 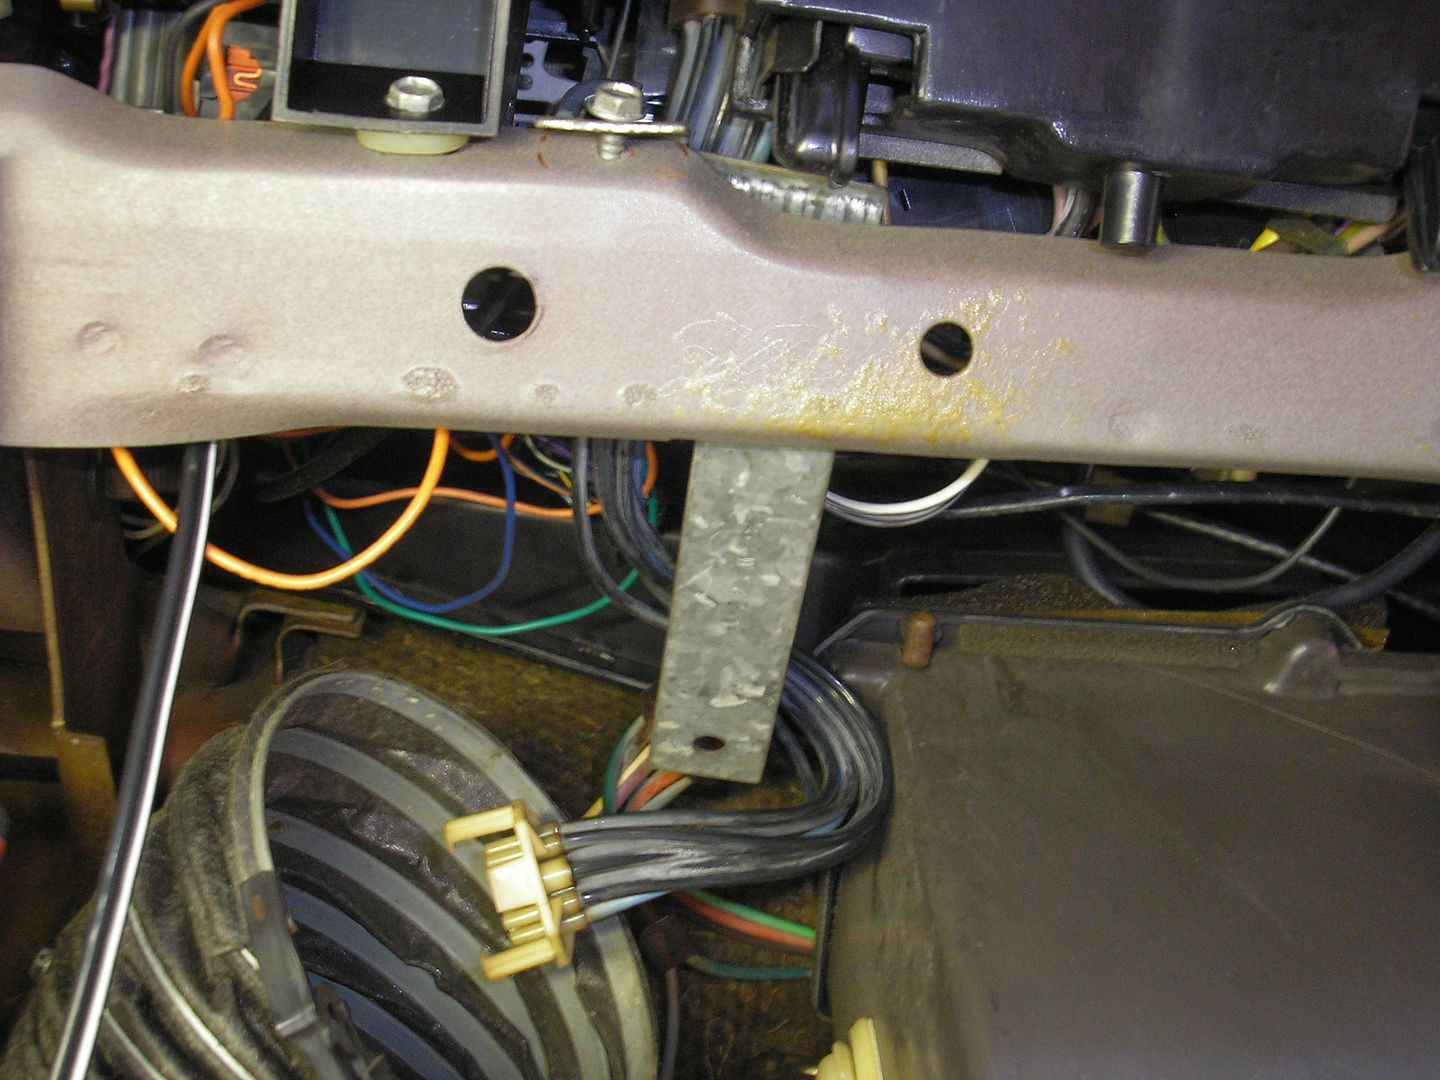 |
|
|
|
Post by spanks79 on Mar 17, 2015 6:54:40 GMT -5
Thanks for he heads up AZB! I will climb under there today and see what I find.
|
|
|
|
Post by Bismo on Mar 19, 2015 20:05:02 GMT -5
I went with sponges on my stencils (the BLUES1 and BLUES2 thread), and was very pleased with the results (tho I still overdid the door stars)... I'll be re-doing my trunk stencils as soon as the weather's warm enough after replacing the lid last Fall and will be going sponge again there. 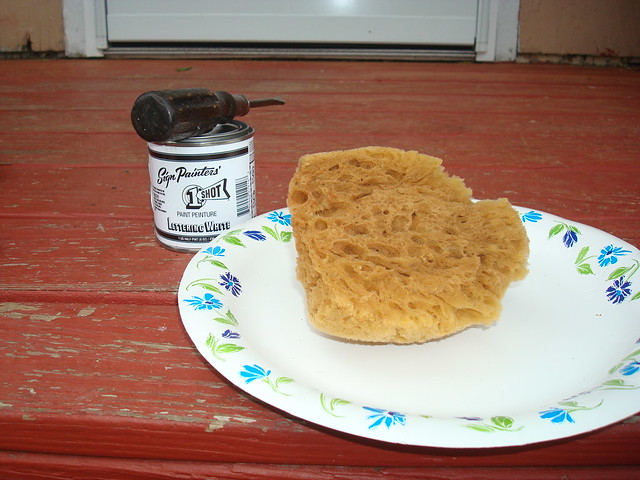 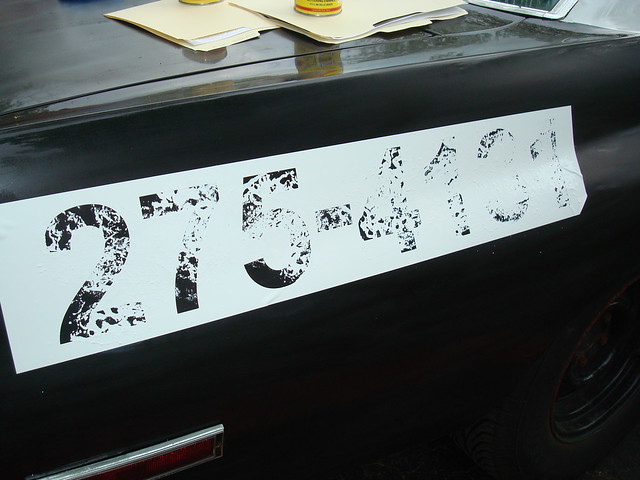 |
|
|
|
Post by spanks79 on Mar 28, 2015 21:35:48 GMT -5
Its been a while since I have updated.
Lots going on but still much to do.
Major accomplishments over the past couple weeks have included: Stencils started, exhaust installed, seats completed, seatbelts came back.
Honestly, for the most part I have been less than satisfied with what I have received, with the exception of the exhaust, it turned out pretty damn nice.
I want honest feedback and opinions as to what this stuff looks like.
TK's stencils are great. There is no way I would have been able to do this on my own.
Rear stencils
Started with my favorite SEM camel toe interior dye and misted with brown leather and flat black
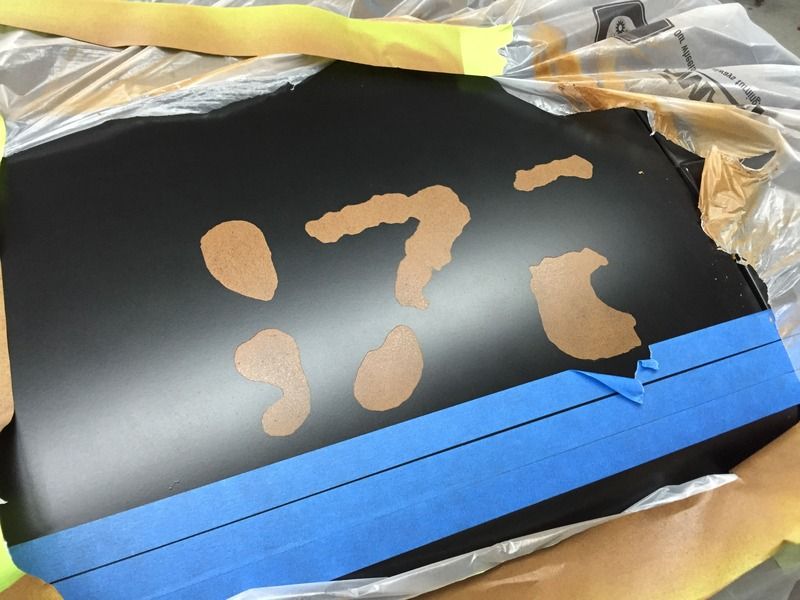
Then the second layer with flat white misted with flat black.
I went over it with a fine scuff pad to knock down the edges a bit
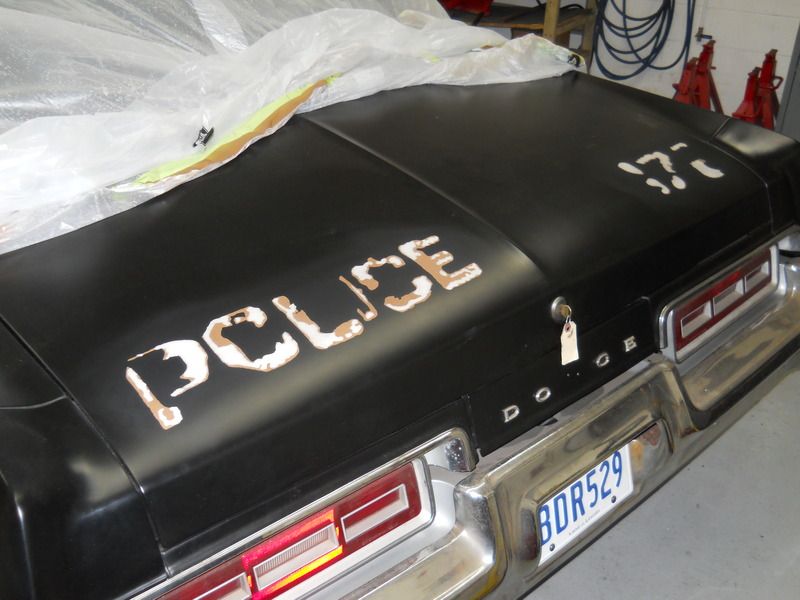
I think it looks decent but still looks almost "too nice" thinking of maybe misting more flat black over it??
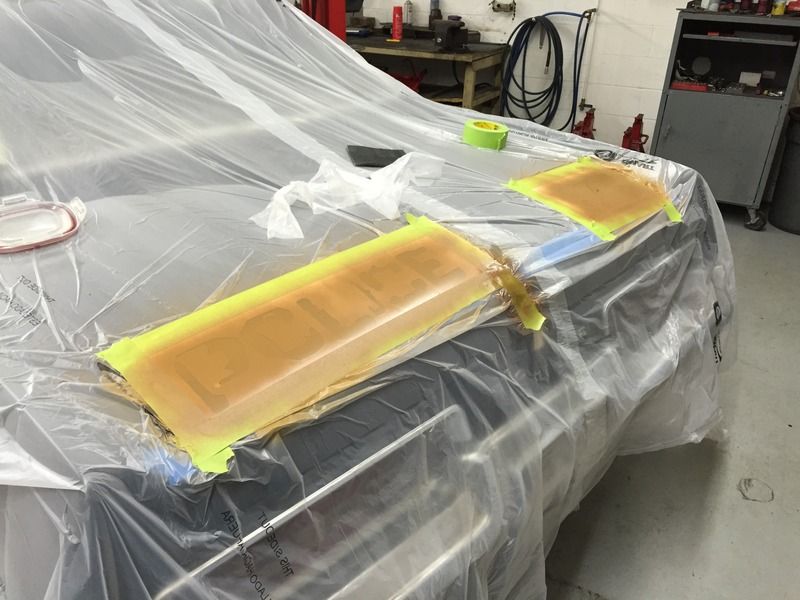
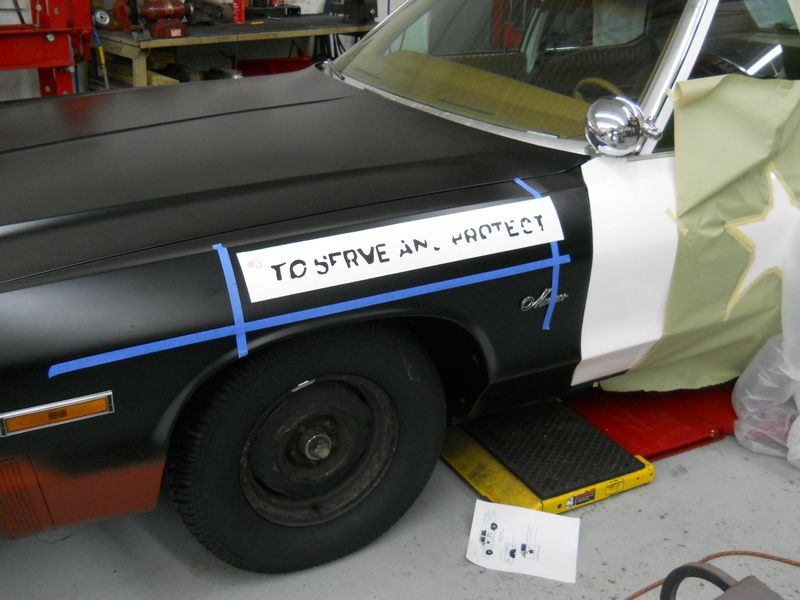
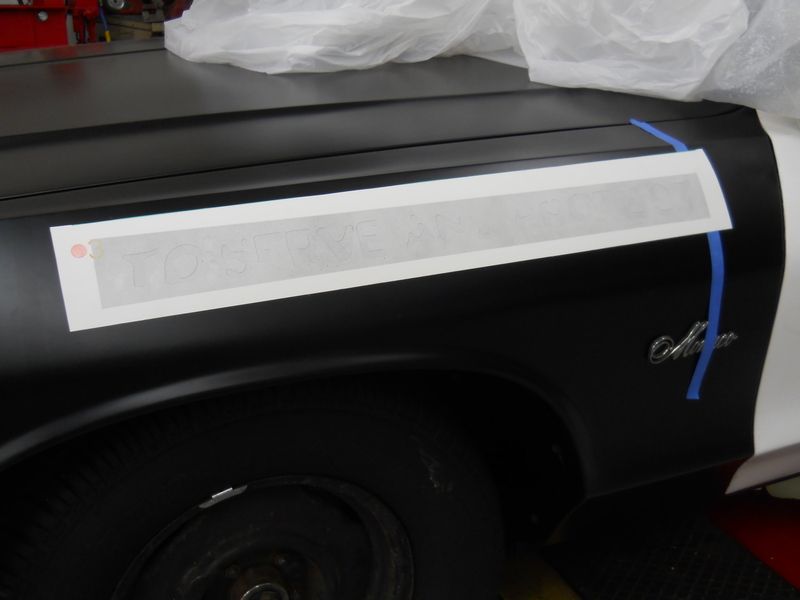
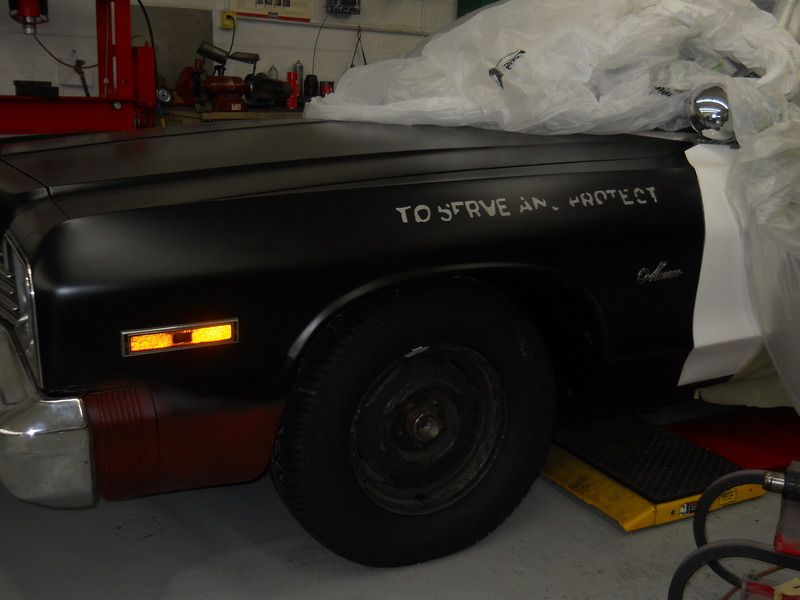
"To Serve and Protect" was a bit easier. Just flat white misted with flat black then scuff pad. Also, misted some flat black on my primer spot.
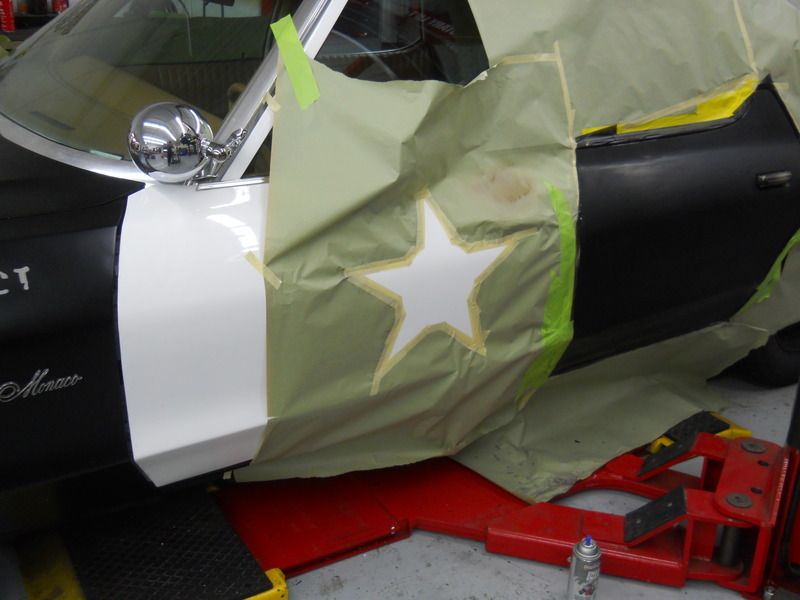
Then onto the door star.
I just made my own template with dimensions given to me by TK and what I found online.
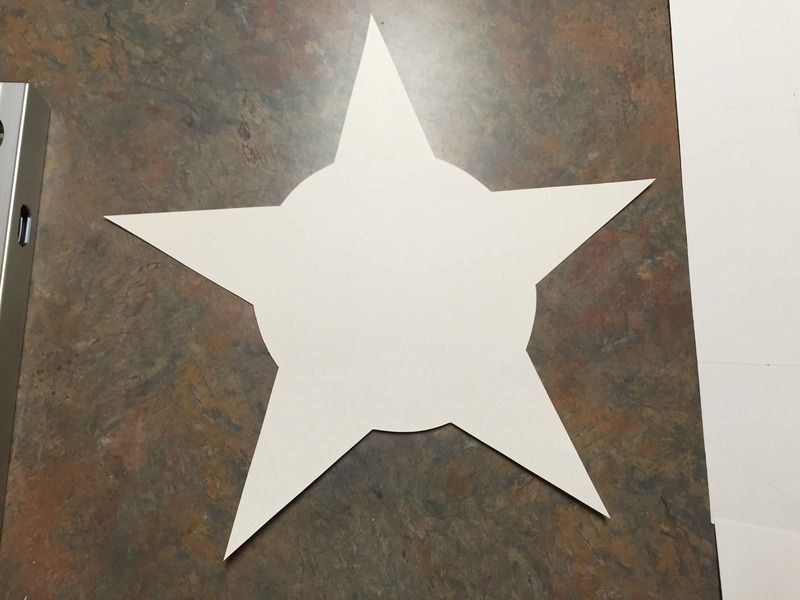
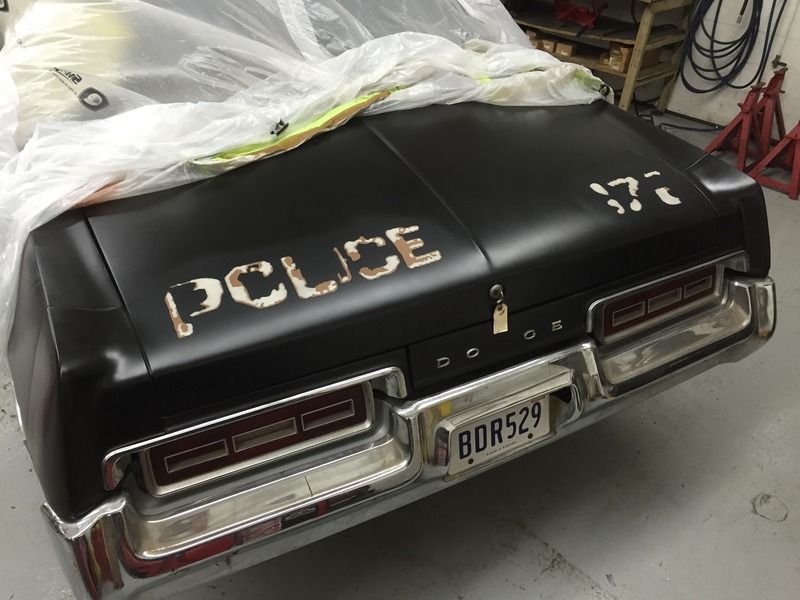
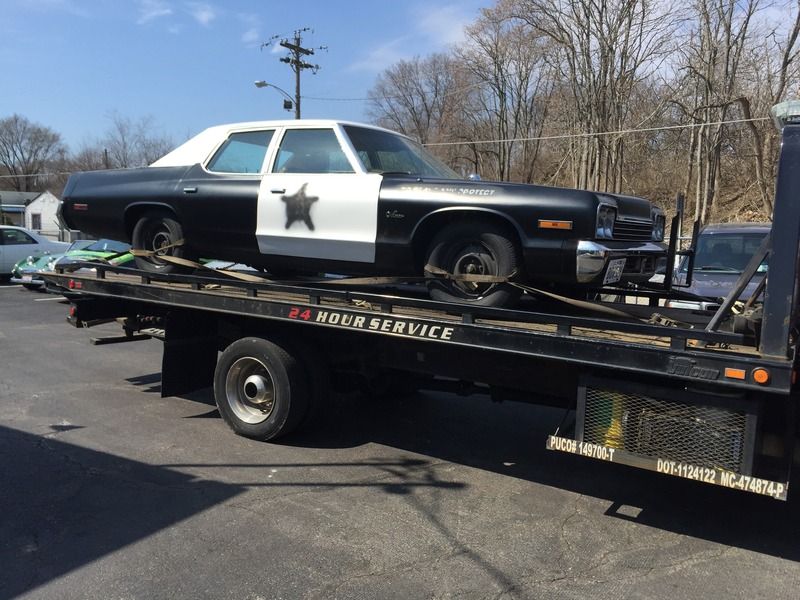
I didn't take any pictures during the process because honestly I was so afraid of screwing something up I was sweating bullets. I now know that it is pretty forgiving. Here is a pic of it outside headed to the exhaust shop
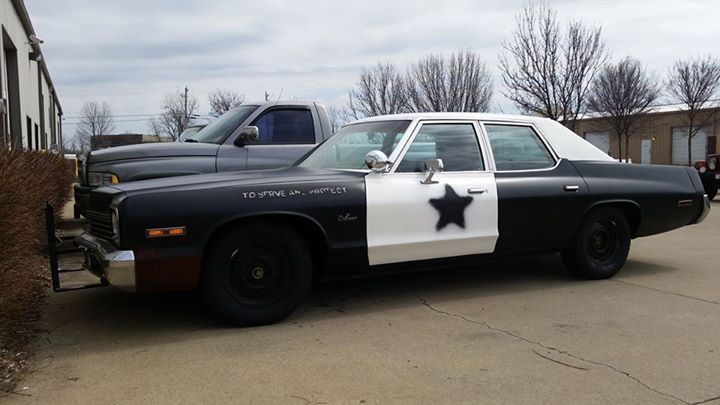
Its a good start but I think it still needs some work. Again "too nice" looking. That is gold covered with flat black, then wet sanded thru to white with 1500, then flat black airbrushed over that. I may sand it again and do some more airbrushing.
Still need to do P1's and phone numbers. Kind of curious what you guys think before I continue.
The exhaust turned out sweet. If any of you follow the Blusemobile Facebook page you probably already saw it. I don't have pics from my camera yet but the exhaust shop took some. I think they did excellent work. It's up high and tight and he tucked the tail pipes up high and put turn downs on the end. Jamie at Flowtek in Mason OH was super stoked to be working on the bluesmobile. I hope to do more work with him in the future.
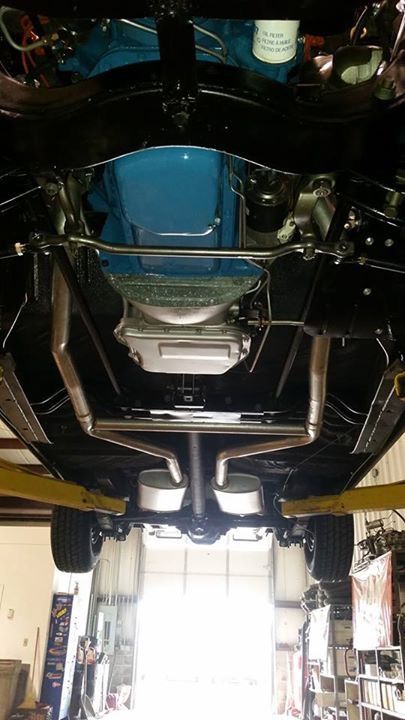
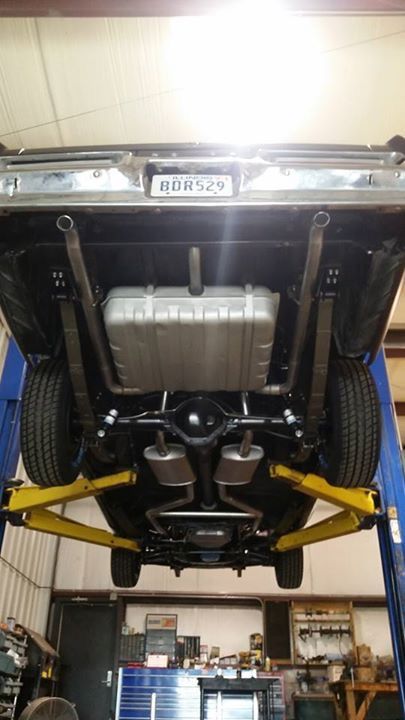
At first I wasn't super wild about the long crossover pipe but after looking at it there wasn't really any other option. He would have had to turn the pipes sharper after the crossmember to get them closer to be able to get a short crossover in before the driveshaft. I am happy with it.
Now for the seat.
I actually got the seats back a couple weeks ago. Literally, less than a week after I posted about the rusty seat frame they were done. Here is how they turned out.
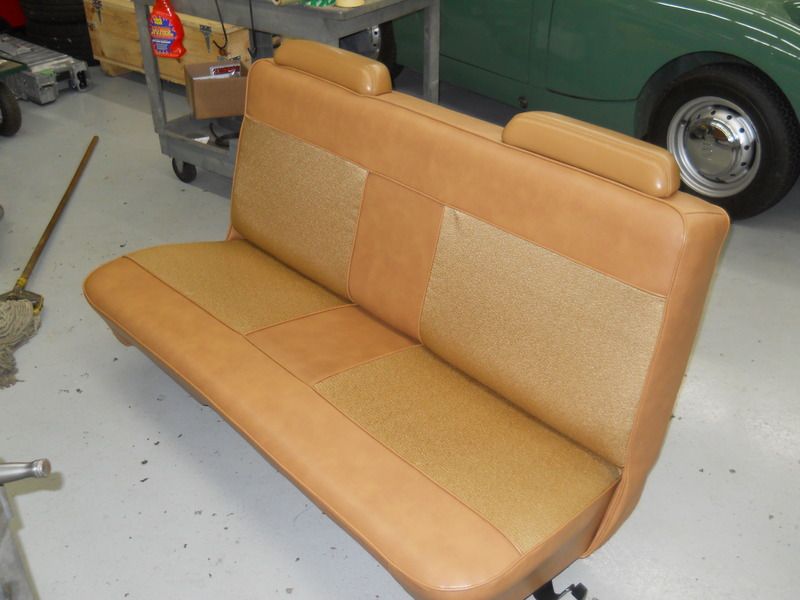
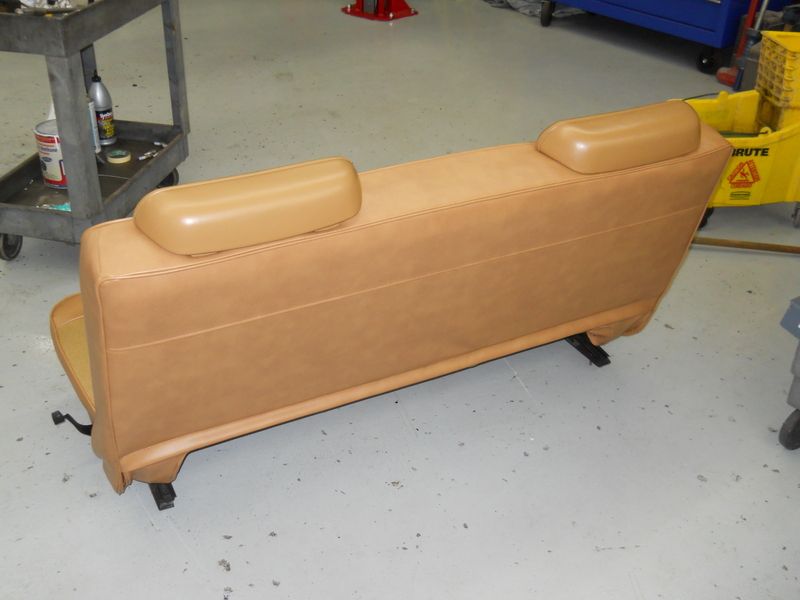
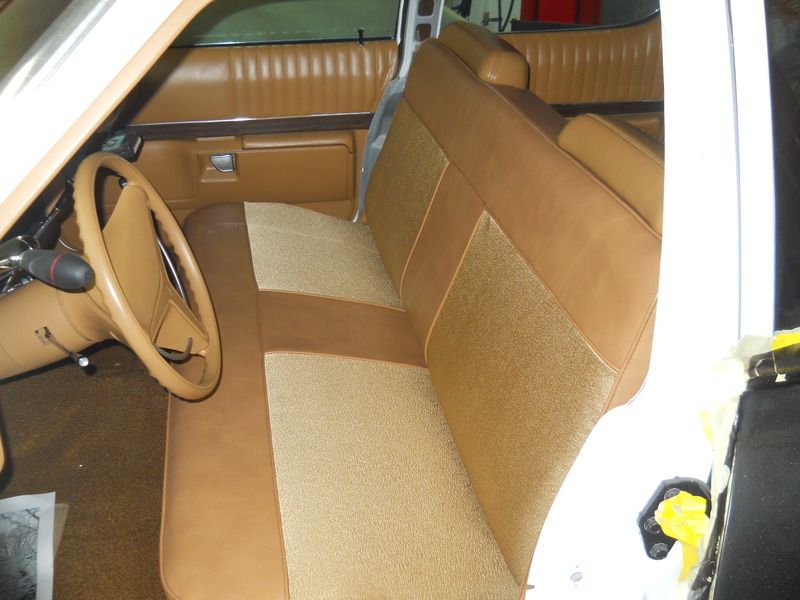
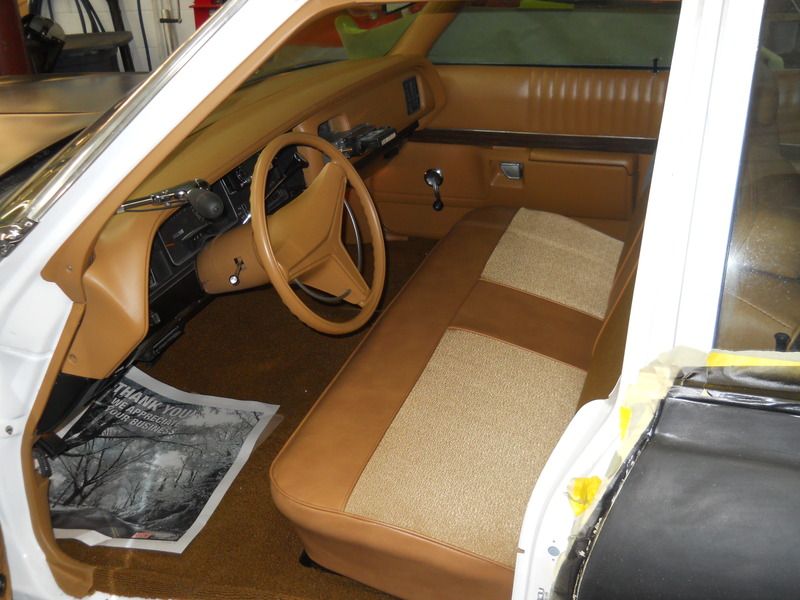
I am happy with the color combo. The pattern is a pretty good representation of what a cop car seat would look like. I am however, not fond of the shape of the seat back. To me it looks squared off like a futon mattress. Its actually pretty comfortable to sit in, but the shape is all wrong.
What do you guys think?
The head rests are wrong as well, but I knew that. They are the headrests from the 76 seat I started with. I have actually purchased a set of "correct" headrests and at some point plan on taking the seat back and having him redo it with a more rounded shape like this.
During this last round of work I did actually get to drive the car a short distance. 1 tenth of a mile. It was kind of cool considering where we started with all this. Unfortunately, it ran like shit and the brakes suck but hay its getting closer! I need to get the seat belts installed. They turned out ok. Honestly for what it cost, I was expecting a bit more. All they basically did was install all new black webbing and dye all the plastic covers and buckles. I almost feel like I could have done it myself. Ill get some pics soon. Until then I am curious to get some feed back. |
|
|
|
Post by Ghostbluesman (Ghostsoldier) on Mar 28, 2015 22:33:50 GMT -5
That update just blows me away, spanks...it's moving right along!  Rob |
|
|
|
Post by AZBlues on Mar 29, 2015 0:41:32 GMT -5
Looks fantastic squared, Spanks. What cloth did you use on the seats? I'm thinking about factory cloth for mine from SMS, but I'd like to see what else is out there.
-AZB
|
|
|
|
Post by Steam McQueen on Mar 29, 2015 17:11:50 GMT -5
- Fantastic updates, Spanks!! Beautiful build, gorgeous Blumo. Pics like this I love ... It's all coming together there, the camel, the paint, the primer, the tires, the stencils, spotlight, lol it's all there. Gotta love it. And the seat, Jesus H., small miracle there between you guys and the upholsterer. I hear ya about the flat-top on the bench but that's a pretty small detail. I like it, looks more about the business, no-frills  Great stuff.  |
|
|
|
Post by spanks79 on Mar 31, 2015 23:38:15 GMT -5
Thanks for the encouragement. I guess I'll keep plugging along. So everyone likes the seat, huh? I like the color and style, just wish the shape we more rounded. The guy that did the seats is a true craftsman. He recently did the interior on a rolls Royce that sold at Amelia Island last month for $600,000. I just wish I had been more clear about what I was wanting. He had the cover off the ragged out old seat, I just assumed he would have used it as a pattern. Looks fantastic squared, Spanks. What cloth did you use on the seats? I'm thinking about factory cloth for mine from SMS, but I'd like to see what else is out there. -AZB I don't know the exact source of the cloth but I could find out. SMS sounds familiar. I know it is an OE cloth. It is actually a 1974 GM cloth. In the sample book I had to choose from all of the Chrysler cloth samples had a heavy pattern, almost an argile or floral print. |
|
|
|
Post by cynot on Apr 1, 2015 7:14:35 GMT -5
The seat, and everything else, looks amazing! I totally think you can get away with the seat the way it is. Being bolted in the car hides a lot of the boxi-ness, but unless you were parked next to another Monaco, no one will ever notice.
How does the exhaust sound? What kind of mufflers did you use? As usual... Great job!
|
|
|
|
Post by AZBlues on Apr 1, 2015 15:54:58 GMT -5
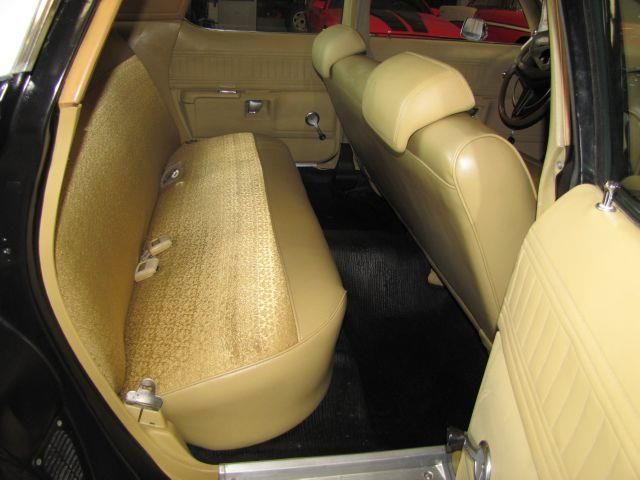
Looks fantastic squared, Spanks. What cloth did you use on the seats? I'm thinking about factory cloth for mine from SMS, but I'd like to see what else is out there. -AZB I don't know the exact source of the cloth but I could find out. SMS sounds familiar. I know it is an OE cloth. It is actually a 1974 GM cloth. In the sample book I had to choose from all of the Chrysler cloth samples had a heavy pattern, almost an argile or floral print. Ha! I just realized what my post might have sounded like. I meant "fantastic squared" in the mathematical sense, as in fantastic times fantastic. Which it does. The squared top of the seat doesn't bother me in the least, as many cars of the era were upholstered that way; so it looks natural. However, if it bugs you, the best thing to do is have it changed - because if you don't, you will always wish that you did. As to the cloth, yes, it's a little foofoo, but it's factory, so what the hell, it's going back to that. It's still on my back seat: 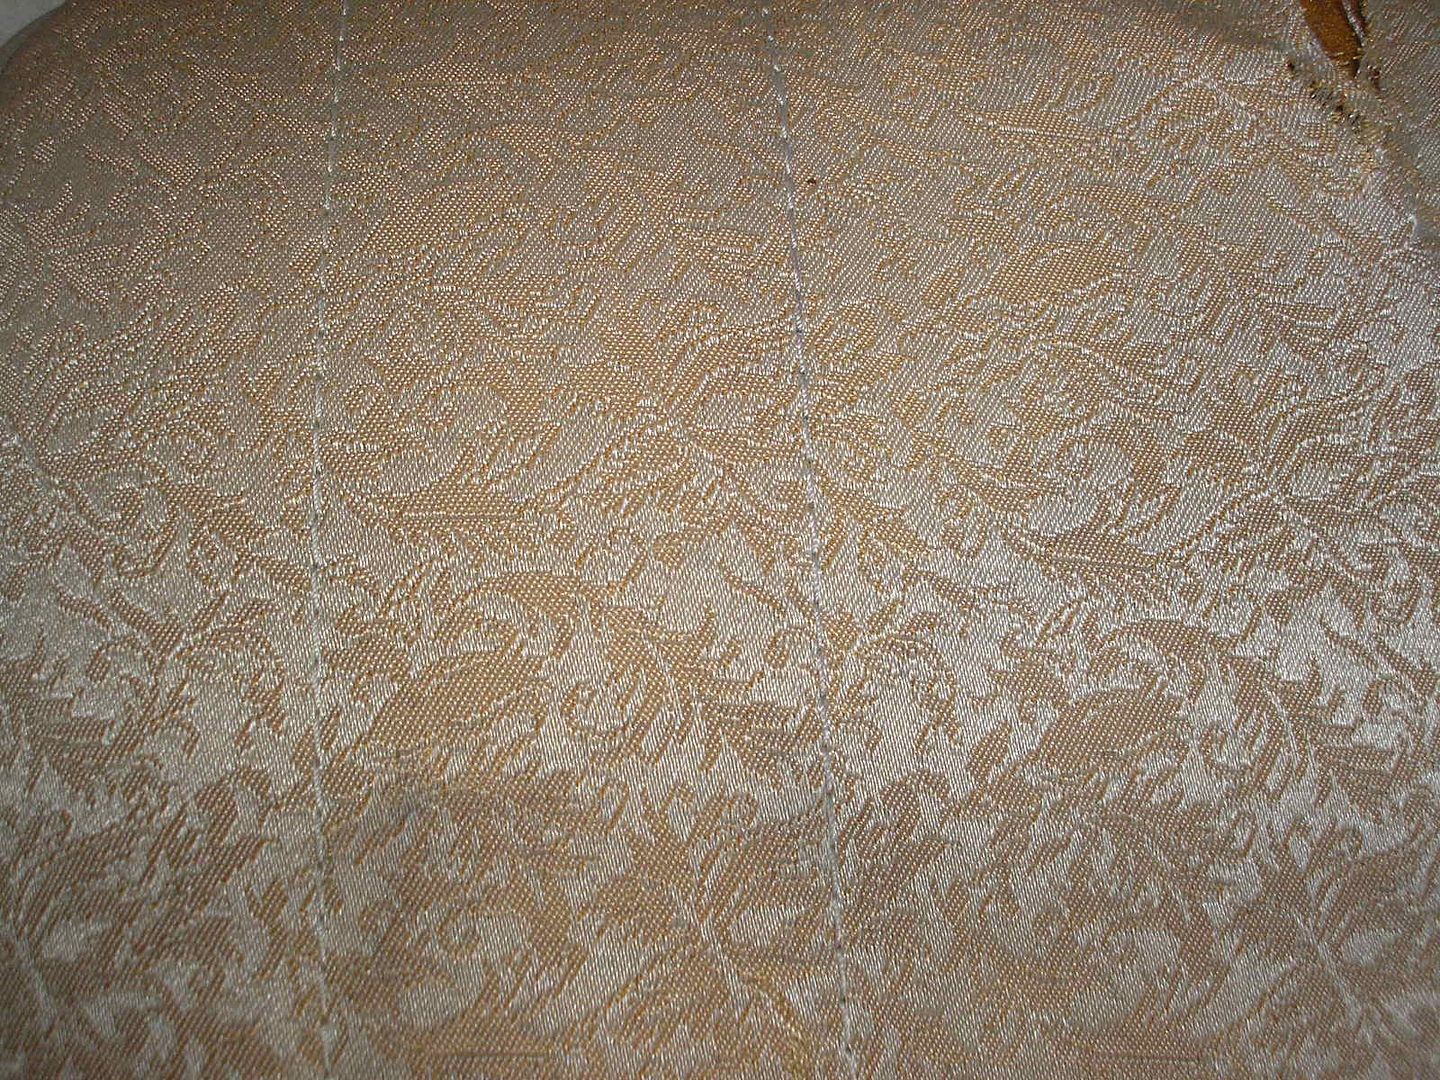 -AZB |
|
|
|
Post by Steam McQueen on Apr 1, 2015 20:46:17 GMT -5
- Spanks, your seat looks damn near identical to the cop brochure seat ...  |
|