|
|
Post by spanks79 on Apr 11, 2012 23:01:22 GMT -5
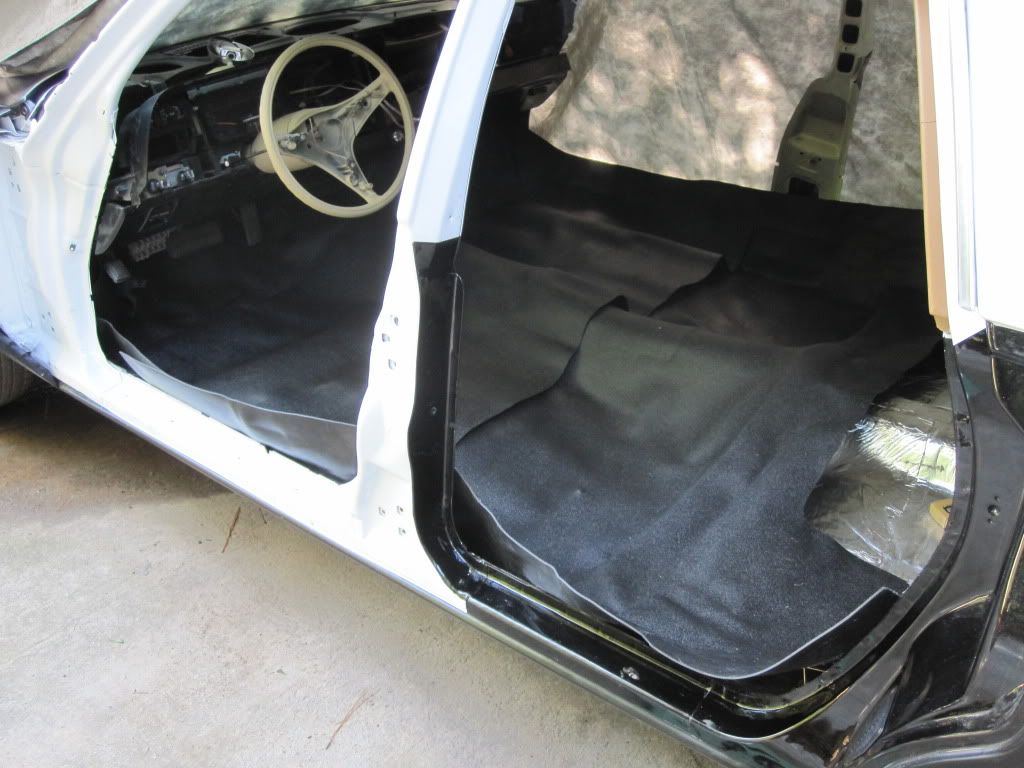
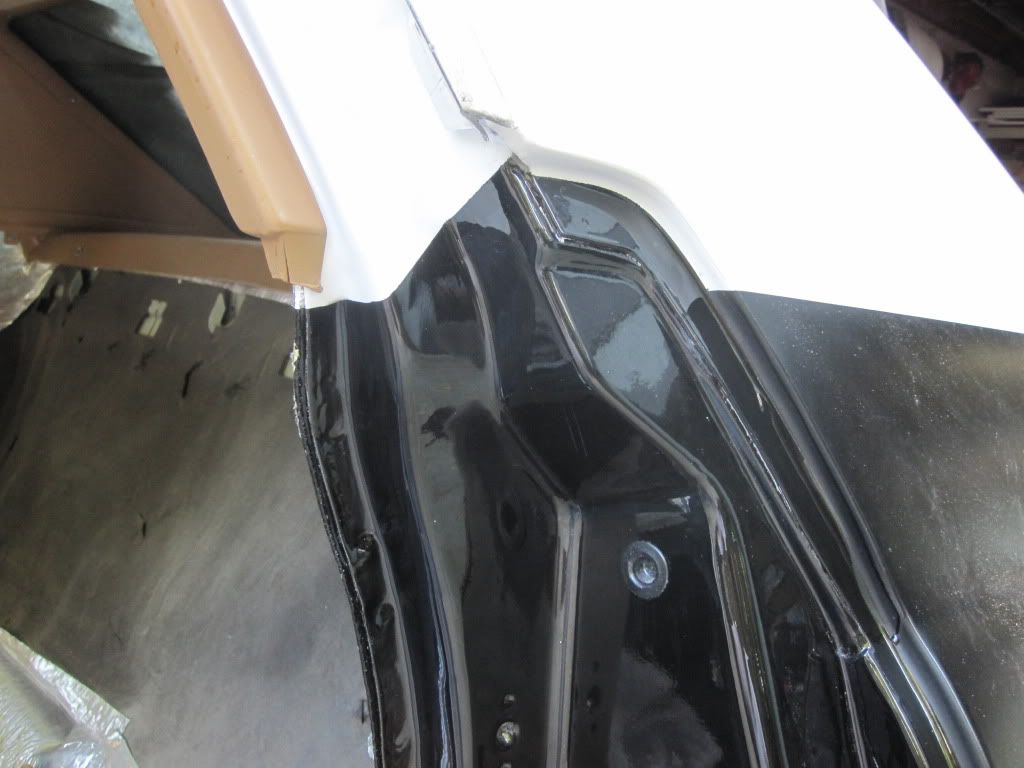
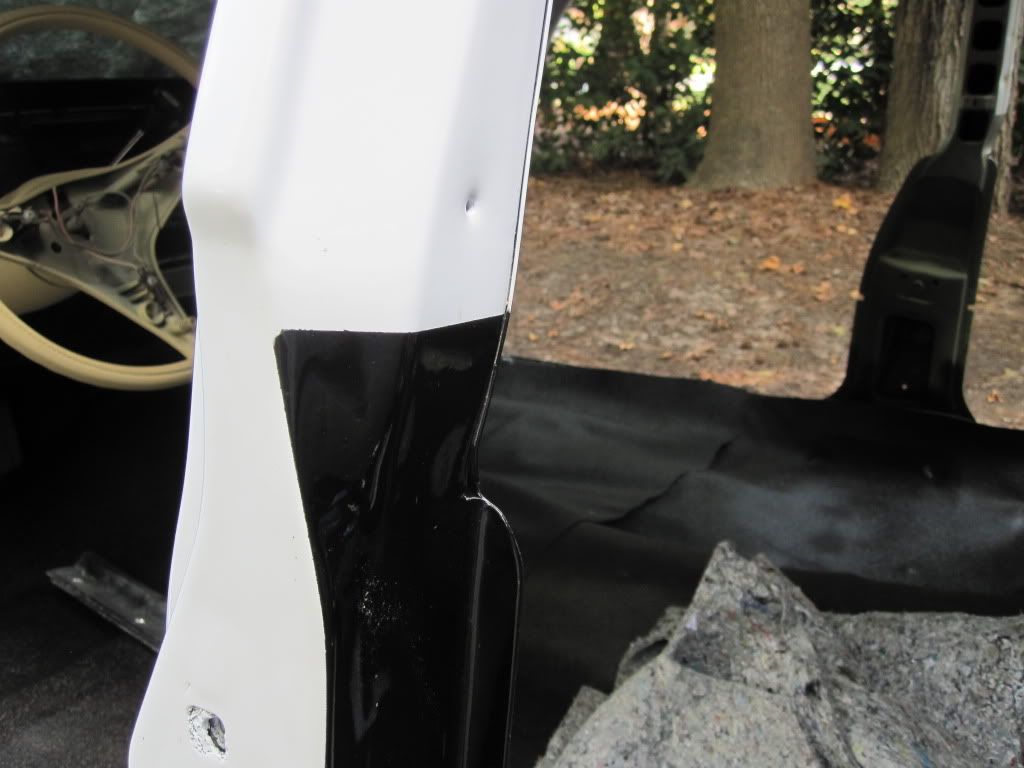
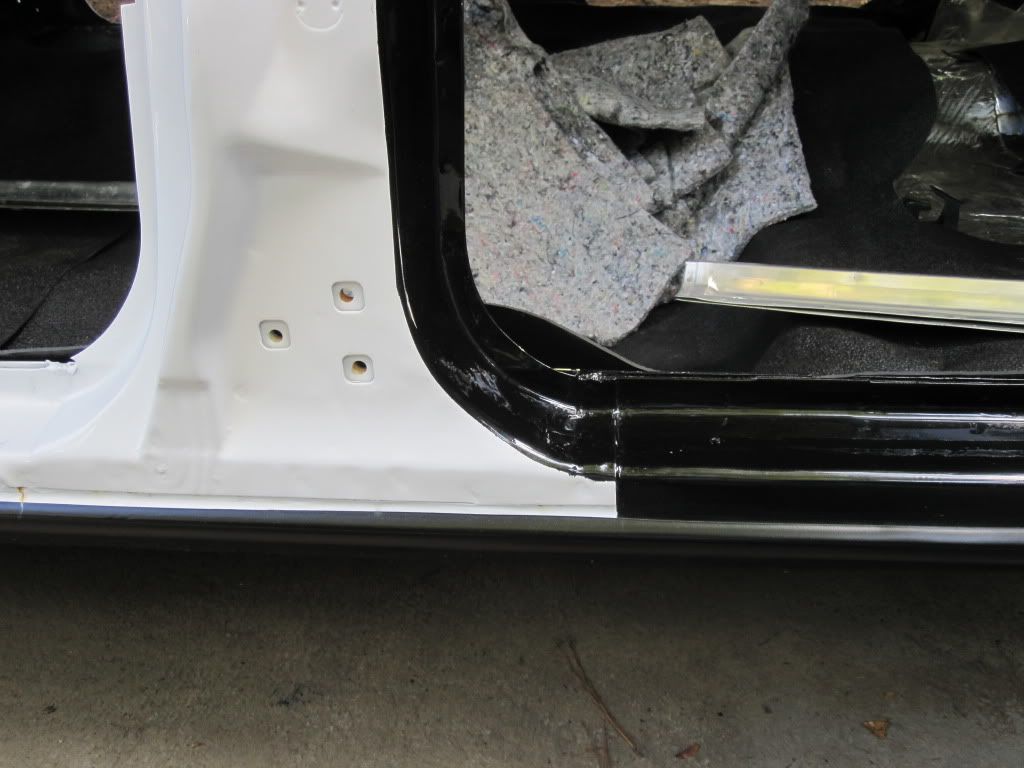
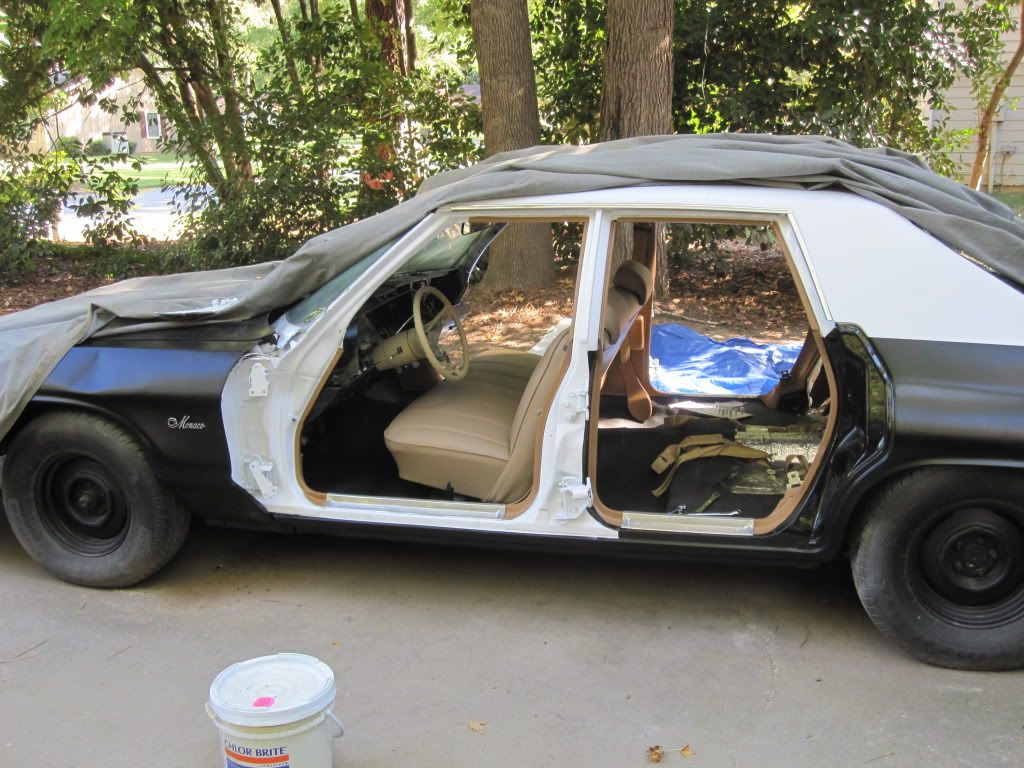
I spent some time on BBC and found some paint info, but it has been a while since those threads have been updated. As I approach some paint time on my project I am looking for some details. We are in the process of prepping my body shell right now and I plan on cutting in the door jams and pillars. So far as far as the body is concerned:
A pillar is white down to the rocker
B pillar is white down to the rocker
C pillar is white up top (to the white/black split on the quarter) and black on the bottom
The rocker is black
Then as far as paint goes. Both black and white paint is to be gloss finish then let it age / get dirty naturally however I am tempted to flatten the paint a bit.
The one issue my project has is that 3/4 of the car is already painted correctly then I am replacing 1/4 of it. I know it will be impossible to match the black on the new quarter panels to my current rear doors and dog house so I am afraid that will mean a repaint and restencil. Ahhhhh stencils that's another topic all together.
|
|
|
|
Post by sigmfsk on Apr 12, 2012 9:06:44 GMT -5
Hi Spanks: I'm short on time until next week, but I can then take some Blu-Ray shots and check my notes and post the info here. The only tricky part I can recall was how to blend the white upper b-pillar to the black rear rocker panel. I hadn't figured out exactly what I wanted to do there. I was thinking this provided one complete option:  from www.bluesmobiles.proboards.com/index.cgi?action=gotopost&board=details&thread=214&post=2701your friend in paint planning, arthur |
|
|
|
Post by spanks79 on Apr 12, 2012 12:32:03 GMT -5
Thanks Arthur. That picture gives a good idea of what needs to be done, but looks a bit sloppy like a movie prop shop knocked it out in a few hours.
My thought is to bring the white all the way down on the A and B pillar to a few inches under the lower hinge to a clean break. Just before or at the point the pillar begins to curve into the rocker. Or run the white all the way down and across the top side of the rocker, with a tape line right on the curve where the rocker goes from horizontal to verticle.
|
|
|
|
Post by sigmfsk on Apr 12, 2012 18:31:44 GMT -5
Thanks Arthur. That picture gives a good idea of what needs to be done, but looks a bit sloppy like a movie prop shop knocked it out in a few hours. My thought is to bring the white all the way down on the A and B pillar to a few inches under the lower hinge to a clean break. Just before or at the point the pillar begins to curve into the rocker. Or run the white all the way down and across the top side of the rocker, with a tape line right on the curve where the rocker goes from horizontal to verticle. Mbmopar has some good pics of his blumo (which he's since sold) here: www.cardomain.com/ride/690202/1974-dodge-monacoI like the b-pillar dividing line, and it looks close to what a real 1974 cop monaco had for a dividing line (somewhere there's a pic of a 74 Monaco Chicago PD car I posted that shows it). The movie shows a black rocker, and a white rocker, so either would be screen accurate. But neither of those shots showed how front/rear rockers top/bottom a/b pillar transitioned. So although the "fall apart car" has a horrible paint job, at least it provided one consistent representation. TK826 and I were talking about this a year or so ago, and I thought he said something along the lines of "you just can't go wrong with MBMOPAR's paint job", and I agree with that. I may not do it, just because I'm trying to follow a rule that "if it's ever shown in the movie, I must pick one of the options shown in the movie", so I may be forced to use the "fall-apart car" rule, but checkout MBMOPAR's setup, as it looks pretty sweet! your friend in sweet blumos, arthur |
|
|
|
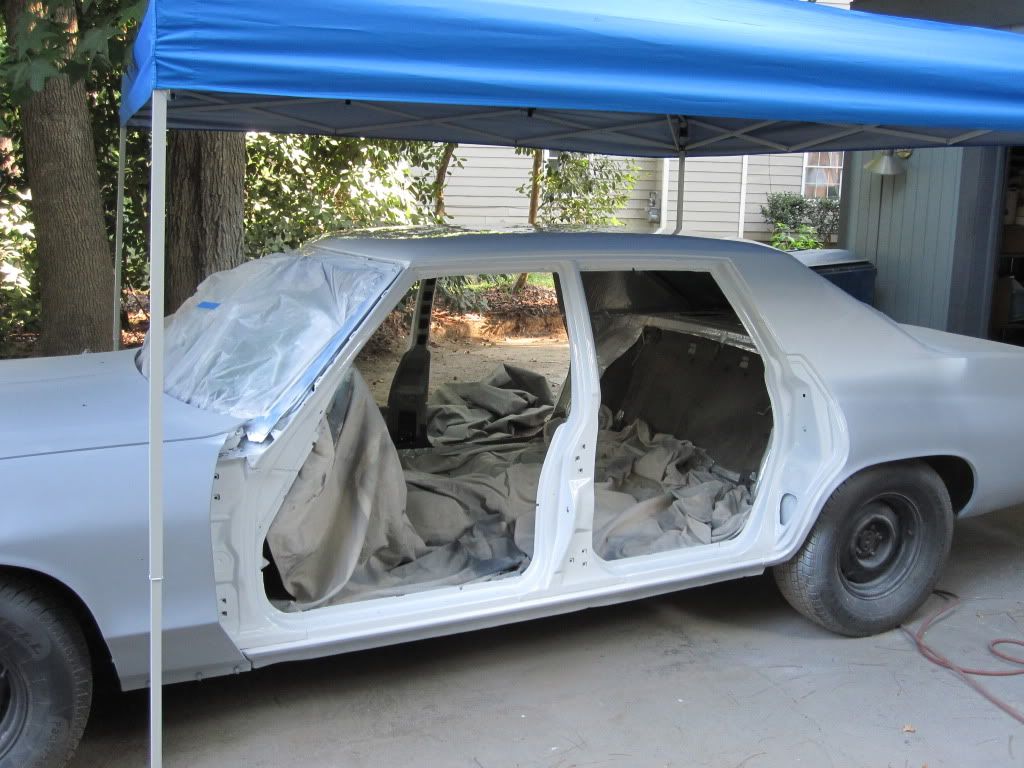
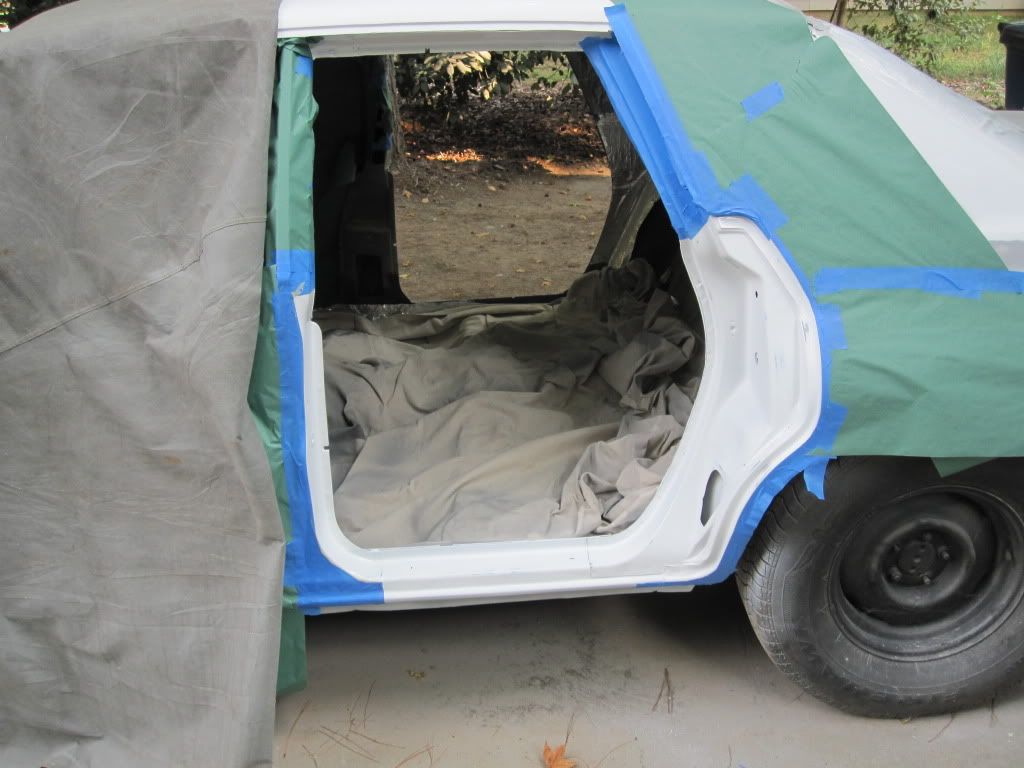
Post by blusmbl on Apr 12, 2012 21:14:31 GMT -5
|
|
|
|
Post by spanks79 on Apr 14, 2012 10:49:44 GMT -5
Thanks for the pics blusmbl. I think I am going to go for a similar look. The only change I am going to try is to eliminate the black stripe on the back of the B pillar. Although screen accurate it just seems more complicated. Well see how it looks, I might end up changing it.
Also thanks for the info on the paint colors. I was concerned about the look of the flat / satin paint, but it looks right on your car.
Not to jump too far ahead in your build, but how did you "fade" your stencils? Sand paper or a scuff pad?
|
|
|
|
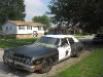
Post by ti4438 on Apr 14, 2012 19:49:27 GMT -5
Gotta love fresh paint ove fairly large dents.
|
|
|
|
Post by blusmbl on Apr 15, 2012 20:51:45 GMT -5
Yeah, the dents were put there on purpose. I welded the trim holes and blocked out the fenders, after it was in primer I put in the movie dents. My neighbor didn't quite understand, he had seen the fenders and the body all straightened out over a long period of time and then these dents in it when it got painted." What the heck happened, who hit the car?" I did, I told him the dents are in the movie car so they are on this one. I told him I had to take dents out in order to put dents in. He still looked puzzled and walked away shaking his head....  The stencils were wet sanded down with 1000 grit and then lightly spayed over with semi flat black spray paint. |
|
|
|
Post by sigmfsk on Apr 15, 2012 21:54:10 GMT -5
I told him I had to take dents out in order to put dents in. That's awesome. |
|
|
|
Post by flcl64 on Jan 1, 2013 17:57:49 GMT -5
Im not sure if this is a good idea or not, but what I would do is paint the entire car glossy then just going by places that would seem to have more wear on the Bluesmobile, stand back and dust it with flat paint, maybe scuff some paint with sandpaper? I'd also paint the letters/#'s and stars on with stencils and maybe go over it with a sponge. Or paint the letters on with a stencil then leave the stencil on and use black spray paint to make it look worn. If anyone thinks these don't sound like good ideas then speak up cause i am NOT a professional. lol
|
|
|
|
Post by 58hemifury on Jan 1, 2013 20:28:00 GMT -5
I did my paint job based on the "body in white" train of thought where you assume the car was painted all white and the black was added. I did my jams in gloss as well as the insides of the doors. Actually "BODY IN WHITE" has nothing to do with final color, this is an email from my friend Marv who is a retired engineer from Chrysler answering a question I posted on the Forward Look email list about a '77 Monaco i had looked at (it's the black one on this forum with the rust colored door jambs from NJ), that car had no white 2 tone. I found this email answer a little confusing but hopefully one of you guys (most likely Arthur) will make better sense of it. "Adam. As a Chrysler body engineer in my previous life, BIW was a designation for the body as it entered the paint shop. This could mean any body configuration 2 dor 4 dr convertible etc. The Body Engineering department was also responsible for body seam sealers and glass and weather sealing. But Body in white usually meant as it moved forward for Trim Chassis Final. When we built the first prototypes they would be painted white for inspection of sheetmetal issues etc, Back in the 60s and 70s they were white and ugly until colors and trim ornamentation was added. ....hence the term BIW. So I believe in your case perhaps some unique body structure may have been added in the body framing stage and maybe caused a unique biw number. make any sense?" |
|
|
|
Post by 58hemifury on Jan 1, 2013 20:34:46 GMT -5
Im not sure if this is a good idea or not, but what I would do is paint the entire car glossy then just going by places that would seem to have more wear on the Bluesmobile, stand back and dust it with flat paint, maybe scuff some paint with sandpaper? I'd also paint the letters/#'s and stars on with stencils and maybe go over it with a sponge. Or paint the letters on with a stencil then leave the stencil on and use black spray paint to make it look worn. If anyone thinks these don't sound like good ideas then speak up cause i am NOT a professional. lol I have found a good way to "age" paint is to spray the black with base/clear using a semi flat clear, wetsand the clear with 2000 grit until it's smooth, wears thru to the primer or whatever look you want, then wax the clear, it gives a worn but still semi shiny look. (you may want to experiment this on something other than your car, but it worked well on a '32 Ford grille shell that I was matching to a old cruddy car) Adam Adam |
|