|
|
Post by spanks79 on Mar 8, 2012 23:20:31 GMT -5
Thanks Arthur, I will have to keep an eye on him. I'll have to ask him to draw a picture of the BB and see how it compares. I had a pretty good day. Countrybunker stopped by my shop today and dropped off a really nice set of door glass. He had his car packed to the gills.  We had a good time chatting and comparing cars. We did not get any pics of the two blumos together, I now realize that was a mistake, but it was rainy and crappy outside and my guys were digging into another car (like the kind of job that helps pay my bills) and I did not want to disturb the process to move my car out or his in. On well, there will be other opportunities. I got my door panels all removed and have verified that the front widow regulators and motors work, the rears do not. I removed the rear regulators and will work on them and see if they can be revitalized. I am going to start a post in the parts section for the list of stuff I need /want, because i am missing some stuff. I also gathered some supplies to start fixing some rust. After seeing Blusmbl's work on his trunk and floor pans, I am inspired. |
|
|
|
Post by spanks79 on Mar 9, 2012 21:09:44 GMT -5
Well I took the car out for an actual drive today. The weather was nice so cruising with no windows was not a problem. It was great! The car handles surprisingly well, the biggest problem was the straight pipe exhaust and the TF727 that has the performance of a centrifugal force clutch on a go kart. I also got the car in the air and got some pictures of the undercarriage. Crazy cool straight pipe exhaust and dented tank 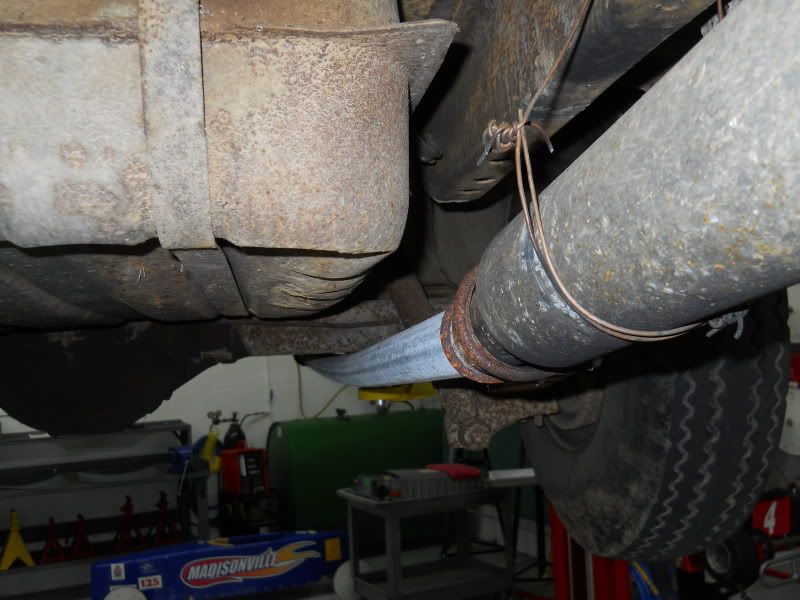 Fake duals 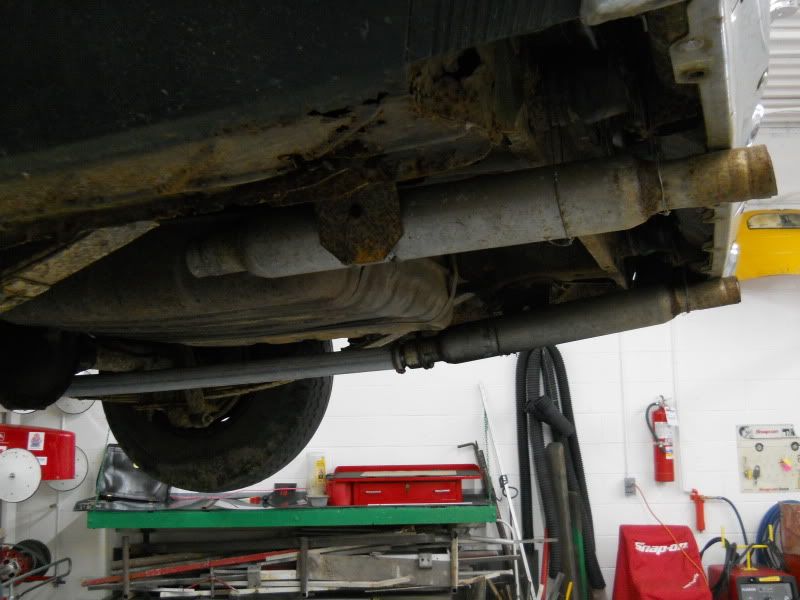 8.25 rear....I have a line on a 9.25 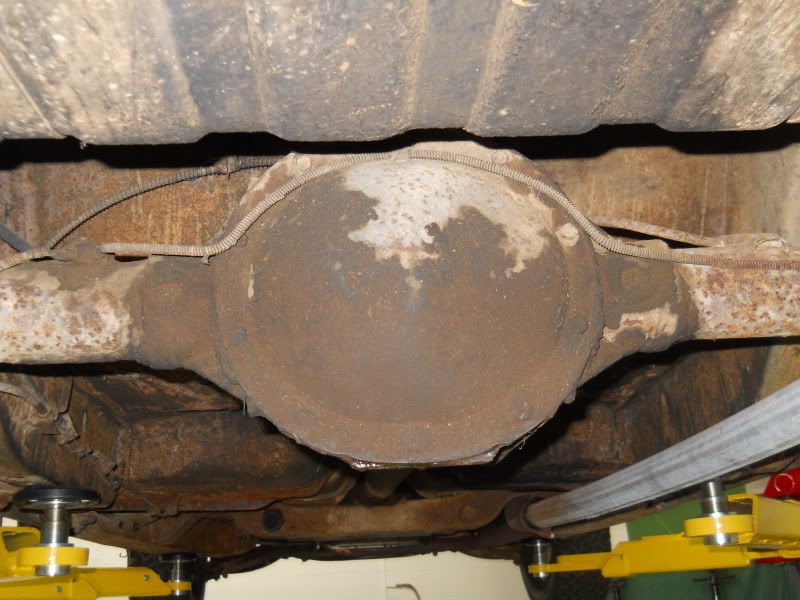 Torqued up torque box. Arthur, I am interested to get your ideas on reinforcing this area. 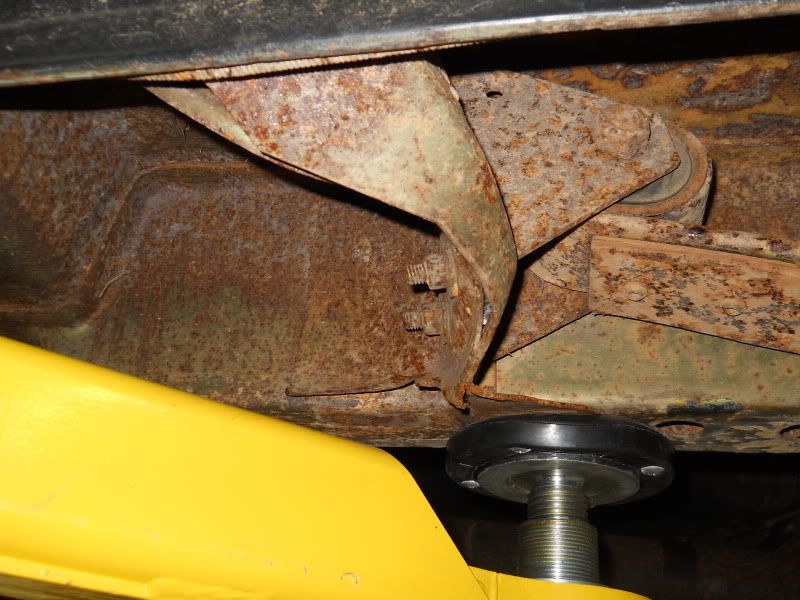 Sloppy Idler arm 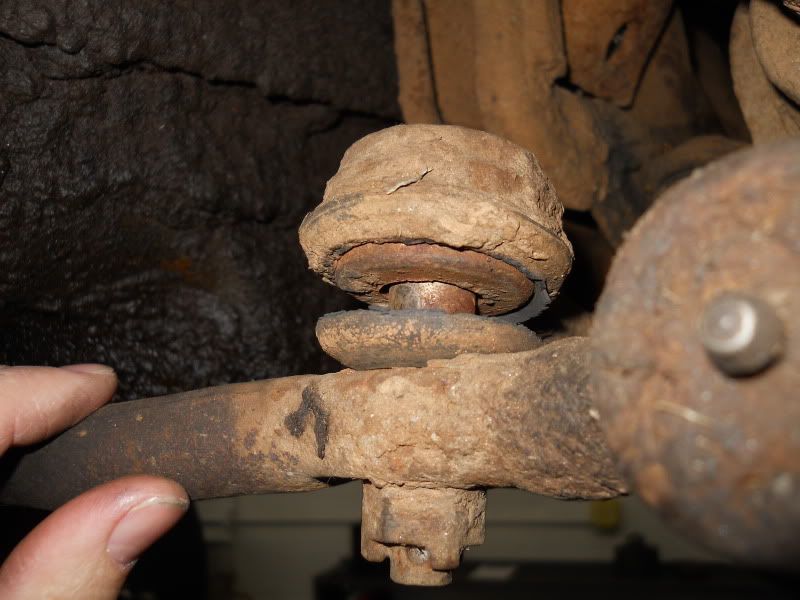 Leaky steering - a stage 1 Firm Feel box will look nice there 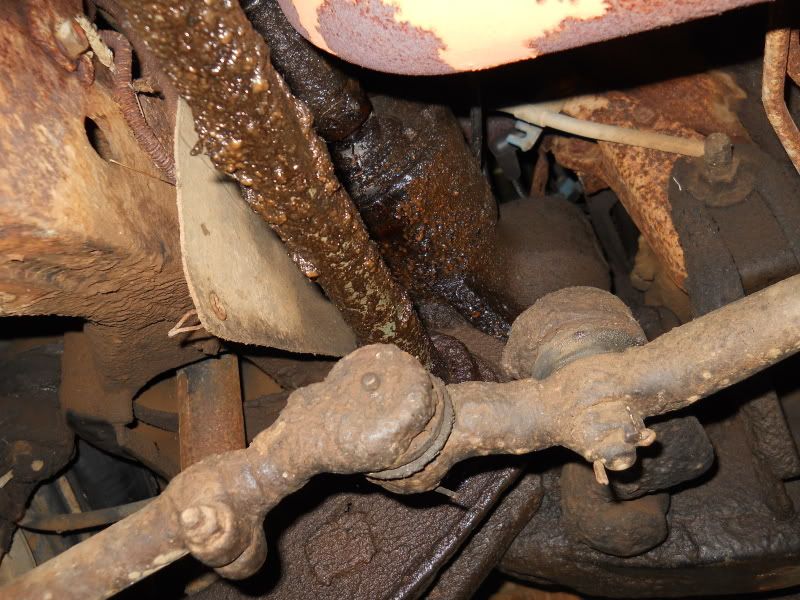 solid rockers 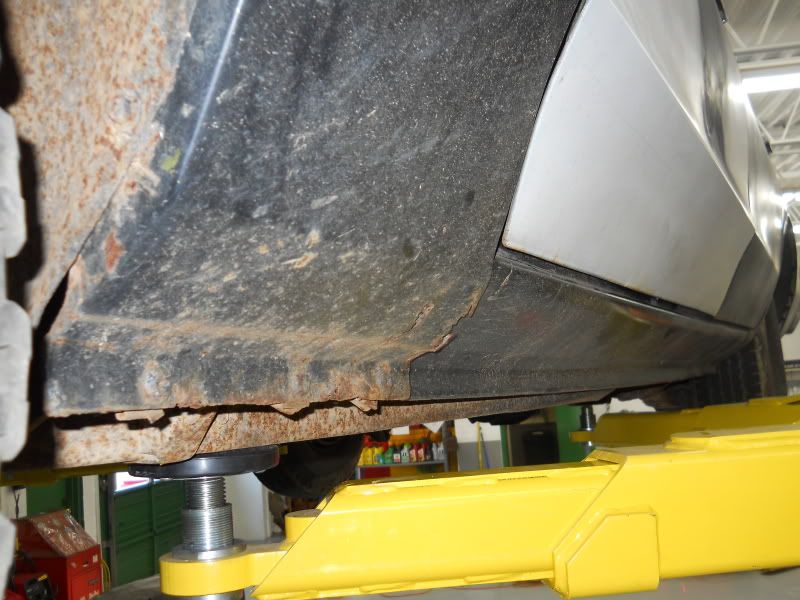  rust free quarter lips and dog legs 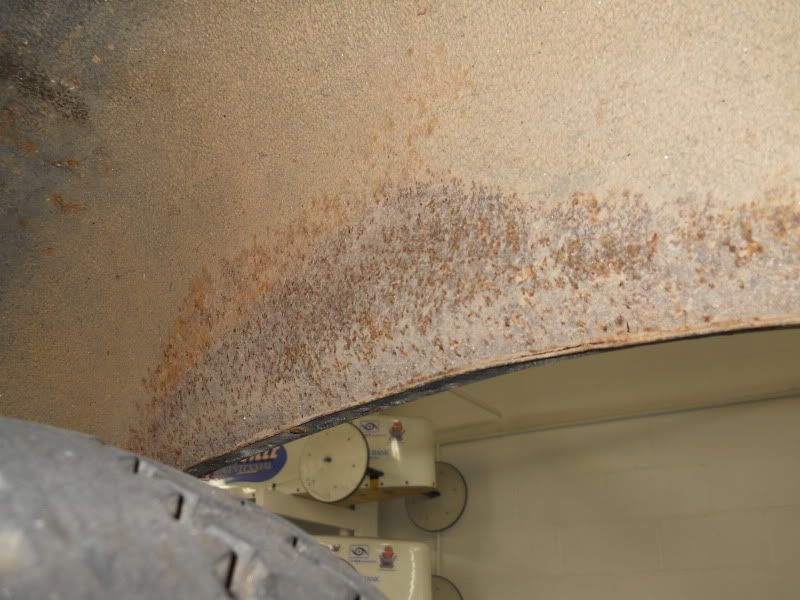 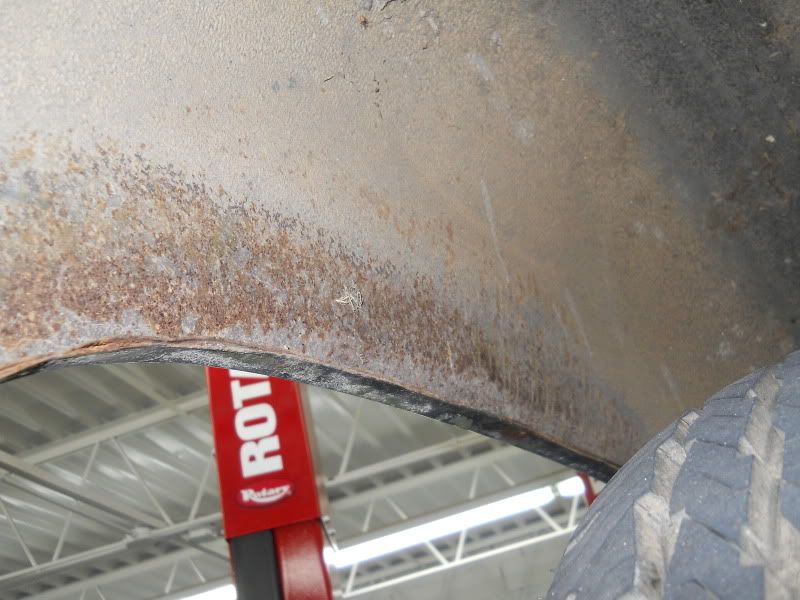 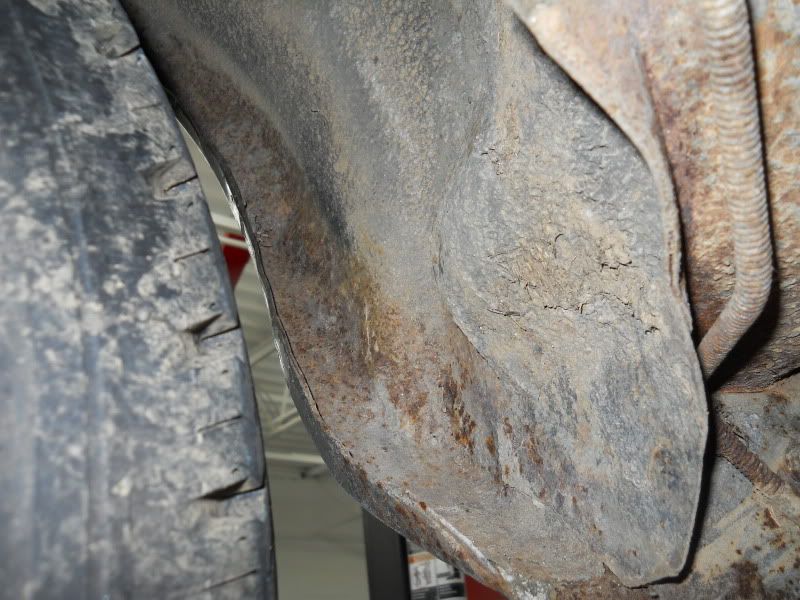 front inner and lower fender  I was surprised to see that the sub frame rubber mounts looked this good 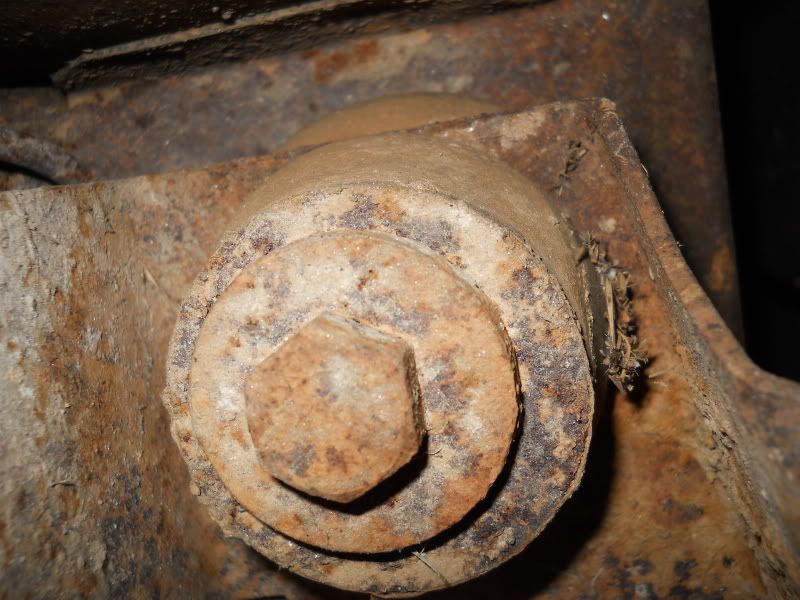 Shift linkage skid plate goes here, it was in the trunk 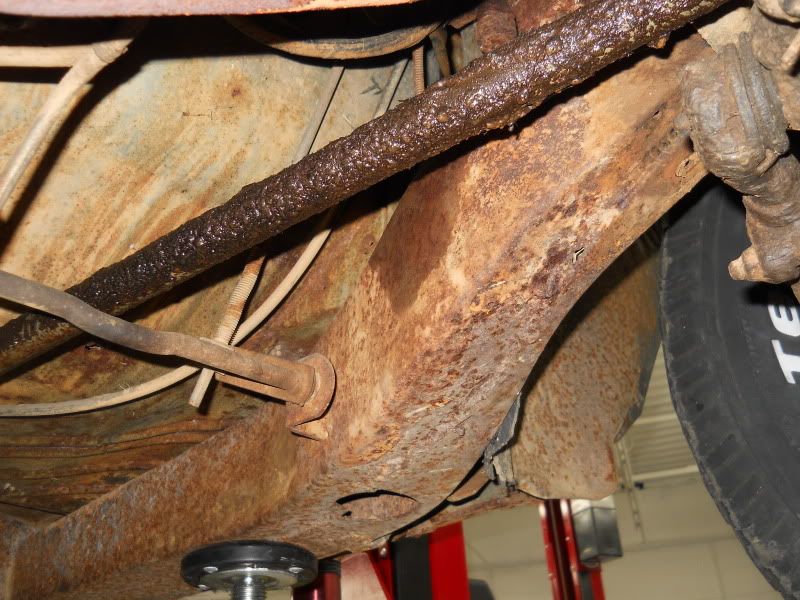 Again, I am very happy with the condition of this car. I am so glad to have a fairly solid car to start with. Hopefully next week I will have some pics of thing actually being fixed! |
|
|
|
Post by spanks79 on Mar 11, 2012 23:22:59 GMT -5
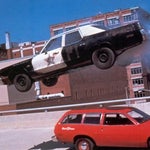
From my favorite Christmas movie 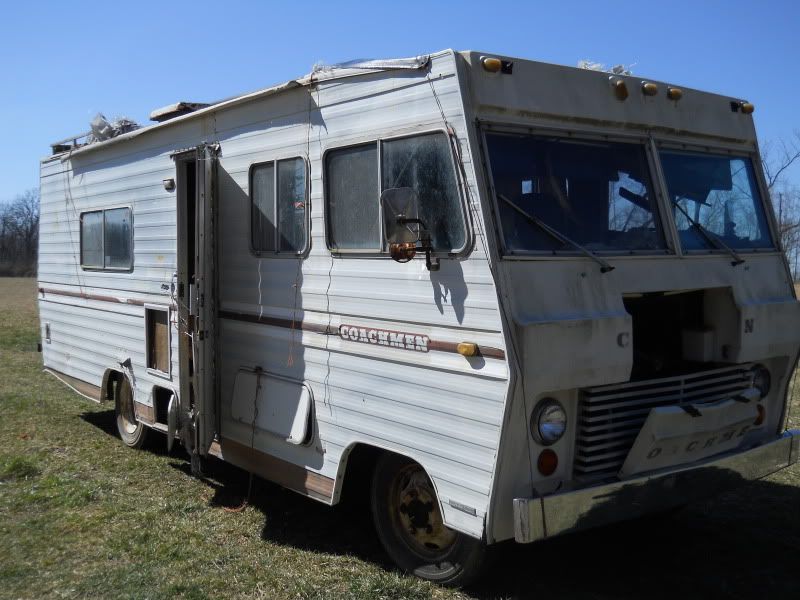 And it just happenes to have a 440 / 727 combo in it...... Or should I say it did. |
|
|
|
Post by sigmfsk on Mar 12, 2012 2:19:00 GMT -5
Torqued up torque box. Arthur, I am interested to get your ideas on reinforcing this area. ... Sloppy Idler arm ... Leaky steering - a stage 1 Firm Feel box will look nice there For torque boxes, right now all I know is that I want to do something to mine. But I don't think I'll have any more ideas until I actually dig into mine and see how I'm going to to subframe connectors and tie it all together. For idler arm see the Mopar Action article here: www.74monaco.com/on how firm-feel replaces the bushing with bearings. I spoke with Dick of Firm Feel, and he can do the same upgrade for a 74 Monaco idler arm, but he hasn't done one yet. And an article on that same page shows how firm feel provides sector shaft support for the steering gear. I sent my Marin County steering gear into Firm Feel and had it done up per the "barge massage" article on that page. I also got new torsion bars. I'll be selling all these parts, new, at 1/3 off what I paid, as my build plan has changed and I won't be using them. So give me a bit to go through what I have, and I'll post it on the parts for sale section. I'm guessing that a lot of what I had originally planned will what you'll be doing on yours. your friend in new parts on old cars, arthur |
|
|
|
Post by spanks79 on Mar 12, 2012 6:44:14 GMT -5
Right on, Arthur!
You are correct, my build plans basically include a walk through Firm Feels' catalogue.
I have talked with Dick as well, more about his off the shelf stuff than custom stuff. We did talk a bit about idlers and he basically told me his off the shelf arm for a c body listed on his site is basically a stock parts store reproduction. I did not ask about a bearing upgrade.
The sector shaft support seems simple enough as well.
After reading those articles, upgrades to the "stock" suspension will be enough for my needs right now.
Let me know what you have, I'm sure we can work something out. I also have my eyes on that carpet you have as well.
|
|
|
|
Post by spanks79 on Mar 13, 2012 22:01:50 GMT -5
Started into the floor boards, it's looking a bit worse than I thought. 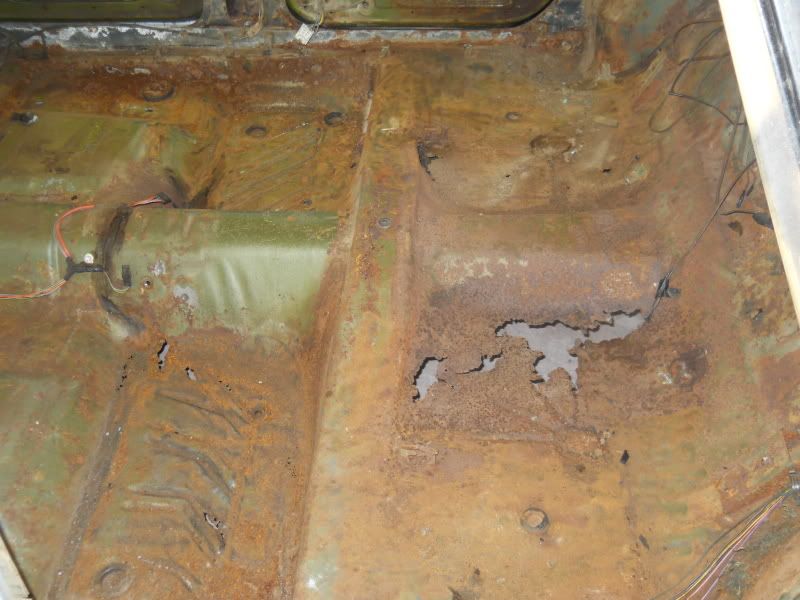 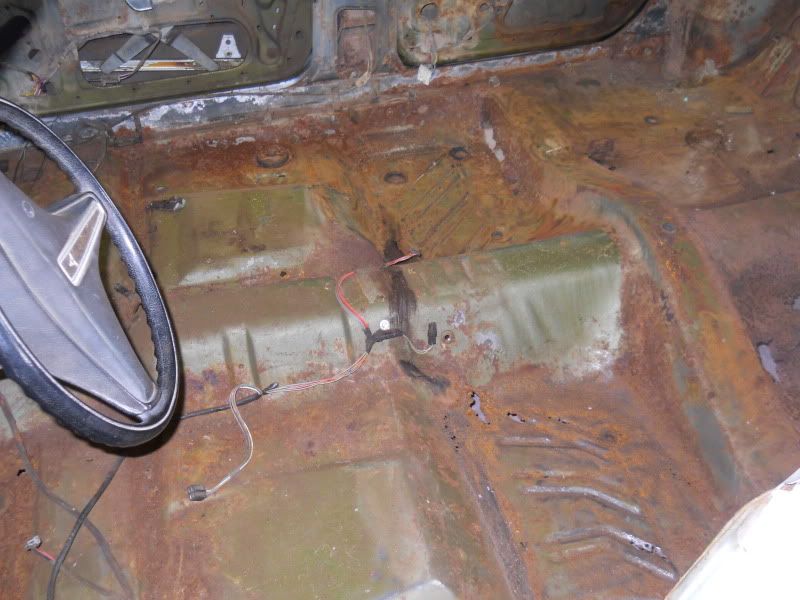 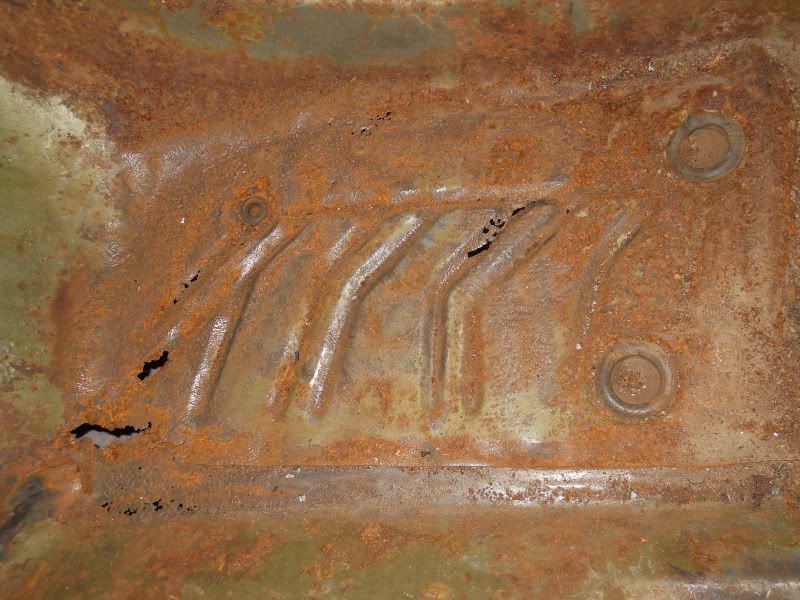 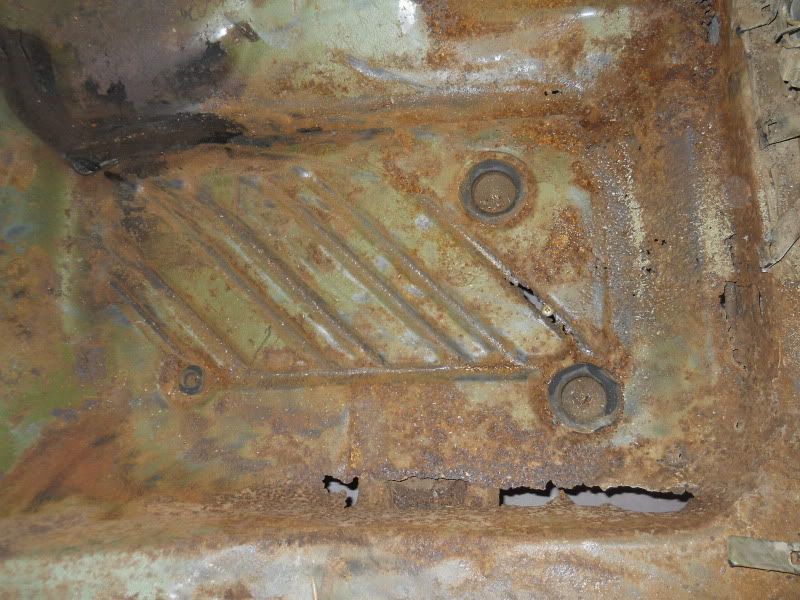 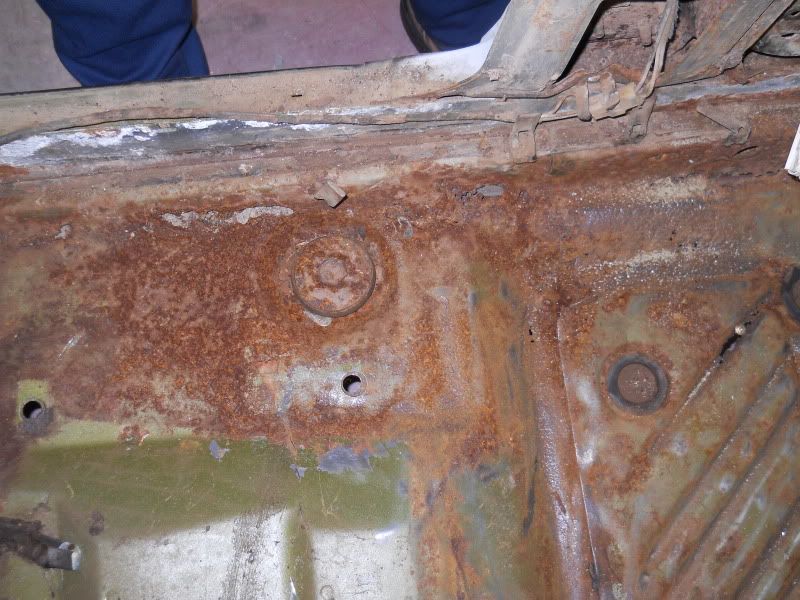 In not exactly " too far gone" but it appears to be more than a couple patch panels. I started out looking for a donor to swipe some floor sections out of. However, it appears that I may have a couple options, working on the details now. Stay tuned. The snow ball is rolling, getting bigger and picking up speed! |
|
|
|
Post by sigmfsk on Mar 14, 2012 4:09:00 GMT -5
Started into the floor boards, it's looking a bit worse than I thought. Spanks blumo, Marin County: Twins, separated at birth? I guess green rusty Monacos are the norm, but it did bring back memories. |
|
|
|
Post by spanks79 on Apr 3, 2012 22:52:22 GMT -5
Its been a few weeks since my last update. Lots going on, lots trials, tribulations and lost sleep over the direction of this project. The goal is to build a nice car, and that is going to be difficult given the current condition of the floor pans of the car. So.... over the past couple weeks I managed to locate and retrieve this: 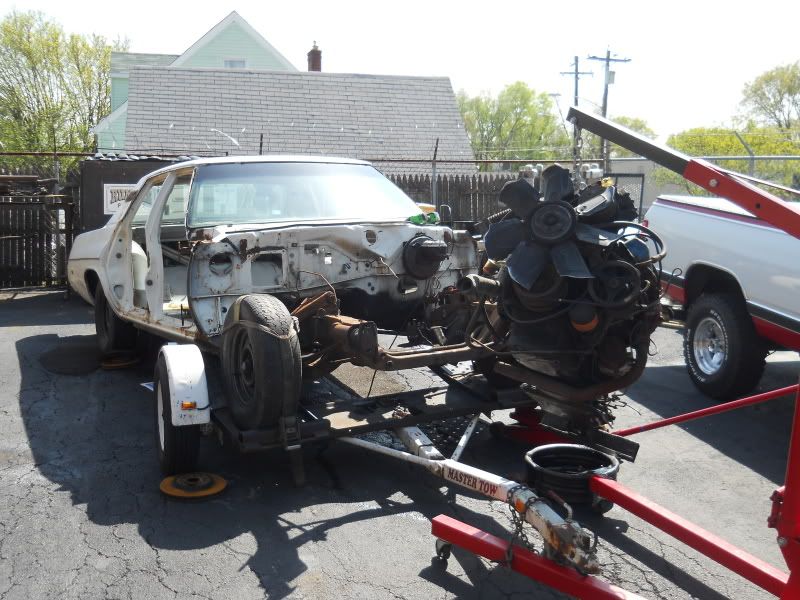 A clean 74 Monaco rolling chassis. A couple weeks ago I sent a rather desperate email to Arthur asking if he had any bits and pieces left from his 76 or Fury that would be worthy of being patch panels for my floor. He replied that the 76 was used up and the Fury was obviously being dissected with a sawzall, but he did have one other alternative, hence this white shell. I don't know where he comes up with this stuff but I cannot question the results. This past weekend I made the trip to Michigan to meet Arthur. We had a nice lunch, toured the Monaco museum of wonder and amazement, bought a bunch of sweet Firm Feel suspension parts that Marin county will not be using, checked out the 74 Fury mock up car and finally headed off to Lancing to dig this thing out from behind a body shop. I feel like a master Monaco mover. In just under a month I have managed to tow 1.5 Monacos over 700 miles with essentially no issues what so ever. This car, or whats left of it, fills two main voids in the project right now. One, a solid foundation to build on and two a clean and clear title, something I was missing. It also came with a 400 4bbl and 727 trans, which I promptly removed (as seen in the pictures). Check out the floors  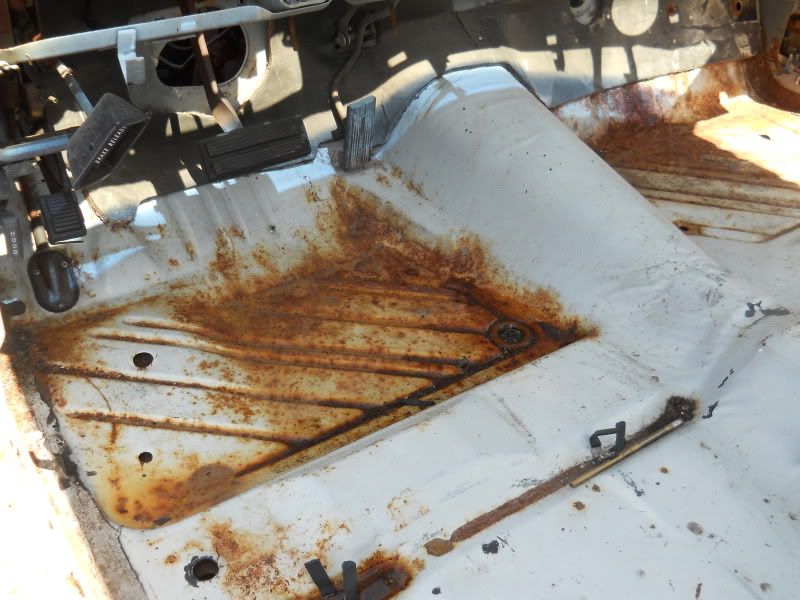 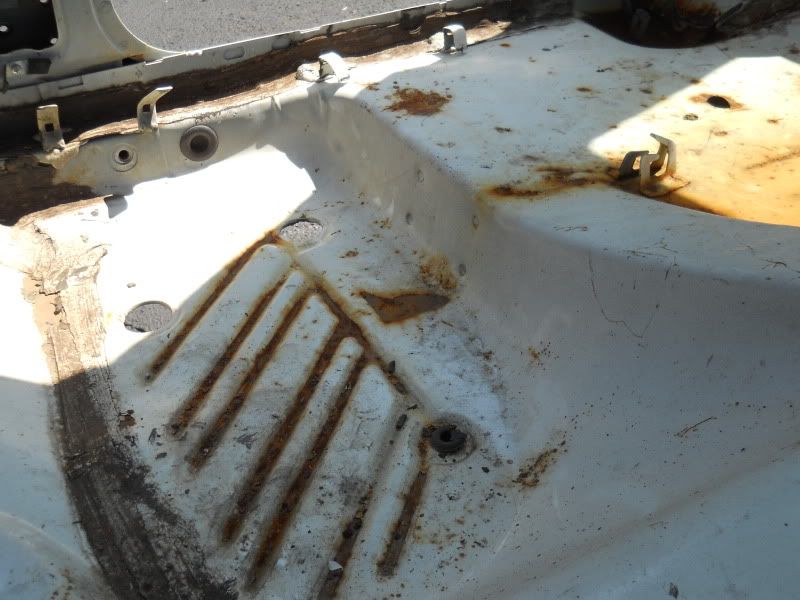 And the underside 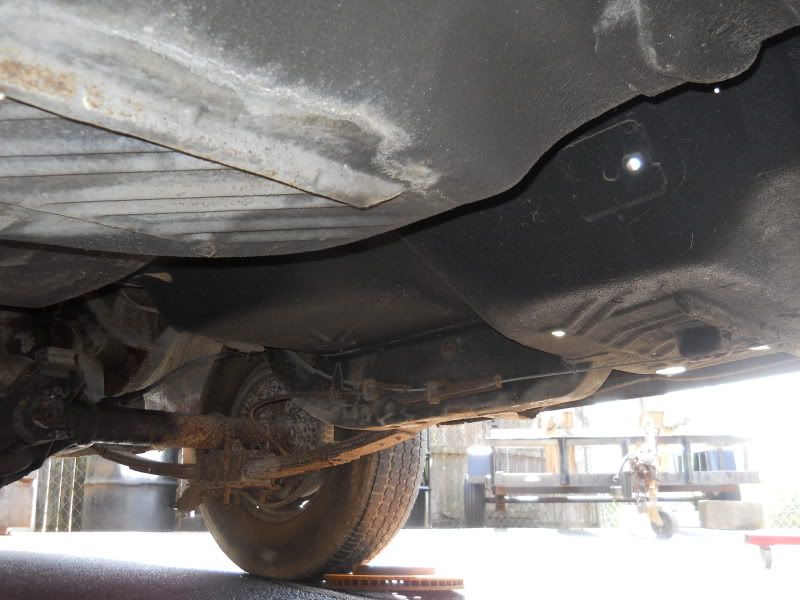 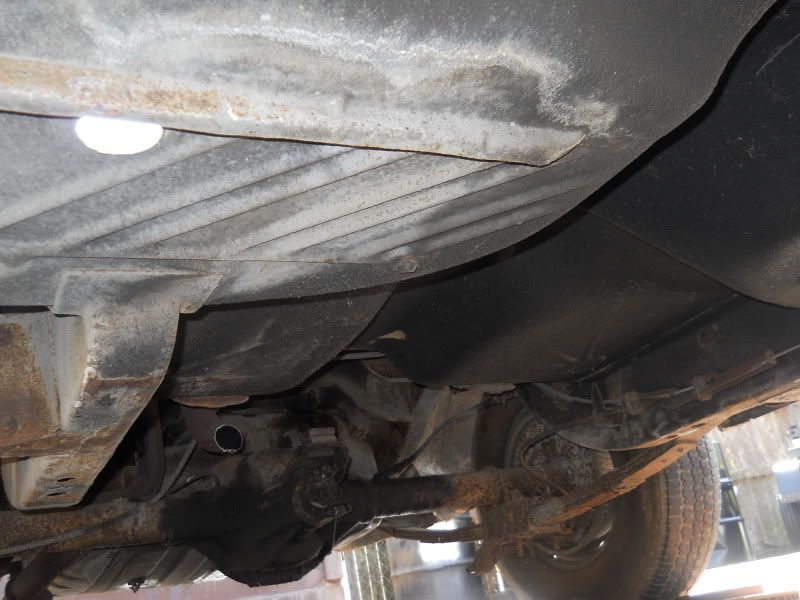 Not perfect but far better than my other one. So the current plan is to clean up and prep the white body top and bottom. Overhaul the front and rear suspension and brakes, drop in my 440 / 727(more on that later), and install the 9.25 rear. Then swap all the hardware from the North Carolina car to the white car. Simple right? We shall see. |
|
|
|
Post by sigmfsk on Apr 4, 2012 6:11:22 GMT -5
Glad you made it home OK without the Monaco doing anything wild on the road; you're getting to be quite the Monaco dolly specialist - and cool stop blocks!
> ...drop in my 440...
Oh yeah!
|
|
|
|
Post by spanks79 on Apr 4, 2012 6:45:44 GMT -5
Thanks, I'm glad you like them. At 8:30 at night after waking up at 4:30 am and enduring 700 miles of Monaco madness. I picked the first thing I could get my hands on. I admit that is not a really good picture, with the engine dangling there working out in the yard. Typically not my style. But the front brakes were locked up on the car and the engine just had to come out without much percision needed, I figured leave it on the dolly to aid in transportation to the next location.  |
|
|
|
Post by Steam McQueen on Apr 4, 2012 17:05:17 GMT -5
Wow Spanks. It's sure turning into a big project. We have faith in you, man , she's gonna be an awesome Blumo when you're done. Glad you found that donor frame, kudos to Arthur for pointing you in the direction of that one.  |
|
|
|
Post by spanks79 on Apr 4, 2012 21:11:05 GMT -5
Thanks Steam. This is a lot more than I planed, but it is the way I always dreamed of doing it. Progress continued today. 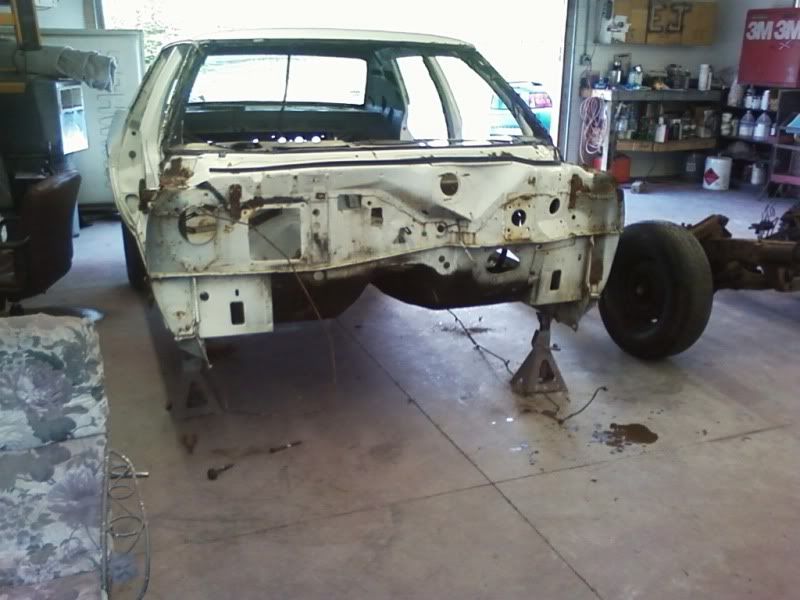 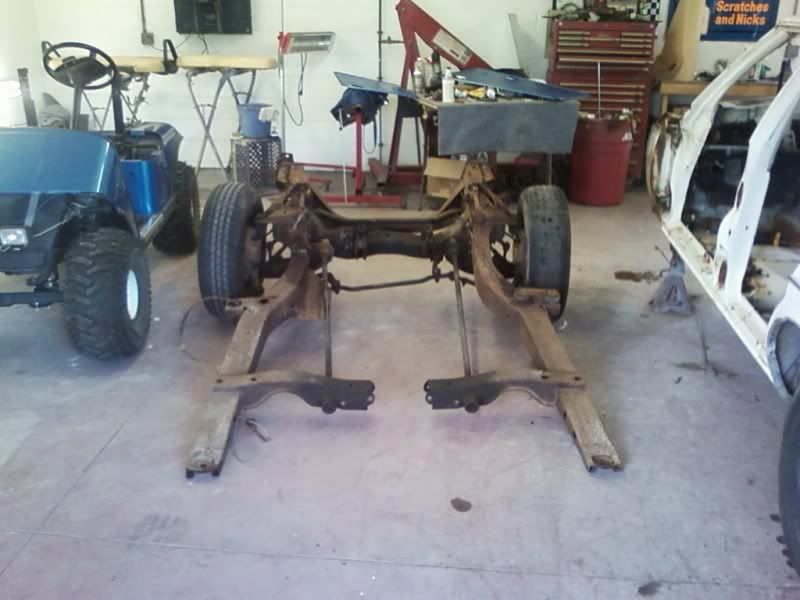 While all this car locating and body swapping has been going on I have also managed to locate a couple other key items. 9.25 diff out of a 74 cop car, c/o Rick Shields in FL. Plans for it include 3.55 gears and a posi. 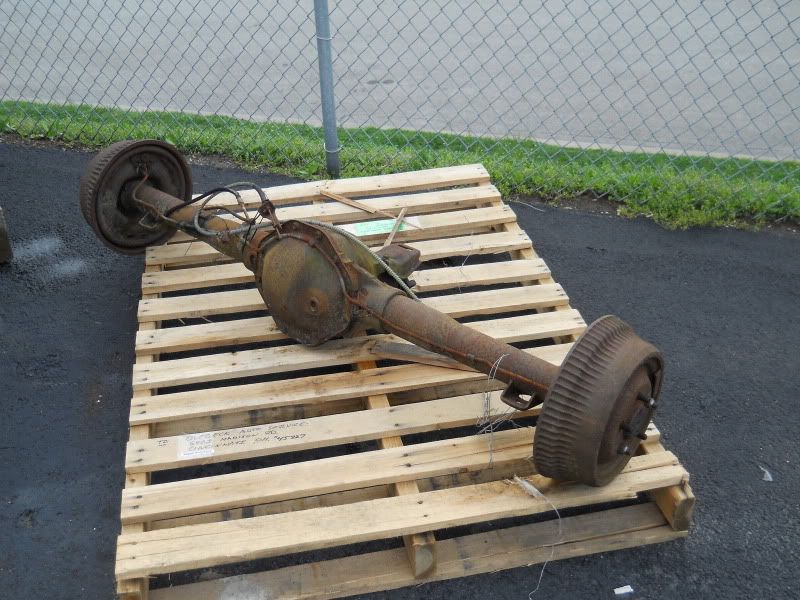 And a 440 out of the 1976 motorhome shown earlier in the thread. The RV was a 76 but the engine has a 74 casting date. That is a coincidence and was in no way a requirement of the build. 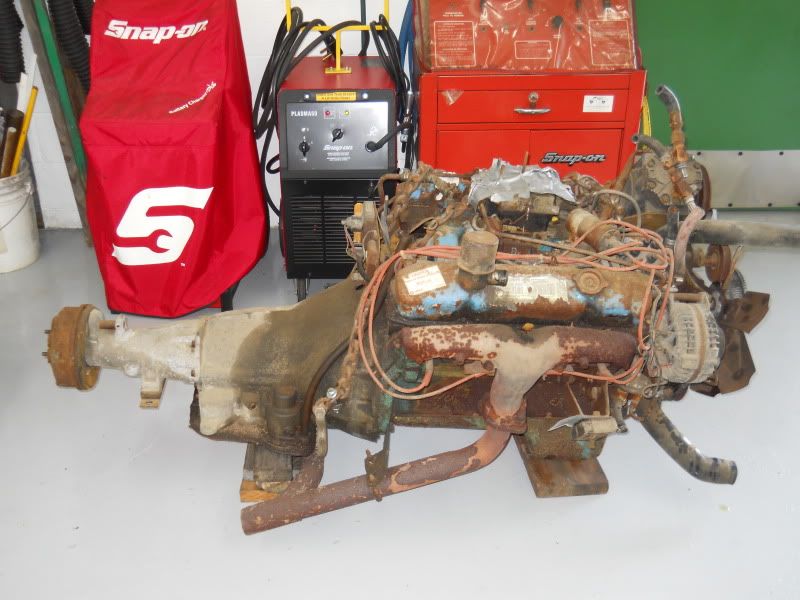 After some disassembly, it has become apparent that the engine had actually been rebuilt at some point recently even thought the RV showed less than 40k on the odo. It is already .040 over, has a forged crank, super clean inside and has nice looking cylinders. 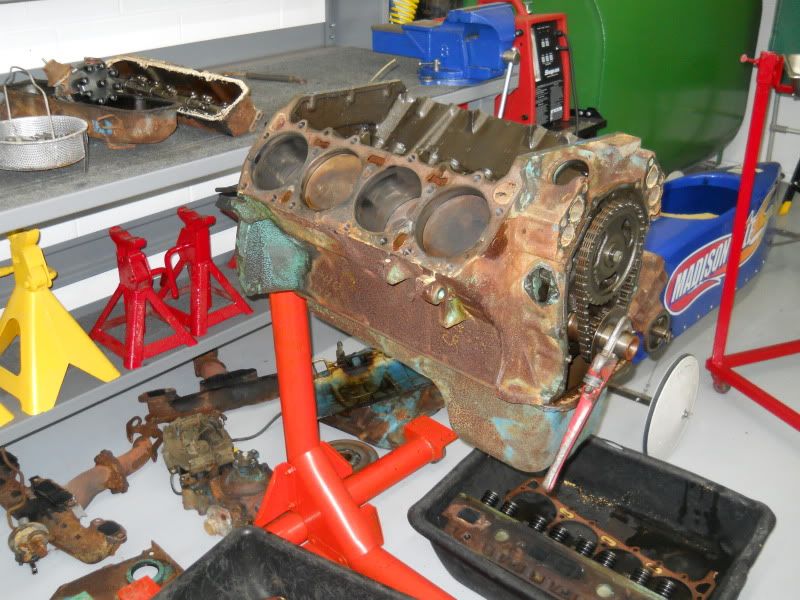 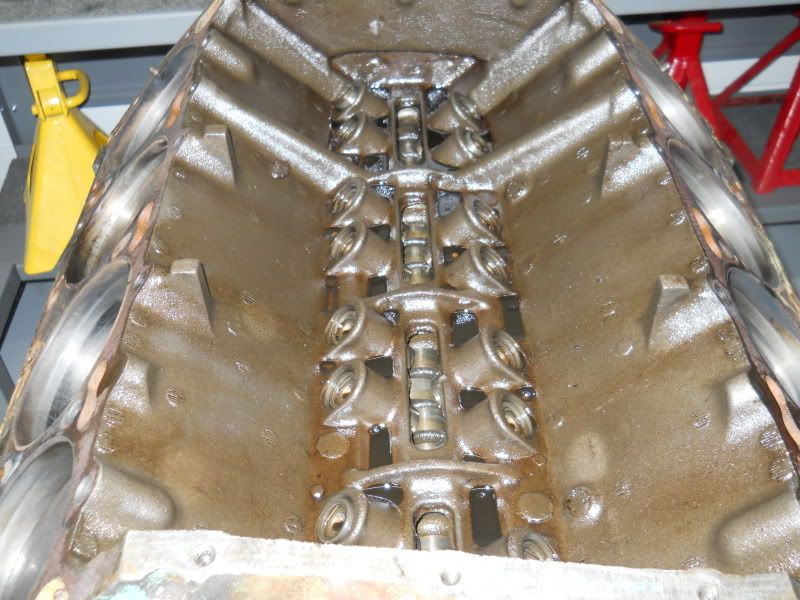 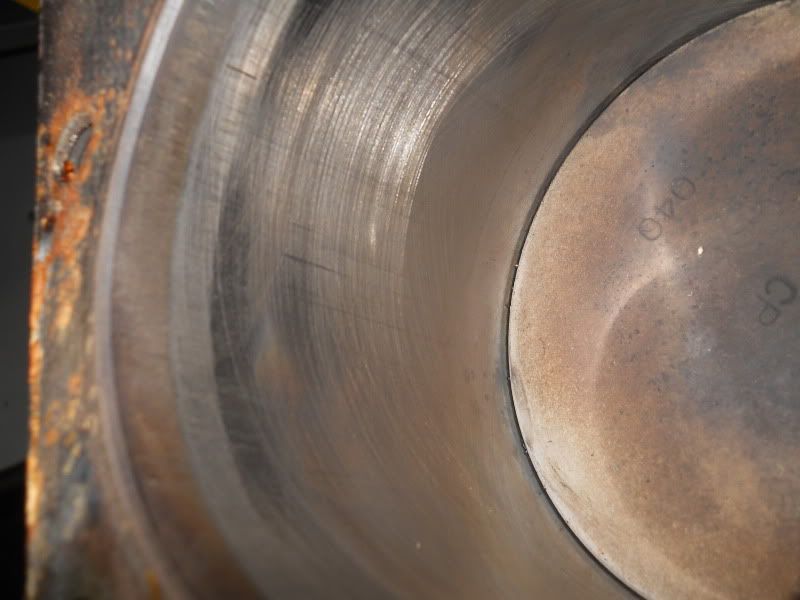 For now the plans are to reseal everything, install a new cam and timing set, new intake and headers. I am still trying to figure out what to do with the heads. Rebuild, replace, port, run as, or what. From what I have been reading that by the time you pay to have all the machine work done, valves and guides replaced you may as well buy a set that has already been tricked out or even a set of aluminum 440 source stealth heads. Anyone have any suggestions in this area? |
|
|
|
Post by sigmfsk on Apr 5, 2012 2:36:09 GMT -5
I am still trying to figure out what to do with the heads. Rebuild, replace, port, run as, or what. From what I have been reading that by the time you pay to have all the machine work done, valves and guides replaced you may as well buy a set that has already been tricked out or even a set of aluminum 440 source stealth heads. Anyone have any suggestions in this area? I'm using 440-1 heads, which require a different intake and have different exhaust locations than stock. But I've read about Indy's 440-EZ heads that keep those things in the stock locations: > Indy offers the 440-EZ head in four versions, covering applications over > a wide performance level. The most basic version is the standard > 440-EZ, which retains the factory port window size at the manifold > flange to mate with any standard factory or aftermarket intake > manifold. The EZ heads preserve the factory layout for the pushrod > location and rocker arms, and oil the rockers through the heads, just > like the originals. Basically, all that is required are longer pushrods and > the Indy valley plate to make the swap a bolt-on. Read more: www.moparmusclemagazine.com/projectbuild/mopp_0508_440_engine_top_end_build/viewall.html#ixzz1r97yQDDPMaybe something on that page to get the ideas going. What's going on with the transmission output shaft of that RV transmission? I read that on the 727 for RVs, the > ...output shafts on the tranny is different. Mobile homes use the bolt > up type of drive shaft. moparforums.com/forums/f7/440-727-motorhome-car-5987/but I can't determine exactly what's going on in your pic. Is that honk on the back of the transmission the yoke, and the driveshaft bolts to it? I made a thread about Monaco oil pans: bluesmobiles.proboards.com/index.cgi?action=display&board=details&thread=679I see your RV pan is the wrong shape to fit the Monaco subframe. Are you planning on using the pan from the 400 from the white car (which I'm guessing is a 933 pan)? your friend in build plan wondering, arthur |
|
|
|
Post by spanks79 on Apr 5, 2012 15:44:09 GMT -5
What's going on with the transmission output shaft of that RV transmission? I read that on the 727 for RVs, the > ...output shafts on the trany is different. Mobile homes use the bolt > up type of drive shaft. moparforums.com/forums/f7/440-727-motorhome-car-5987/but I can't determine exactly what's going on in your pic. Is that honk on the back of the transmission the yoke, and the driveshaft bolts to it? That big honk is actually the e-brake mechanism. It is essentially a drum brake that holds the driveshaft in place so the RV cannot roll. The driveshaft does use a 4 bolt flange and bolt directly to it. It really is a good idea because it gets the ebrakes off the axle plus it can be much smaller since it can use the mechanical advantage of the ring and pinion gearing to give greater hold force. However I suppose a broken axle shaft or differential spider gear would render it useless. My trans guy tells me he is going to use a majority of the RV trans but then use the tailshaft off the 727 out of the white car. He claims that the RV trans has beefier internals. You are correct, the oil pan is all wrong from the RV. I plan of stripping the 400 for all the accessory brackets and oil pan. This way I can keep the NC Blumo mobile for as long as possible. |
|
|
|
Post by spanks79 on Apr 17, 2012 21:05:01 GMT -5
Got the rear end torn down only to find that it was half full of water! Good thing I didn't really need anything inside it. 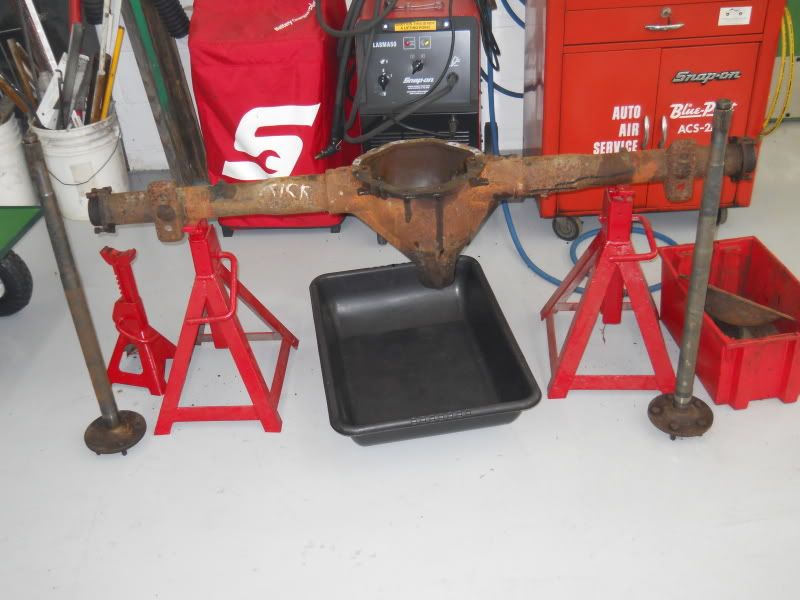 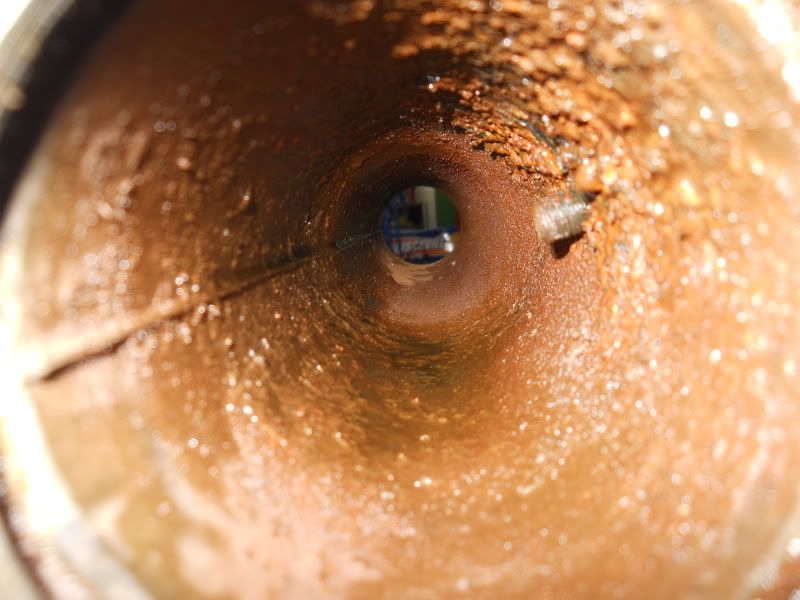 The only real casualty may be the left axle shaft. The surface where the axle bearing rides got pretty pitted up where the bearing had basically rusted to it. I have not tried to locate a replacment yet, not sure how avaliable the shaft will be outside of the whole assembly. I think some bearing companies offer a replacment bearing and a sleeve that will slide over the damaged area, I will have to check into that too. Arthur, this may become a test part for your custom center caps. 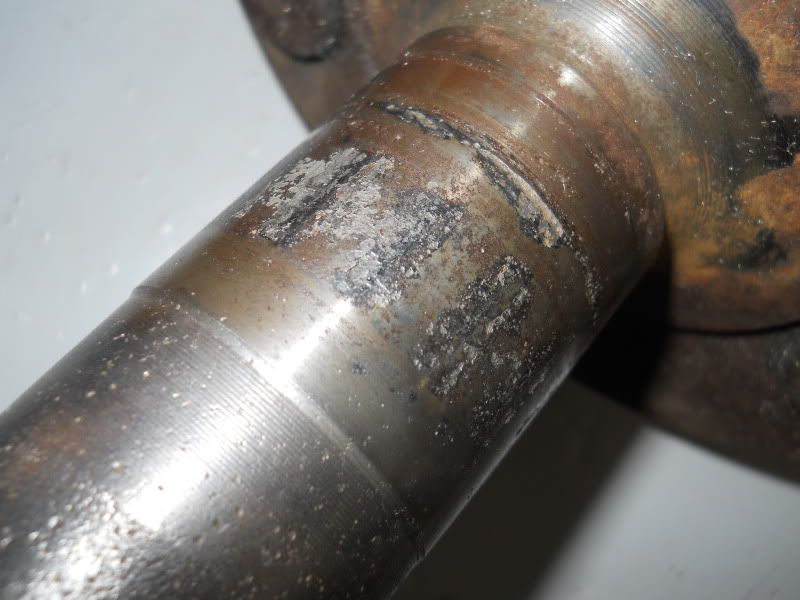 We also got some work done on the shell. One of the hardest things we had to do was remove the front and back glass. Well, actually the front was easy as it already had a crack in it so we did not have to be too careful. The back was difficult. I even had a pneumatic knife made for windshield removal and it was still a pain to cut out, luckily it came out in one piece. I only suffered minor cuts bruises, blisters and semi permanent hearing loss! Stupid air tools! Right side quarter work. The bottom of the quarter and the c pillar area where the vinyl top once was had the most rust. I am finding it difficult to convince helpers, who are body men by profession, to NOT smooth out every little dent. 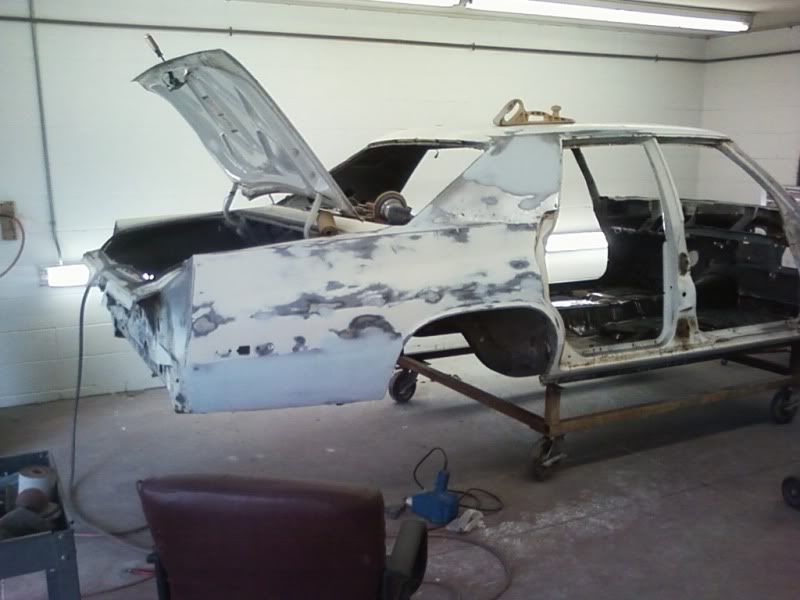 Started on the roof. The paint up there was pretty bad as it had just been sprayed on to cover up after the vinyl top was removed. 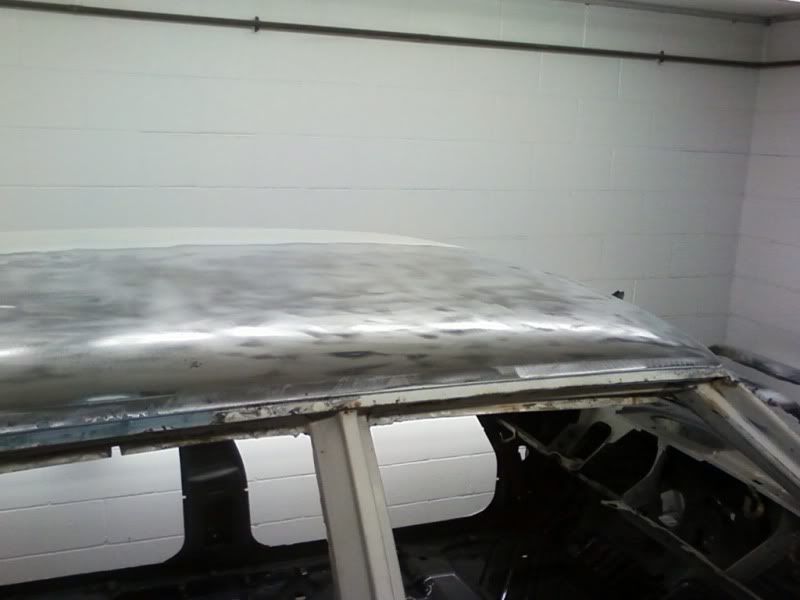 Got the interior floor painted with POR15 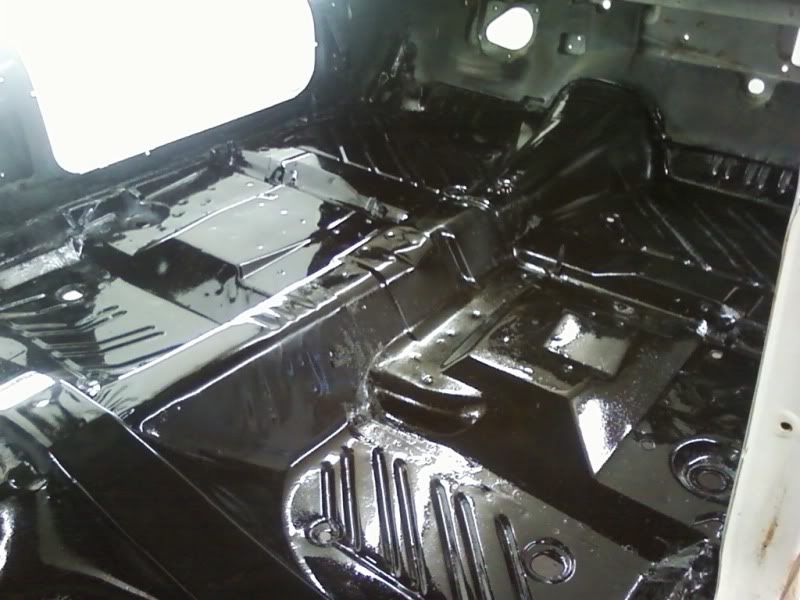 Firewall got sanded, some epoxy primer and single stage gloss black. We also fixed up some crusty stuff on the cowl before paint. 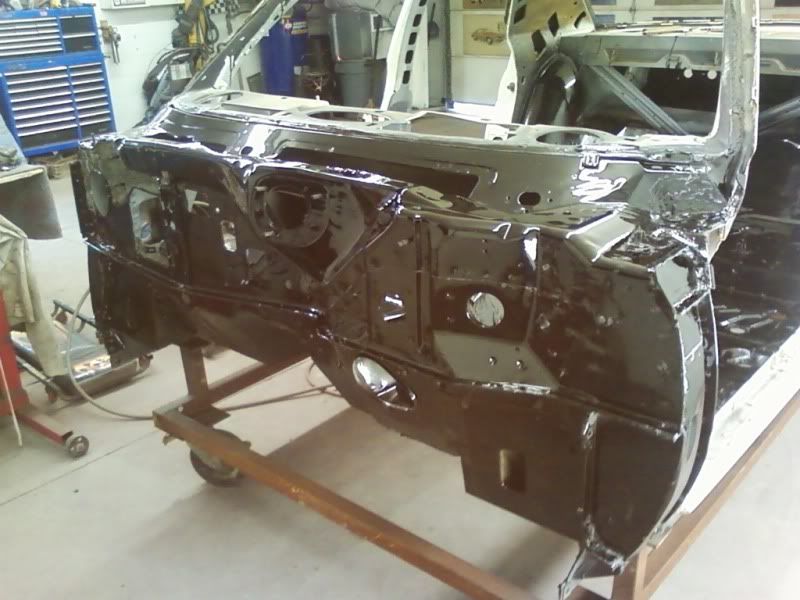 |
|