|
|
Post by Steam McQueen on Sept 26, 2012 17:26:13 GMT -5
ooooh, that's a lookin' good foundation! I concur, 'tis a thing of beauty. Good update, Spanks. This is going to be one fine Blumo!  |
|
|
|
Post by countrybunker on Sept 27, 2012 20:32:07 GMT -5
Quit teasing us!! haha jk. Looking great man! Look forward to the coming pictures!
|
|
|
|
Post by spanks79 on Sept 27, 2012 21:58:56 GMT -5
Quit teasing us!! haha jk. Looking great man! Look forward to the coming pictures! Don't worry it will be done soon, just need to wrap up a few more details. If you look carefully, you can catch a small glimpse of my work in the following pics. As I have been going through a pile of rusty parts I came across a couple pieces I do not remember being covered here in the past. 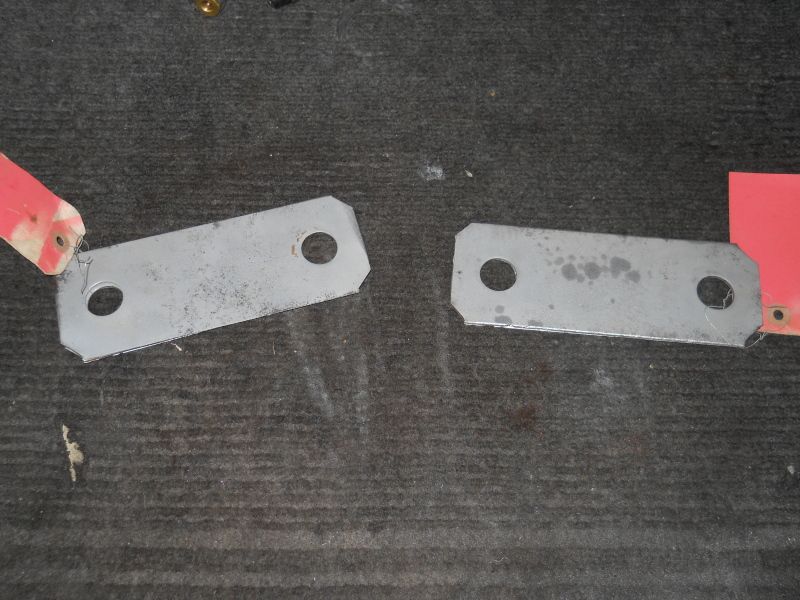 These are spacers that go between the top of the body mount bushings and the body as seen here in a picture Arthur posted a while back about sub frames. 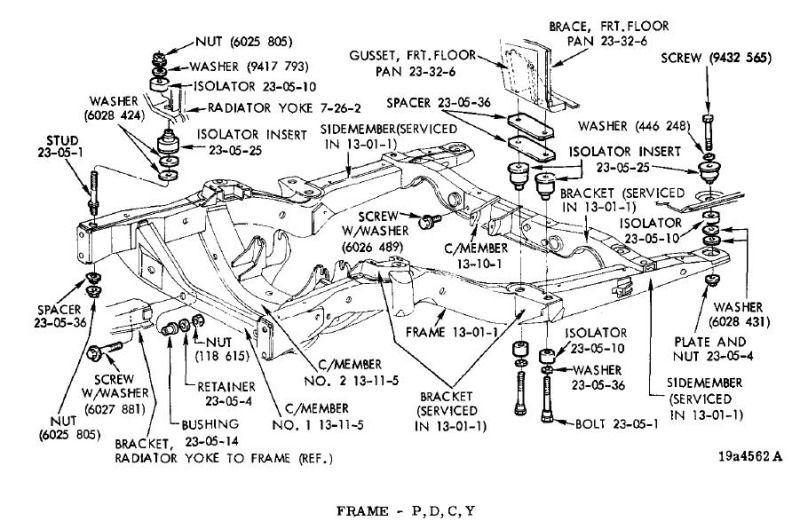 I am wondering what the method was to their installation. This car had one thicker plate on the right side and one thick and one thin plate on the left side? Given the single part number 23-05-36 it doesn't seem they offered different thicknesses however the diagram does show two of them. This only concerns me because of my Delrin body bushings. I made them a bit taller than the old bushing for a couple reasons. 1. I figured the rubber bushing has collapsed a bit over the years. 2. I could always turn them down a bit more if I had to, I'd rather do that then be too short and have to shim them back up (with some silly rectangular plates! lol) 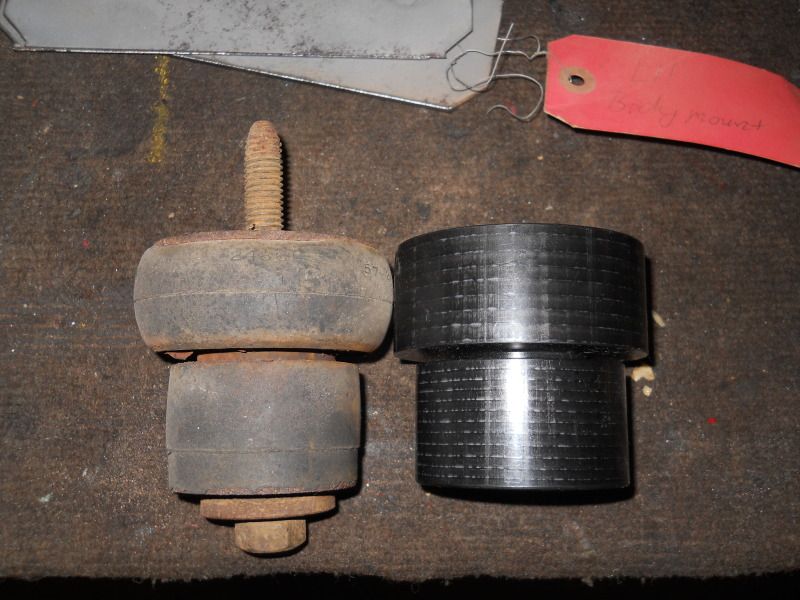 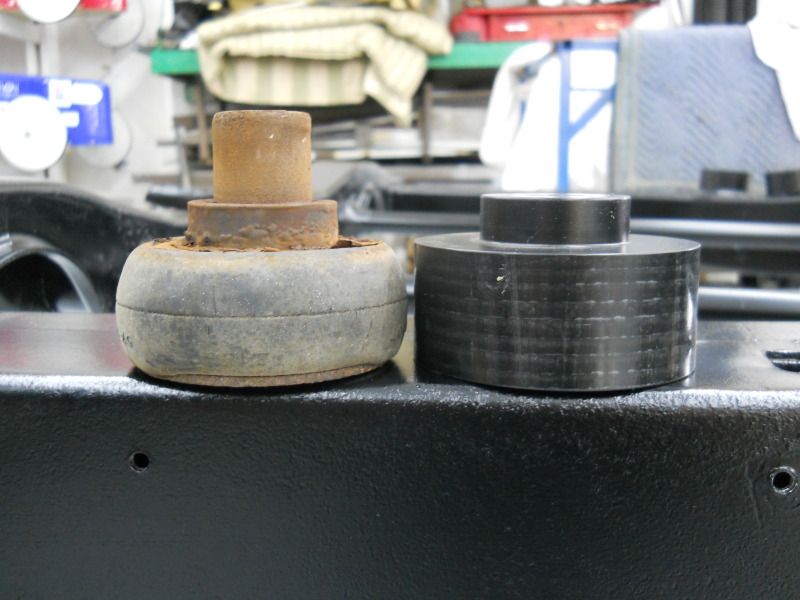  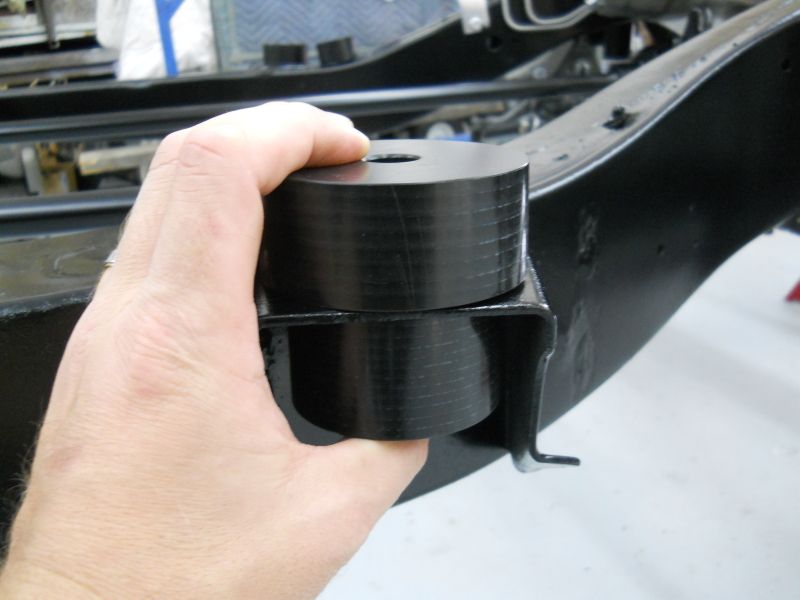 I am wondering if I should use them at all, or if I do use them, I am thinking i should use equal amounts on both sides. Ath this point I am leaning towards not using them and see how everything lines up. 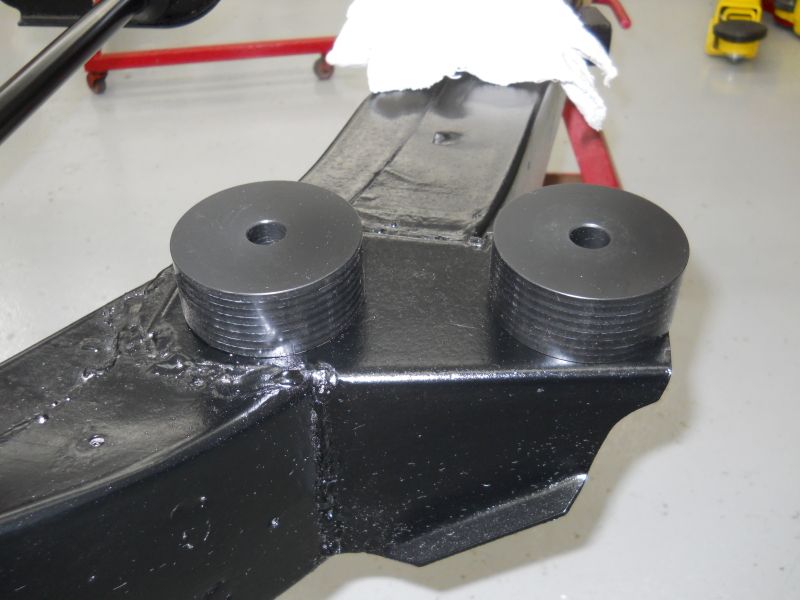 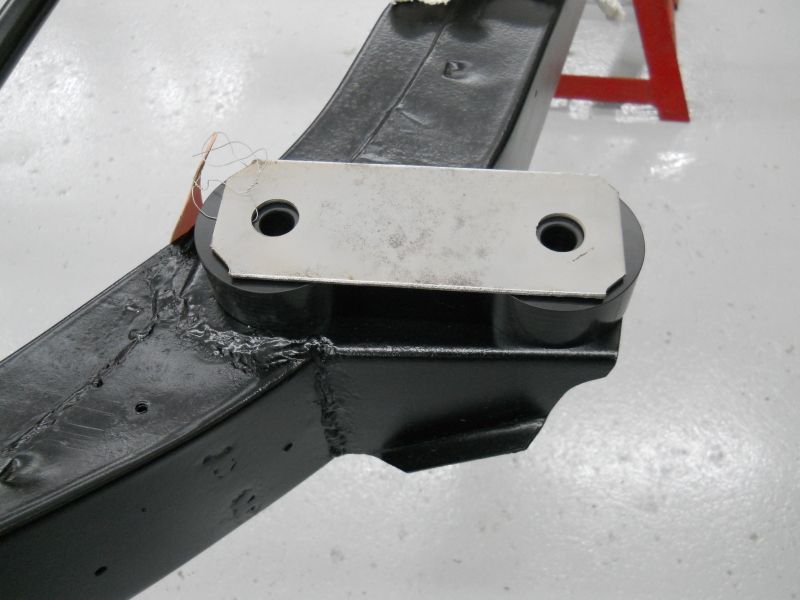 Arthur, I wonder if your guys did anything with these when they reinstalled your sub frame, although temporally? Also, I got some remanufactured brake calipers from my local parts store and it came with some strange hardware. 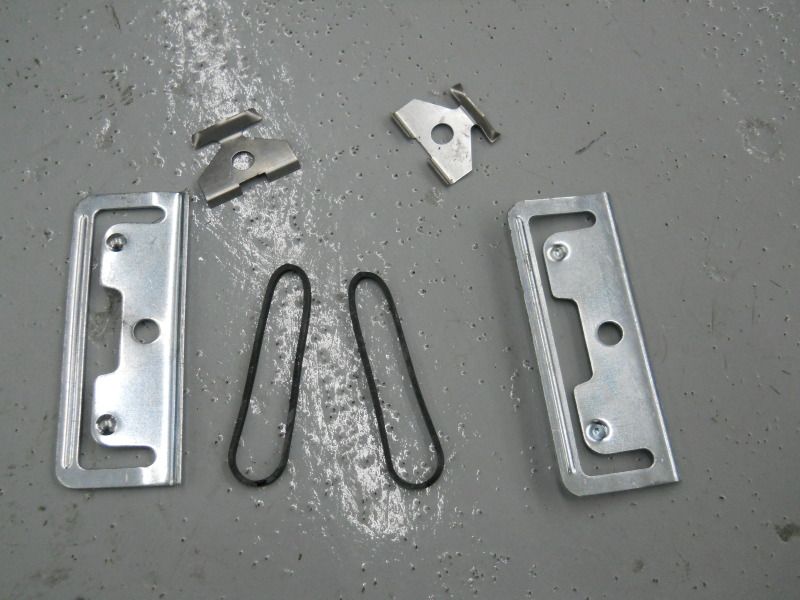 I didn't / don't know what the rubberbands were for? I am ASE Master Certified and I have never seen these before. One of my more senior techs said they go on the caliper brackets like this. 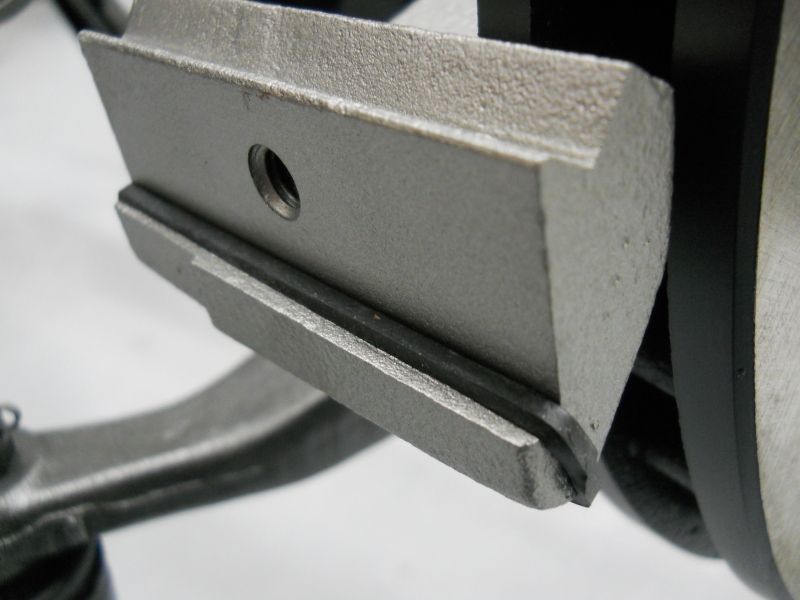 Anyone seen these before? |
|
|
|
Post by Sd.Kfz. 400 on Sept 28, 2012 2:17:37 GMT -5
I got that kind of rubberbands with cheap hardware kit to my van. Didn't know where to put them so I threw them away. Also threw the new "thin metal things that go between the nut and caliper" away, because they were thinner than original ones and the caliper clanked with them.
|
|
|
|
Post by sigmfsk on Sept 30, 2012 14:30:36 GMT -5
These are spacers that go between the top of the body mount bushings and the body as seen here in a picture Arthur posted a while back about sub frames. I am wondering what the method was to their installation. This car had one thicker plate on the right side and one thick and one thin plate on the left side? Given the single part number 23-05-36 it doesn't seem they offered different thicknesses however the diagram does show two of them. Arthur, I wonder if your guys did anything with these when they reinstalled your sub frame, although temporally? Hi Spanks: I'm up for asking them - but I'd rather stay under their radar until I get some news on my intake manifold and oil pan. Currently they're not charging me for storage space for MC, and I know its clogging up part of their shop. I know that doesn't really help you right now, but their answer is probably only most helpful if we know how thick the spacers are that they made, and I'm afraid that if I start asking them to go through their books to find out, they'll find out that I owe them some storage money. your friend in sharing the news, even if its not immediately helpful news, arthur |
|
|
|
Post by spanks79 on Sept 30, 2012 20:55:32 GMT -5
Thanks Arthur.
I am not in immediate need of the info, I plan on some trial and error as it all goes together. I figure it won't be too hard to slip the spacers in or out if needed. If I had to guess they probably just installed the spacers the same way they came out or they omitted them all together.
It would be interesting to know how tall they cut the bushings. I measured all of mine and used the tallest measurement as my baseline, figuring all of the bushings started at least that tall at some point and squished down over the years. I do not have the exact dimensions right now but I will post them later for reference.
|
|
|
|
Post by spanks79 on Sept 30, 2012 20:58:13 GMT -5
I got that kind of rubberbands with cheap hardware kit to my van. Didn't know where to put them so I threw them away. Also threw the new "thin metal things that go between the nut and caliper" away, because they were thinner than original ones and the caliper clanked with them. Thanks SD. I got the calipers mounted up Friday and used the supplied hardware with no issues. I did do a little "adjusting" on the brake pads to get the out side pad to hold tight inside the caliper instead of flop around. Other than that it went easy. |
|
|
|
Post by spanks79 on Oct 4, 2012 17:57:30 GMT -5
Well, here it is. 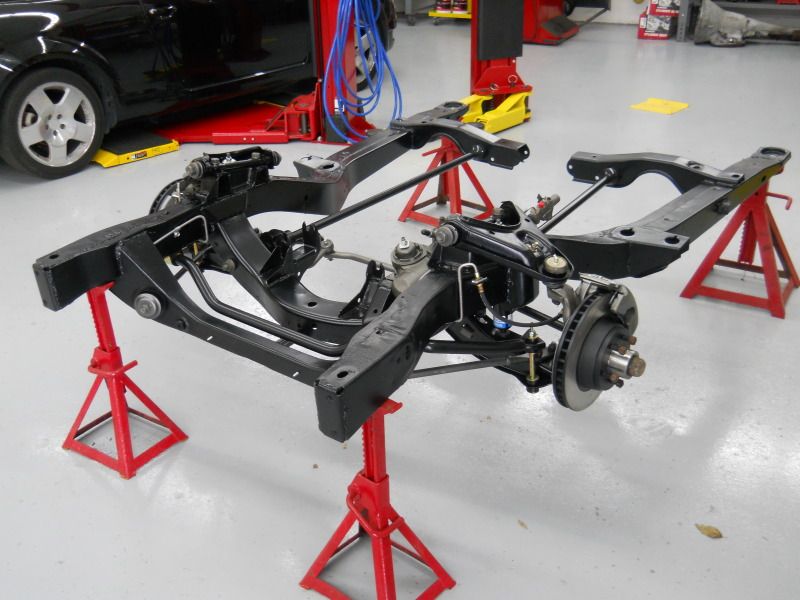 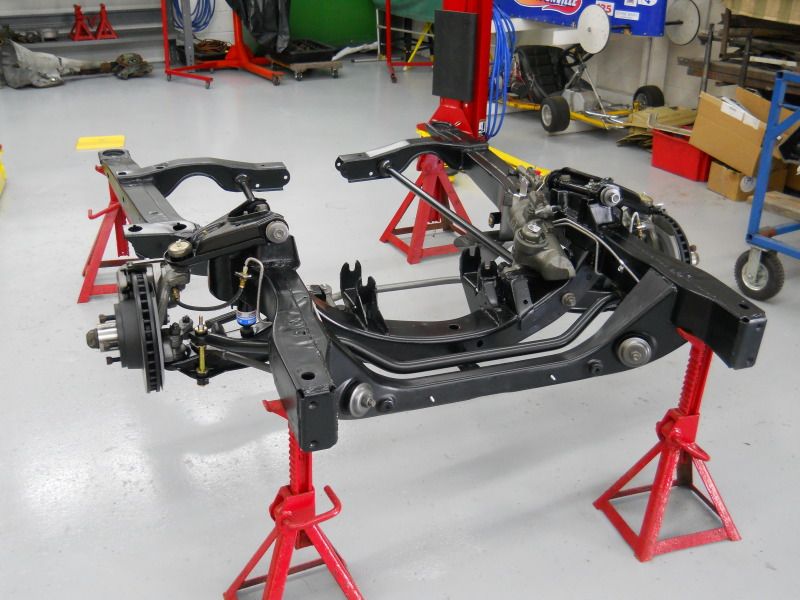 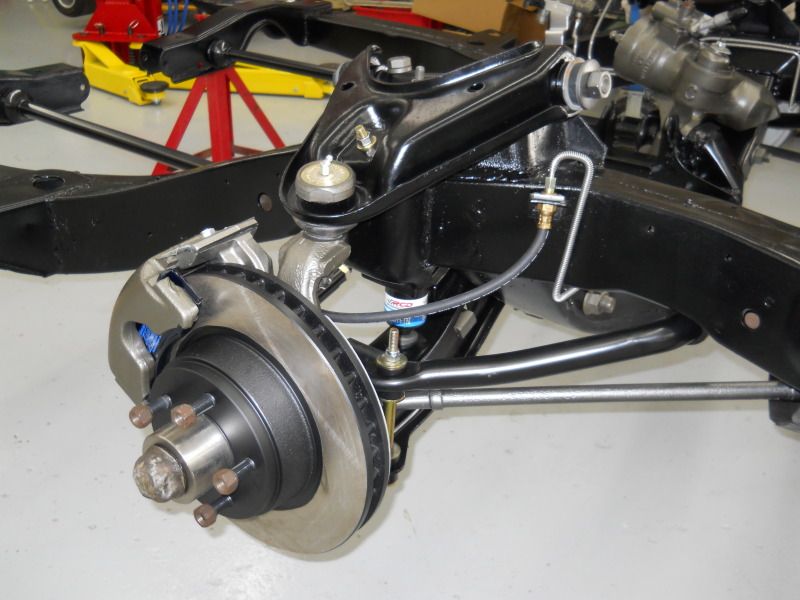 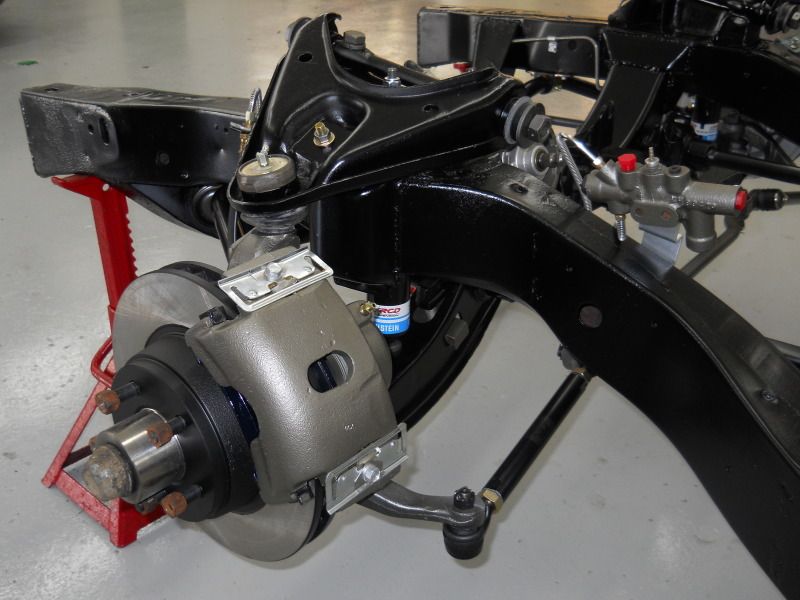 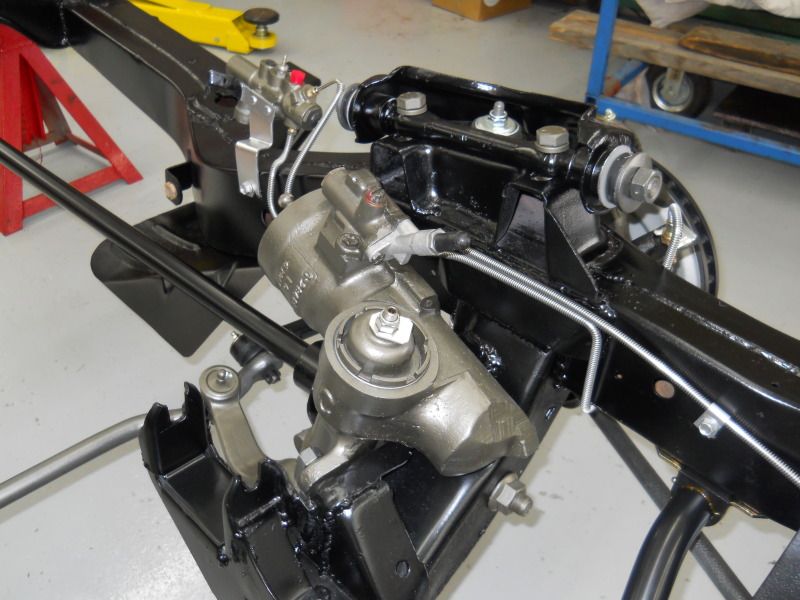 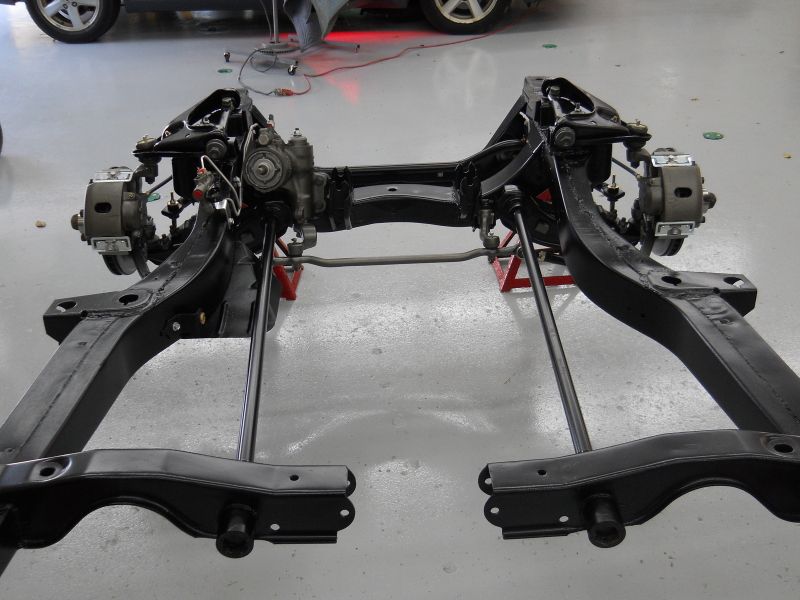 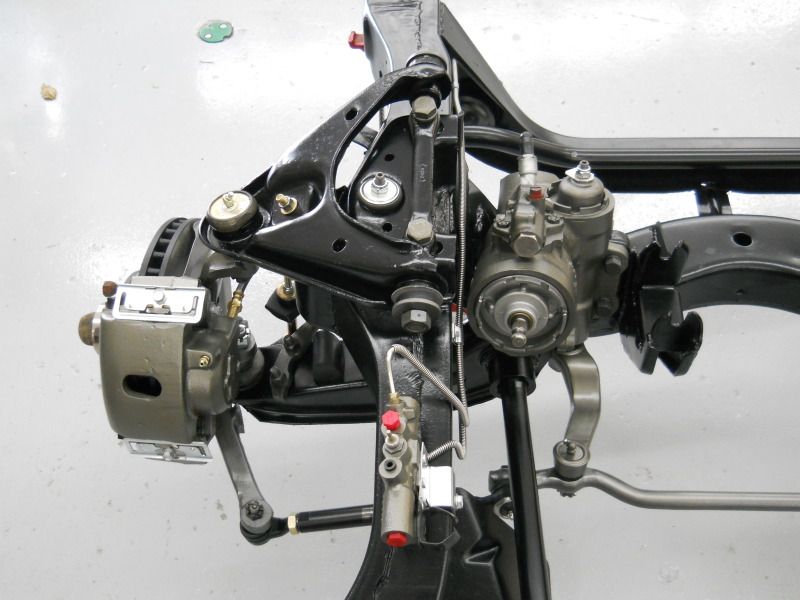 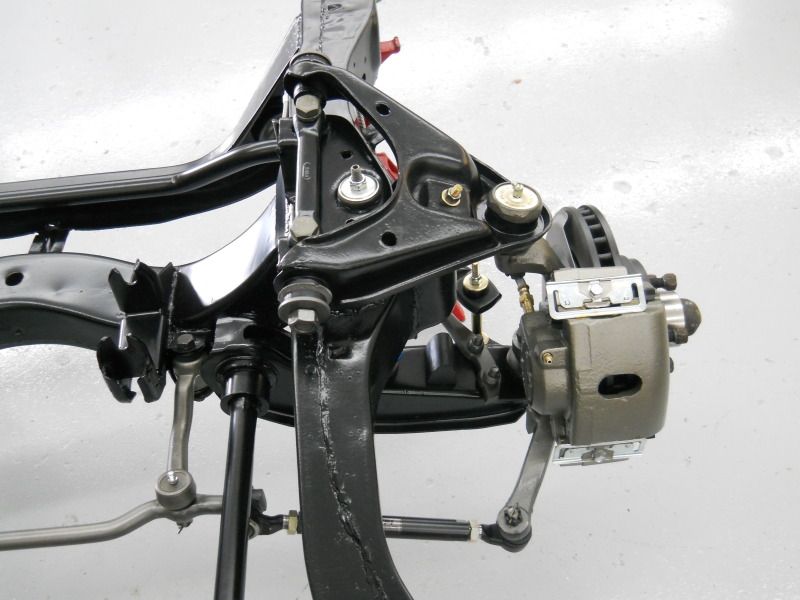 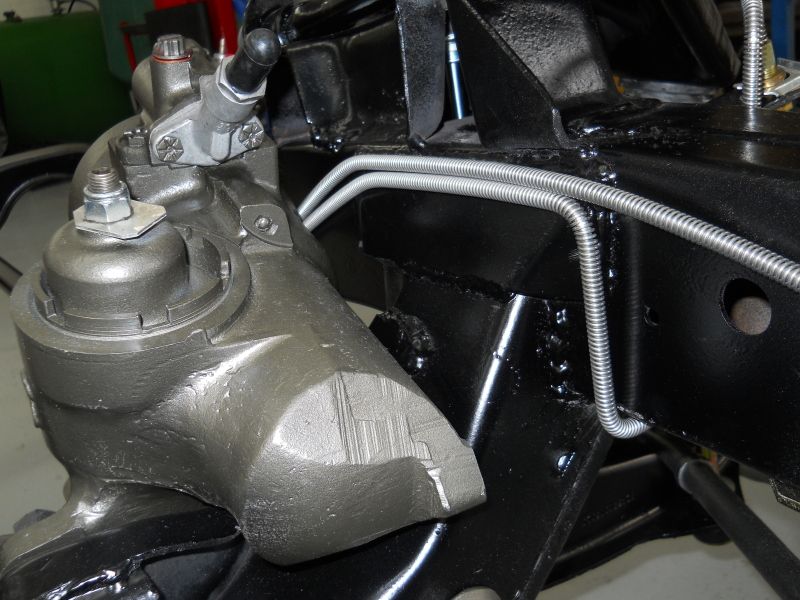 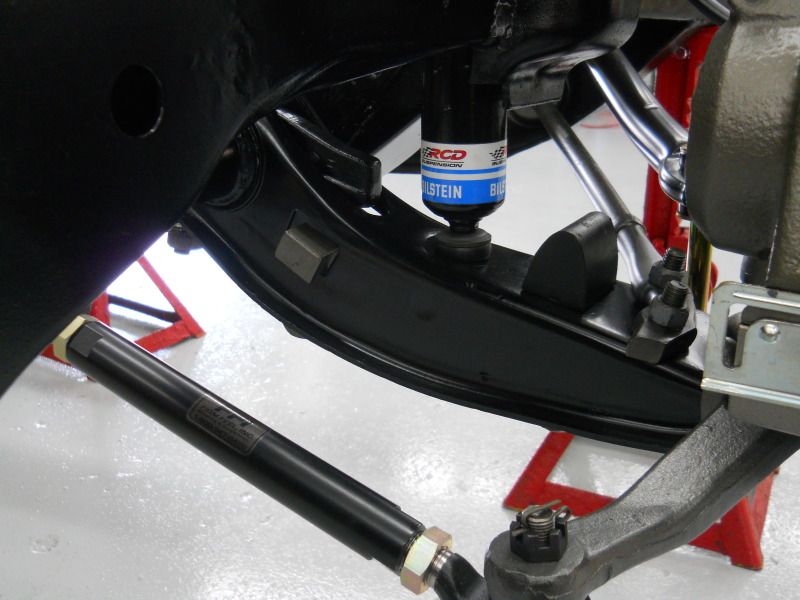 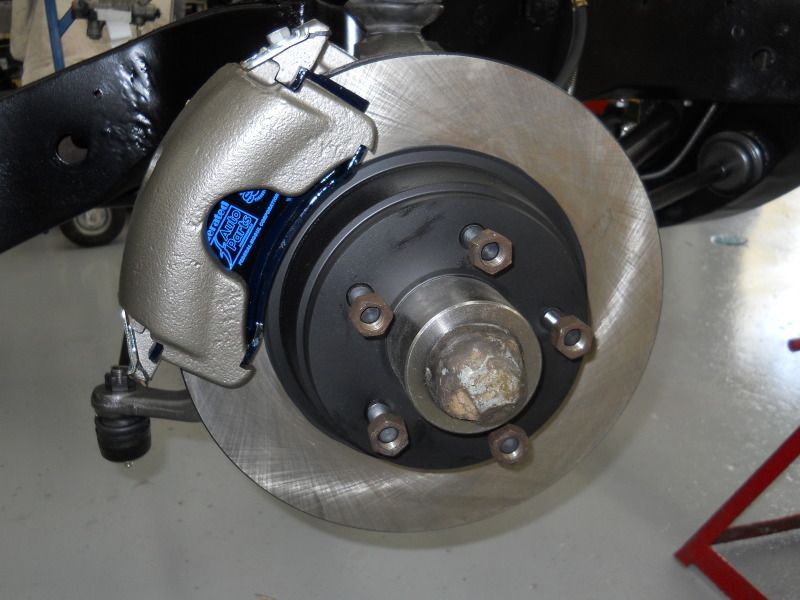 I am really happy with how it has turned out! The best part so far was doing all this detail work then walking out in the yard and popping the nasty dust caps off of the NC car and trying the clean out the inside of them without disturbing the "crust" on the outside of them. Now I have to get the hub centers all rusty! The following is a list of parts that have been used: Stage 1 steering box from, Firm Feel Inc, c/o Sigmfsk 1-1/4" front sway bar, Firm Feel Inc, c/o Sigmfsk 1.18" Torsion Bars, Firm Feel Inc, c/o Sigmfsk Bilstien Shocks, Firm Feel Inc HD Tie Rod Assemblys, Firm Feel Inc Bushing Kit, Firm Feel Inc Idler Arm and Pittman Arm, Firm Feel Inc Moog Ball Joints, Firm Feel Inc Custom Stainless Steel Brake Lines, Inline Tube Rotors, Local Parts Store Reman Calipers, Local Parts Store Flex lines, Local Parts Store Tha next step is to build the rear diferential and then slide all this stuff under the body. |
|
|
|
Post by countrybunker on Oct 4, 2012 18:42:36 GMT -5
What a thing of buety! I didn't know they finally came out with the bilstien shocks for the front! I didn't think they were gonna make them! How long ago did you get them?
That big fat sway bar looks great! I want one!!
|
|
|
|
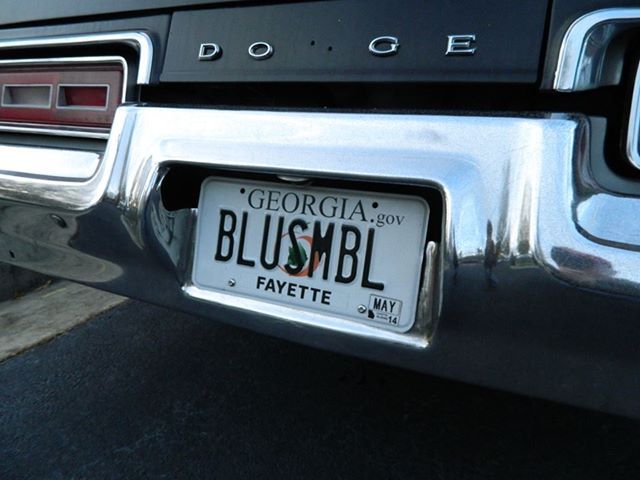
Post by blusmbl on Oct 4, 2012 20:25:13 GMT -5
That is looking awesome.  Great detailing and finishes. I really like that shop you are working in, super clean and organized. Restored and upgraded underneath, sh*tbox Dodge on the outside ;D Sweet! |
|
|
|
Post by spanks79 on Oct 4, 2012 21:25:14 GMT -5
Thanks guys! I didn't know they finally came out with the bilstien shocks for the front! I didn't think they were gonna make them! How long ago did you get them? It took a while to get them but I was in no hurry. They were actually the last parts to arrive, I would have to check my invoice but I think I got them mid July. The FF stuff is nice and all of it fit right the first time with no issues. Great customer support as well. I think I am happiest with the stainless steel break lines. If you remember I sent all of the old lines to Inline Tube and they copied them. I was concerned about fitment but they fit right in place with no issues. Blusmbl, thanks for the compliment. We work hard to keep the place nice. It's my fathers place, he has been in the auto biz for 40 years and in this location since '78 ( just think he could have been repairing a 74 Monaco in that exact spot back when it was considered a new car!) Dad has always prided himself on having the nicest shop with the best equipment even if it wasn't necessarally the best thing for the bottom line. I'm just glad he lets me clog up a bay with my junk! It's my full time gig as well so it's kind of cool that I get to look at it every day, all day. |
|
|
|
Post by AZBlues on Oct 5, 2012 1:43:29 GMT -5
This is almost overwhelmingly nice. And the progress is fast, too. A Mopar magazine car going up in real time.
-AZB
|
|
|
|
Post by sigmfsk on Oct 5, 2012 5:39:44 GMT -5
I didn't know they finally came out with the bilstien shocks for the front! I didn't think they were gonna make them! How long ago did you get them? It took a while to get them but I was in no hurry. They were actually the last parts to arrive, I would have to check my invoice but I think I got them mid July. The FF stuff is nice and all of it fit right the first time with no issues. Great customer support as well. So it sounds that they were a direct bolt-in replacement for the factory shocks. That means that Dick @ Firm Feel was able to talk Bilstein into make those shocks. Last I spoke with him, it sounded like that was unlikely to ever happen, and he was going to investigate some means of using a longer shock somehow. Your setup looks great. That shock deal has me simultaneously happy and sad. Sad because the lack of availability of good shocks was the straw that got me to redo my entire front end, and if those shocks were available, my blumo might be done by now. But happy since my front-end-suspension redo got me to meet nice people, such as yourself when you came up, and got me involved in other interesting areas of car construction. Regarding: > Bushing Kit, Firm Feel Inc > Idler Arm and Pittman Arm, Firm Feel Inc What's the bushing kit for? Did you do any discussion with Dick about using his sector-support-kit: www.74monaco.com/74-monaco-website/handling%20articles/2011-Dec%20mopar%20action%20-%20steering%20gear%20sector%20support%20kit/2011-%20Dec%20mopar%20action%20-%20steering%20gear%20sector%20support-.htmlor idler arm bearings vs. bushings: www.74monaco.com/74-monaco-website/handling%20articles/2012-Feb%20mopar%20action%20-%20idler%20arm%20bearings%20vs.%20bushing/2012-Feb%20mopar%20action%20-%20idler%20arm%20bearings%20vs.%20bushing-.htmlyour friend in fine handling Monacos, arthur |
|
|
|
Post by spanks79 on Oct 5, 2012 23:03:16 GMT -5
This is almost overwhelmingly nice. And the progress is fast, too. A Mopar magazine car going up in real time. -AZB Thank you for the kind words. I am fortunate to have some very good help with this project. My friend is an excellent body man and loves working on old cars and I am pretty good with mechanics and electrical so it is a good combination. If I was stuck doing the body work myself, I'd be screwed. As far as it being a magazine car........ I don't know about that. Arthur, the shocks are direct bolt ins. They were the last pieces I put on the suspension and I found them to be difficult to slip past the lower control arm and up into the frame. Mind you I was trying not to scratch the heck out of everything in the process. I ended up taking the t-bar pre load loose and unbolting the upper a arm to allow enough droop to slip the shocks in. In other words installing these may be a little more than a Sat afternoon project in the driveway. But then again, I have never installed shocks on a 74 Monaco before so maybe that is standard procedure. It would have really helped if the shocks had straps or bands on them to keep the shock compressed until I got it up into the frame then cut the band off, those things are stout and difficult to compress and keep compressed. Looking back I probably could have made something out of a coat hanger to hold them compressed but it was easy enough to do it the way I did. The bushing kit consisted of the inner lower control arm pivot bushing, the upper control arm inner pivot bushings, and the strut rod bushings and sleeves at the front cross member. Some were rubber and some were poly. I also got some cool poly bushings to fit the front spring eye on the leaf springs to replace the spongy oval rubber bushing, I'll post more on those once I get to the rear springs. I did talk to Dick at FF about the idler arm and sector support bearing. His feeling was that they were not needed on a C Body. Not to say that they would hurt anything, and he said I could install them, but he feels that the C body frame is plenty strong to hold the steering in place. I got the same response when I asked about reinforcing the lower control arms. I personally don't look at this stuff and think it is super beefy but then again compared to the rest of the Mopar lineup at the time, I'm sure the C Body was a tank. In effort to save some cash and keep the project moving I took his advice and moved on. I also figured I could add that kind of stuff later on and really see if it does make a difference, before and after. I snapped this pic today and thought it was cool. I loaded up the sub frame and a load of other parts to transport them to the paint shop to be reunited with the body shell. 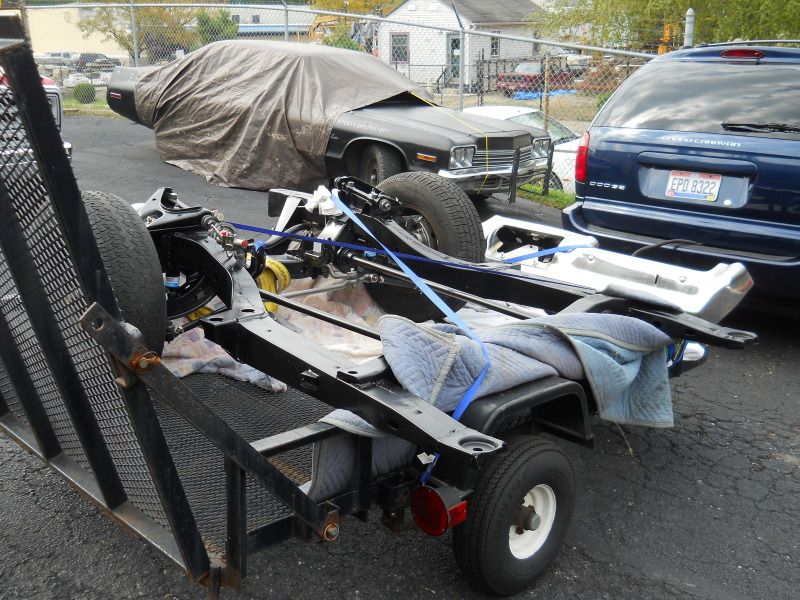 I thought it was cool with the NC car in the background waiting to be dissected. Remember back to the beginning of this thread that it has no glass in it. I use to have a proper car cover, that I acquired with the white car, but it disintegrated a few weeks ago, now its got a tarp. I like it better because I get to look at that front end everyday and keep myself motivated. Here are a couple of the body shell out in the sun. I snapped these while we were rearranging everything to prepare for the reuniting of the frame and body.  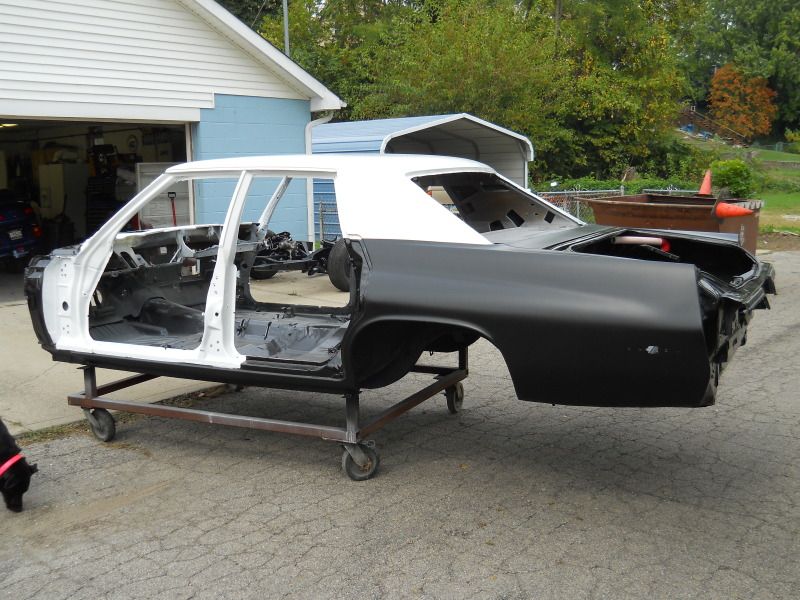 |
|
|
|
Post by spanks79 on Oct 18, 2012 22:11:29 GMT -5
One more sub assembly complete. Got the 9.25 rearend all built up and ready to bolt in. If you remember from earlier in the thread I purchased the rearend out of Florida and when I tore it down it was full of water and sand, the interior of the housing and the internals were shot. So I basically threw everything out except one axle shaft and the housing itself. 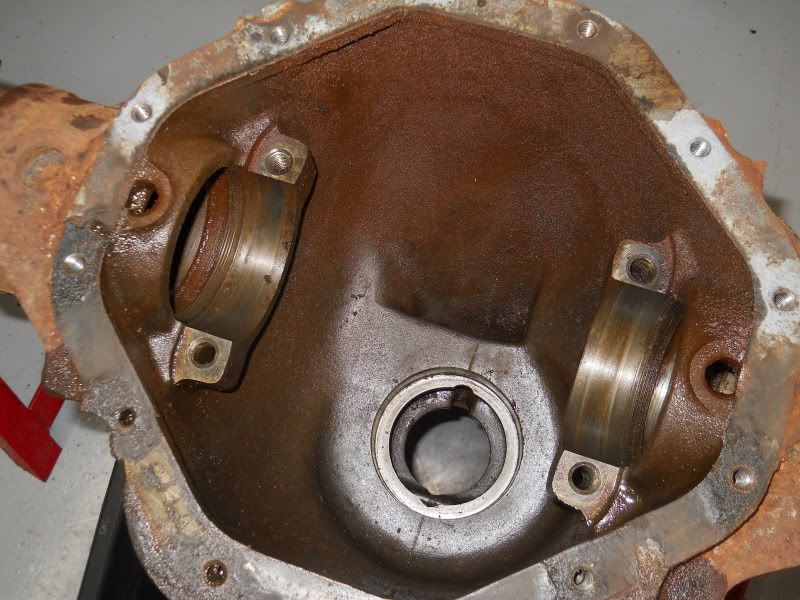 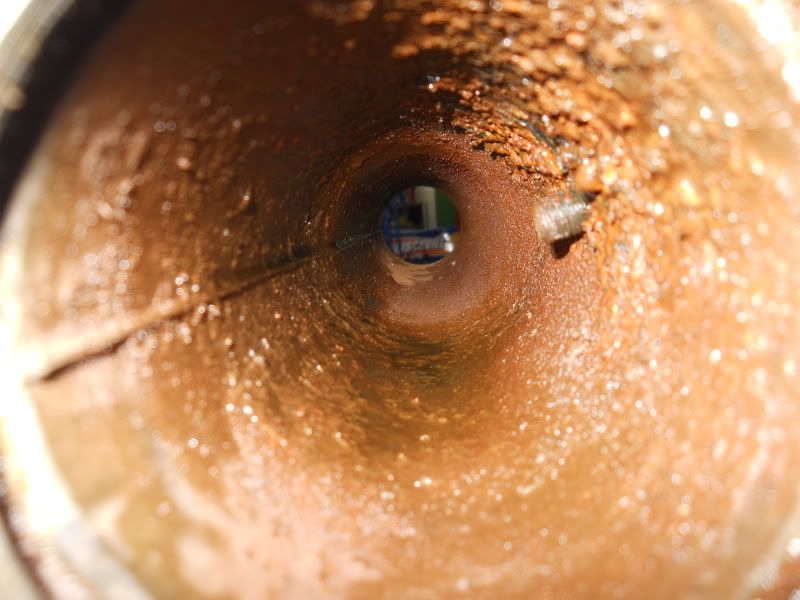 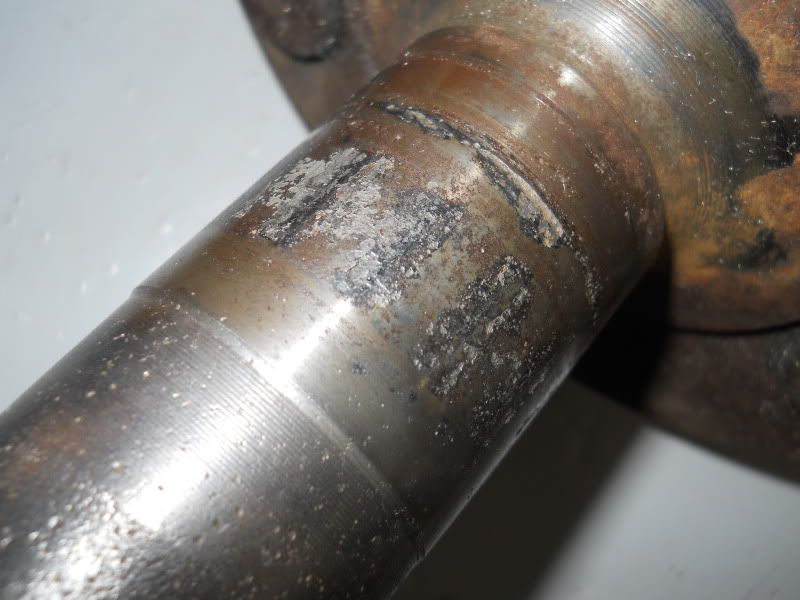 With the housing wire brushed, degreased, power washed and scraped inside and out, it got a coat of paint. This ended up not being the final coat since it got banged around a bit during the rebuild. I ended up spraying a final coat of paint once it was all buttoned up. Basically I ordered a kit from Ron's Machining Service that included the ring and pinion, Yukon Dura Grip posi, and an install kit. I decided on 3.21 gears. My original build plan was for 3.55's but I changed my mind and went conservative. I think I'll be happier in the long run at least until I can afford a Gear Vendors OD! 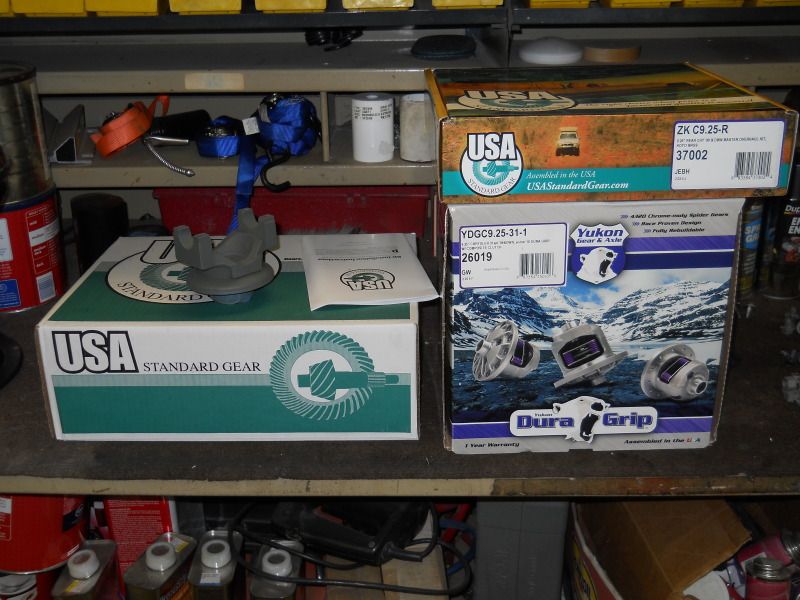 It all went together perfect. I have built a number of rearends in the past and you always want to start with the pinion shim from the old gear set as it should be damn near spot on for the housing. I did manage to salvage the pinion bearing shim from the old rusty stuff before taking it to the scrap yard and reused it, it ended up being right on the money for pinion depth. I set the back lash at about .006" and snugged it all up. 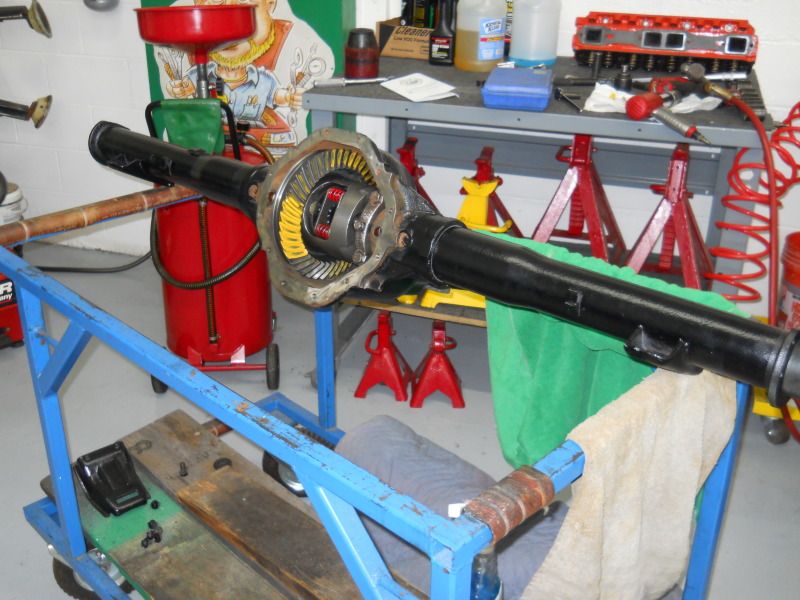 After the gearing I installed new axle bearings and seals, backing plates and installed the brake hardware. I used new shoes, new wheel cylinders, and new hardware kits all from the local parts house. I reconditioned the adjusters, ballance bar, e brake arm, and other bits and pieces just so they look nice. I also ended up reusing the brake drums. They were sand blasted, turned on the brake lathe and painted using Duplicolor Grey Cast. I was able to recondition the e brake cables and hardware as well. They turned out great. FYI almost all of the drum brake hardware is interchangable between the 8.25 and 9.25 rear axle, the only thing that I found different were the shoes and drums, all the other little pieces were the same. Oh Yeah, the brake adjusters are side specific. One has right hand threads the other has left hand threads. 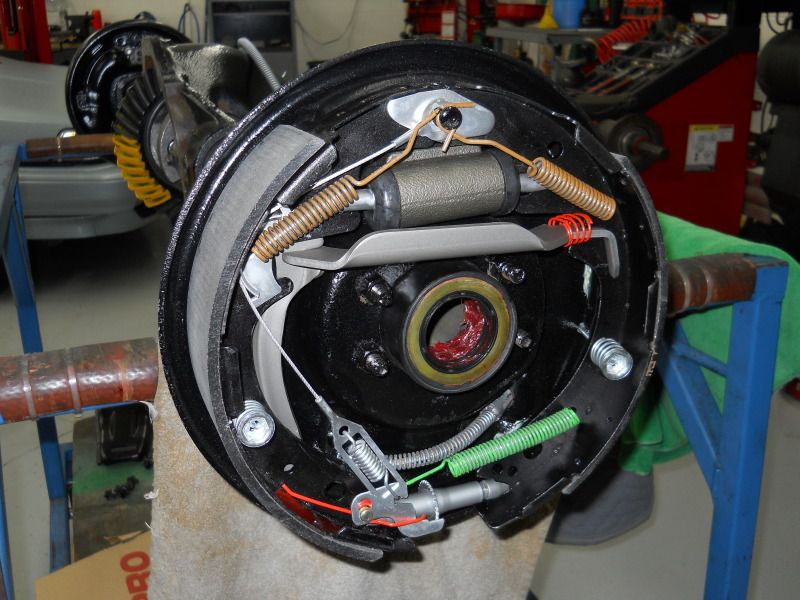 Installed the axle shafts, one was reused and the other was a recent eBay score. It came out of a late 70's early 80's pickup and matched exactly. 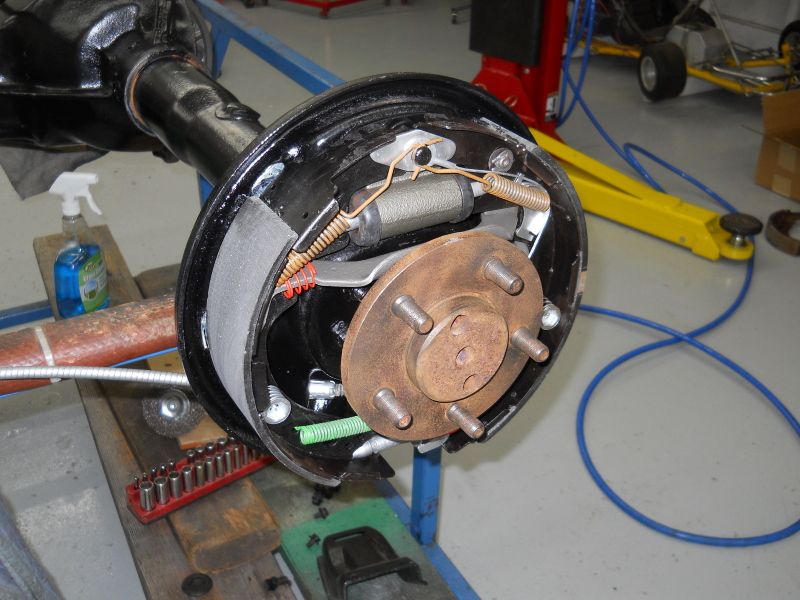 After that I installed the rear cover and masked off the brakes for a final coat of paint. Then installed the stainless steel brake lines. Once again the brake lines were a pleasure to work with and look great. 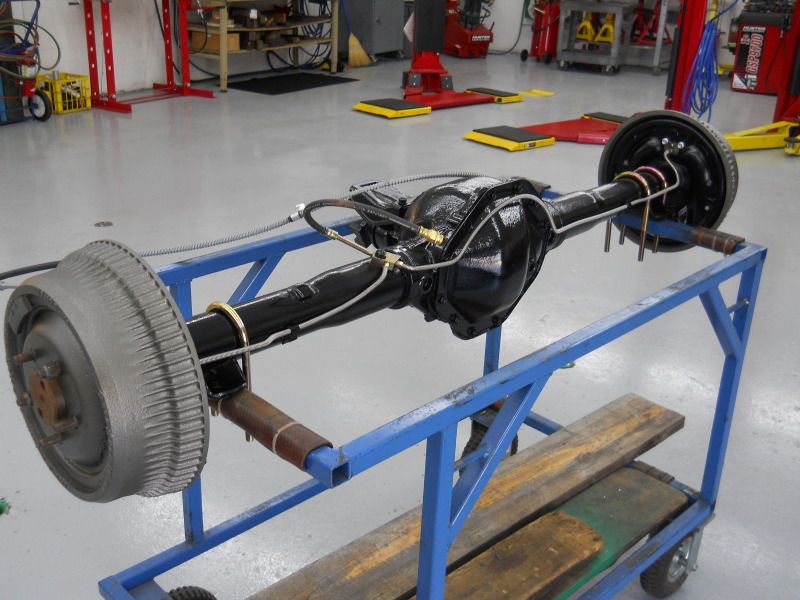   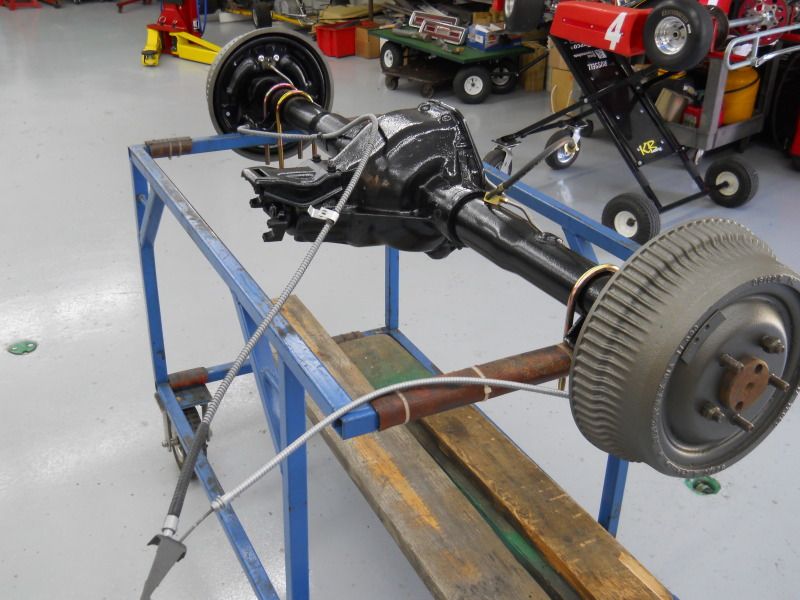 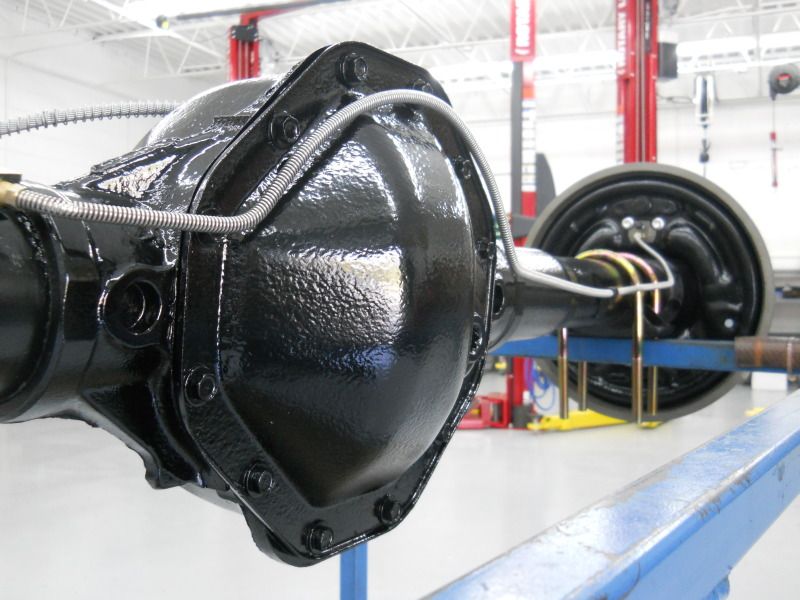 Next step is bolting it into the body and get this body shell back on 4 wheels. |
|


 Great detailing and finishes. I really like that shop you are working in, super clean and organized. Restored and upgraded underneath, sh*tbox Dodge on the outside ;D Sweet!