|
|
Post by countrybunker on Mar 13, 2012 21:47:22 GMT -5
awesome work blusmbl!!! Very impressive! Car looks awesome. Look forward to the following posts.
I love the charecters in the trunk lid as well!
So may you be for hire for the same kind of metal work in the trunk area? Haha i need to tackle mine. But not great at metal work lol
Again car looks great!
Zac
|
|
|
|
Post by blusmbl on Mar 14, 2012 19:39:21 GMT -5
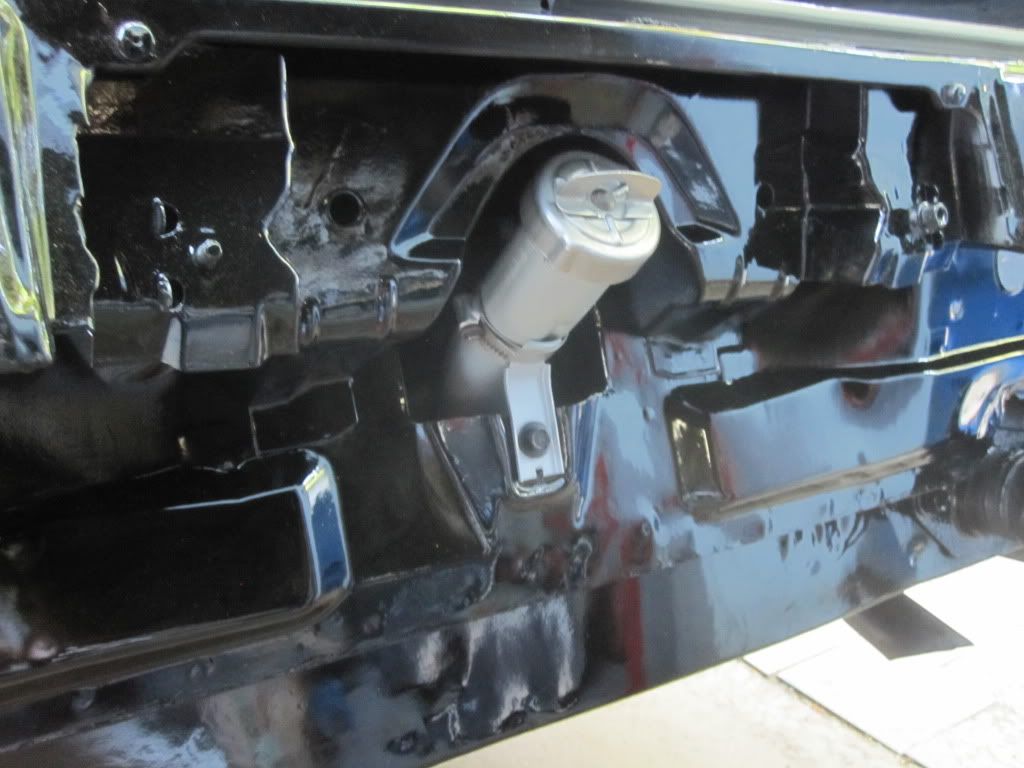
Thanks, Zac it looks like you had a good trip back to Florida. We will have to get together sometime! I haven't been to the home of those Duke boys, nice pics. Laying under the car wire wheeling and scraping dirt and grease off the suspension and floors is big fun  . The rear brake lines had been replaced when I got the car so I just cleaned them up. The rear had been changed to the 9 1/4 but it still has civilian springs. The car had Monroe air shocks, I cleaned them up and repainted them and bought a new plumbing kit for them. I routed the lines through the rear frames and out the bumper openings and up to the fuel door where it can be serviced. I haven't done anything to the mufflers, they are serviceable but I think I will replace them in the future. They are slightly cobbled up at the front where they attach to the manifolds. The paint is Valspar 4432-19 low gloss black 1qt can on the suspension, and of course the floors are done in my favorite DupliColor truck bed liner spray. 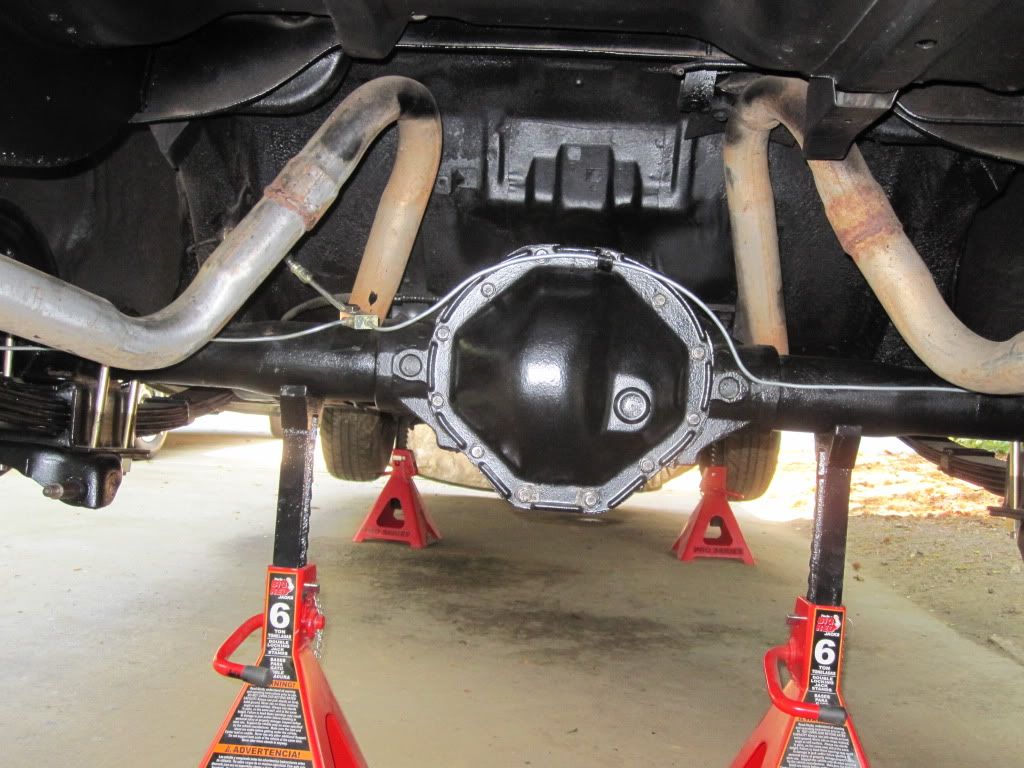 Changed the pinion seal and rear cover gasket. Serviced the rear with Royal Purple Max Gear SAE 75W-90. 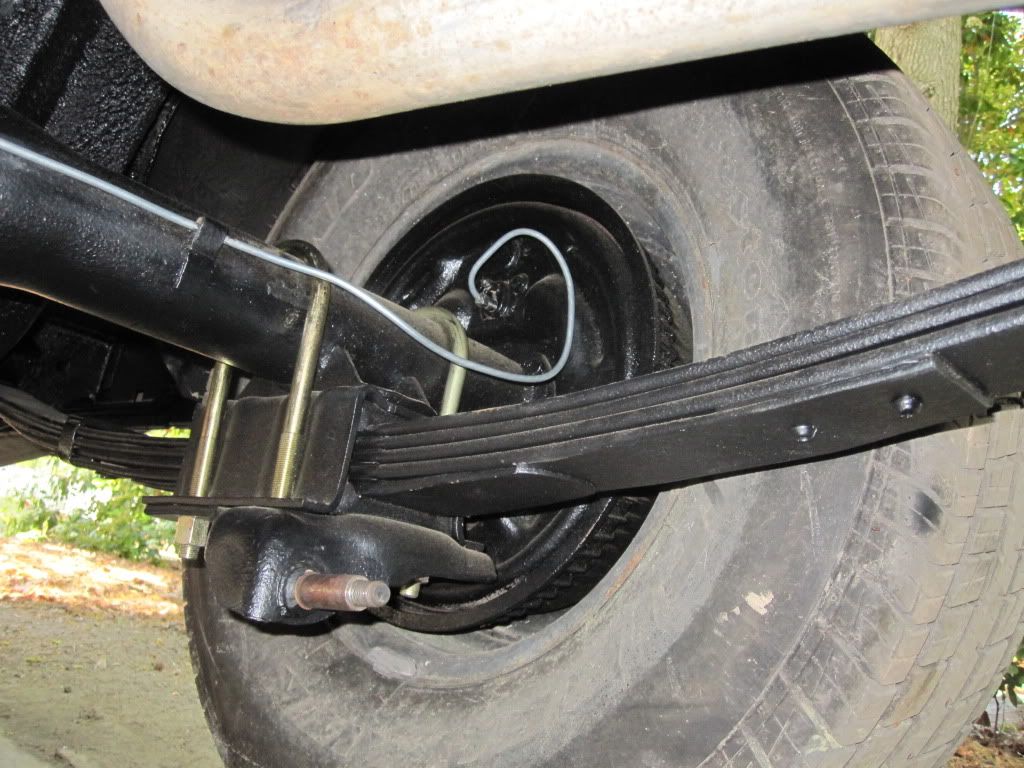 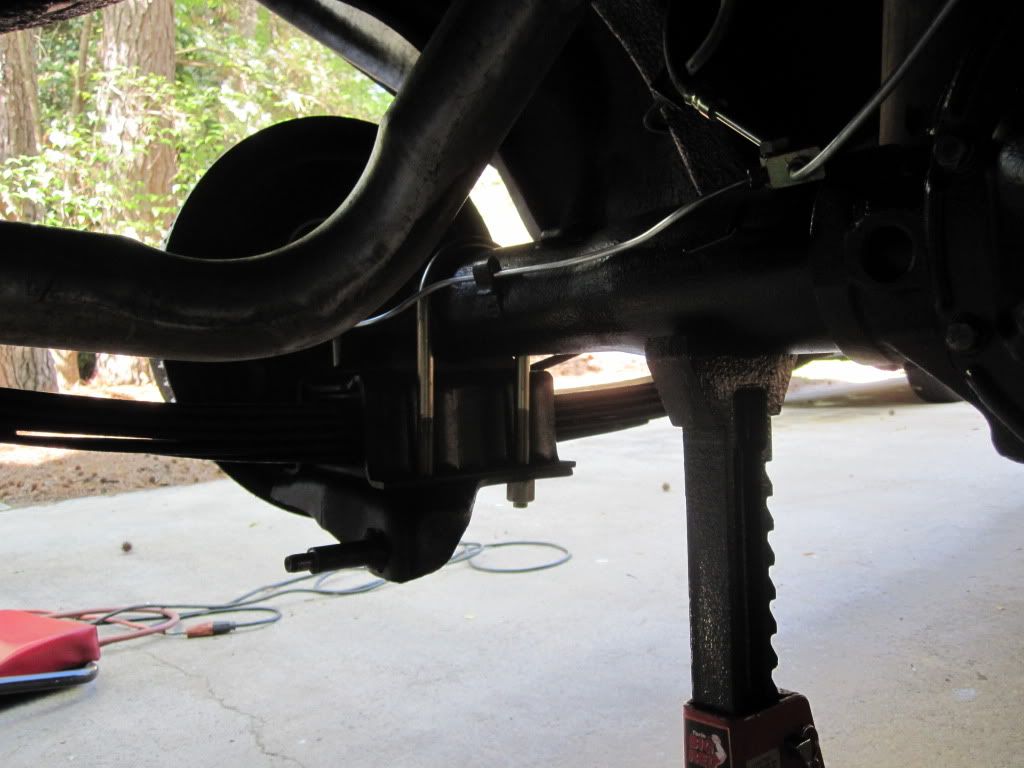 I replaced the U-bolts and cleaned and greased the springs.  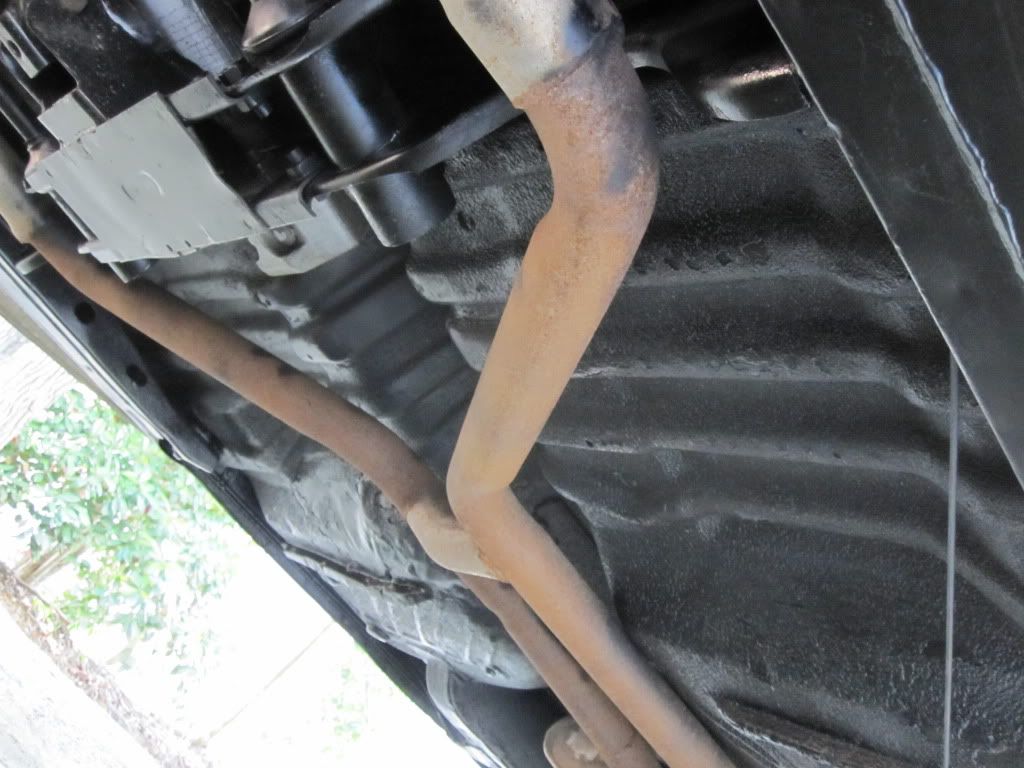 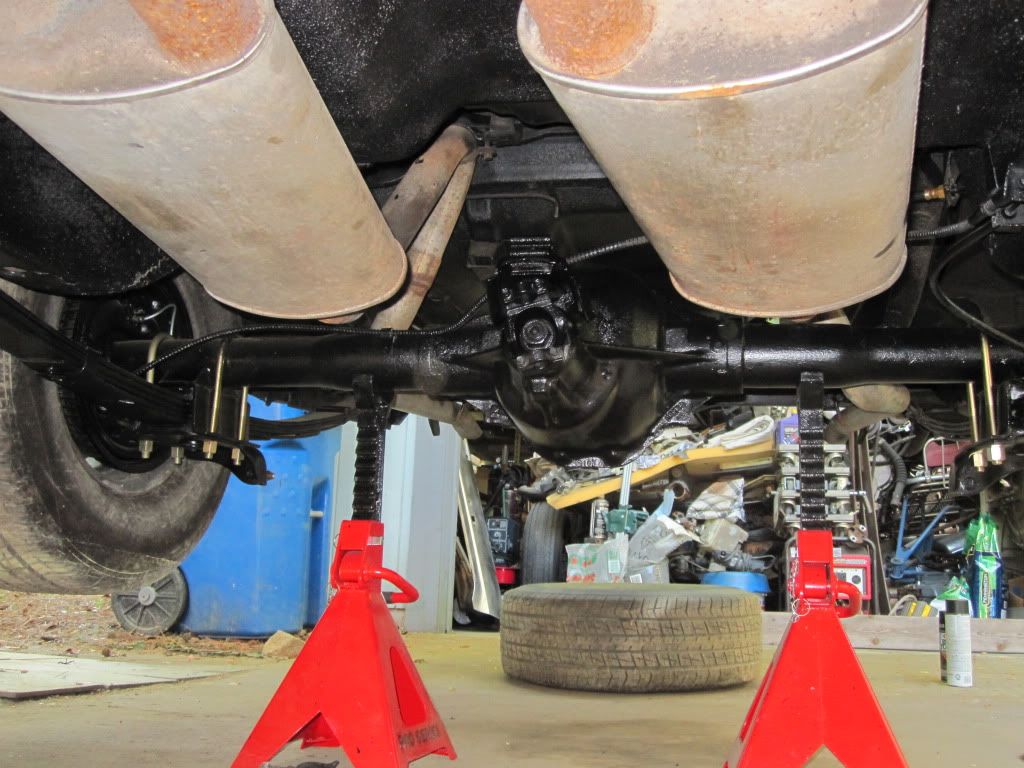 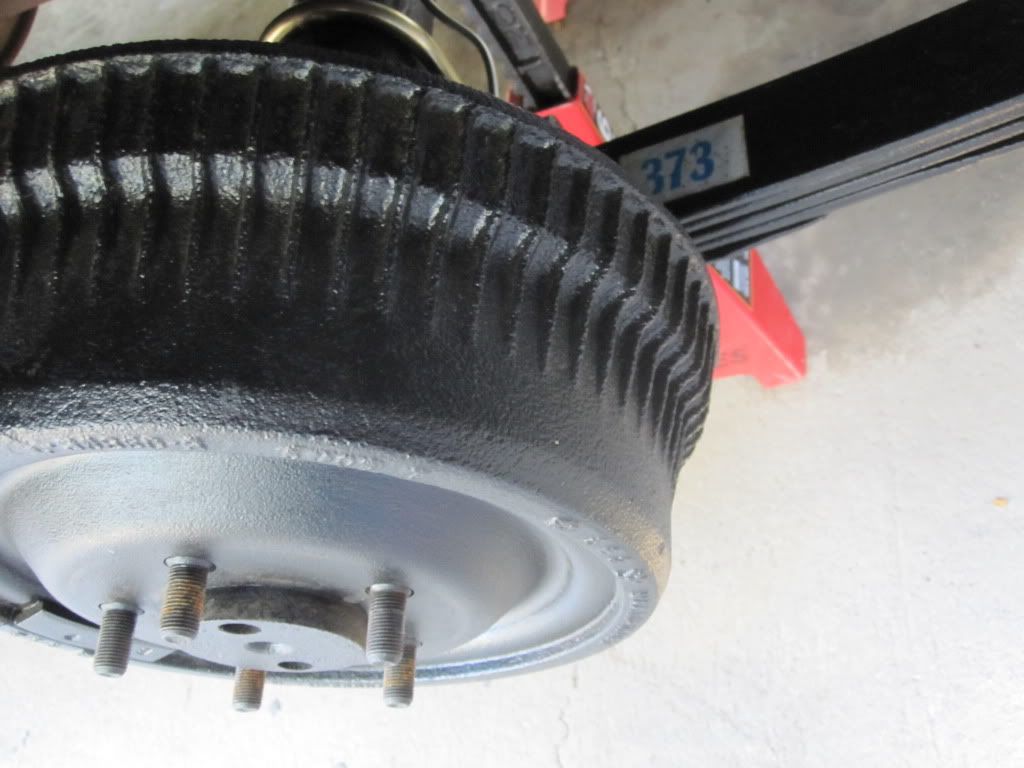 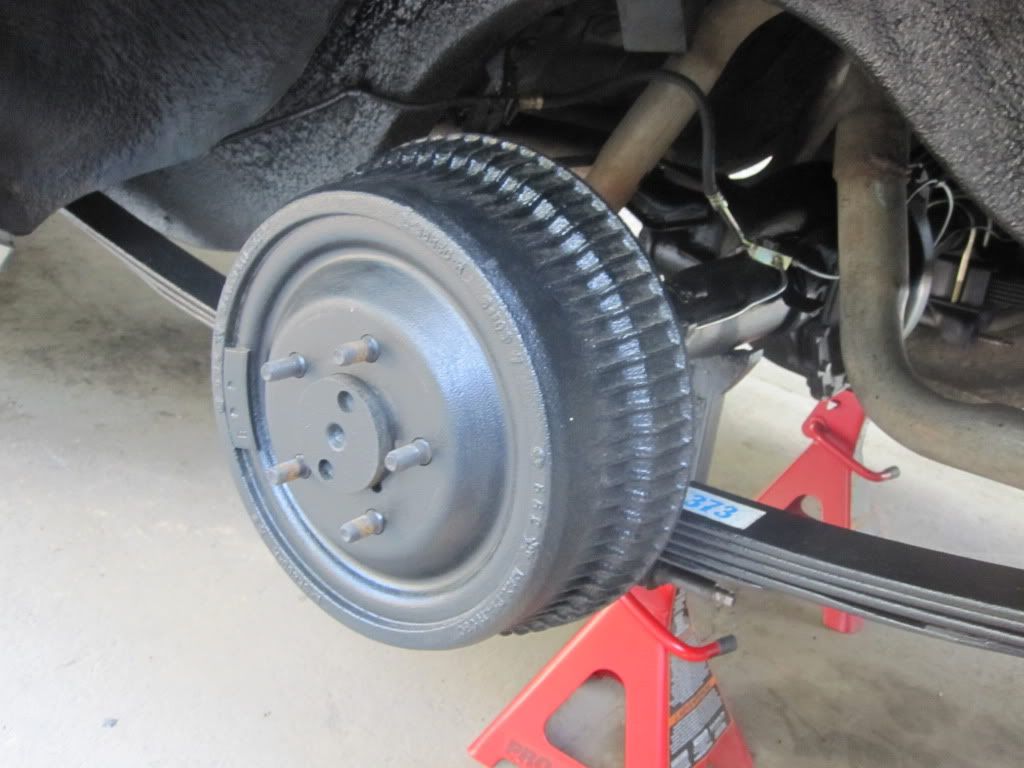 The wheel wells got a coating of DupliColor rubberized undercoating UC101 16oz cans. 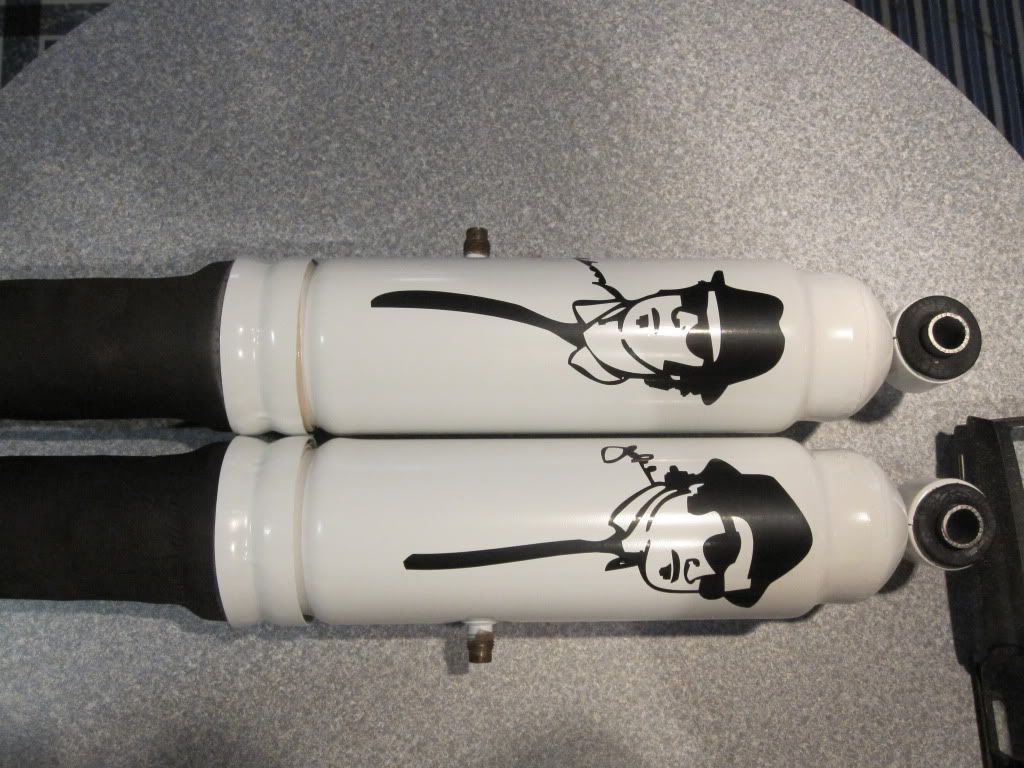 Alright already with the stickers, this was my last extra set I had and they needed to go somewhere..... ;D |
|
|
|
Post by sigmfsk on Mar 15, 2012 1:51:06 GMT -5
Alright already with the stickers, this was my last extra set I had and they needed to go somewhere..... ;D heheh, that's cool. Love the writeups! |
|
|
|
Post by blusmbl on Mar 25, 2012 11:38:26 GMT -5
|
|
|
|
Post by sigmfsk on Mar 25, 2012 12:36:09 GMT -5
|
|
|
|
Post by blusmbl on Mar 26, 2012 20:11:49 GMT -5
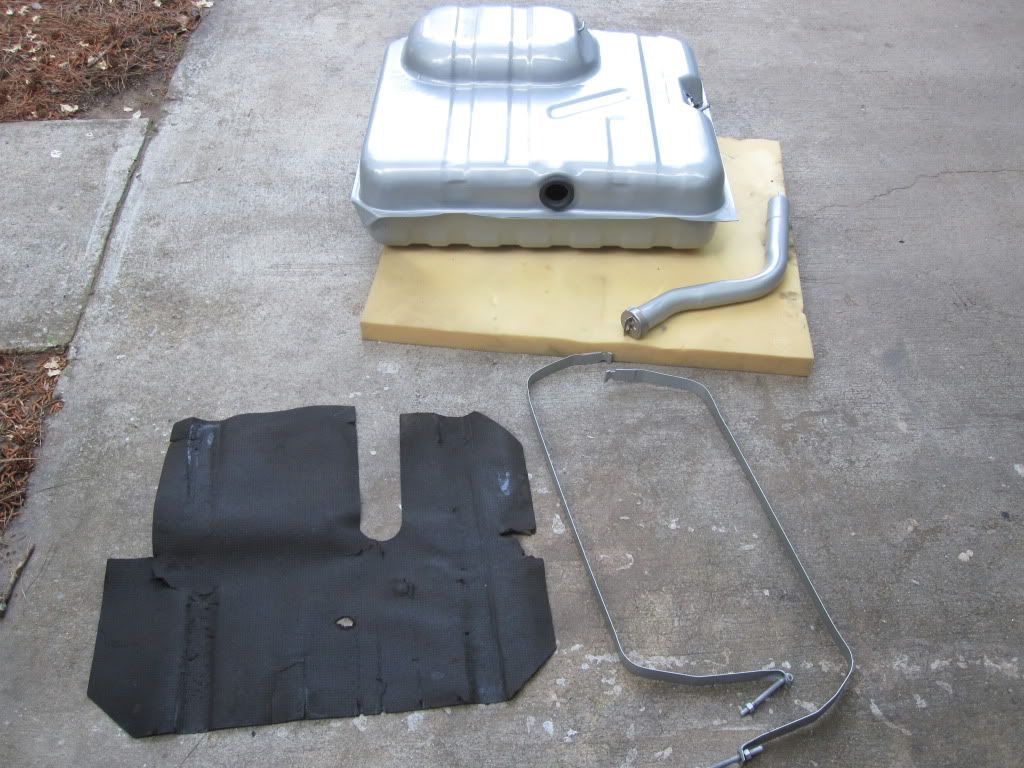
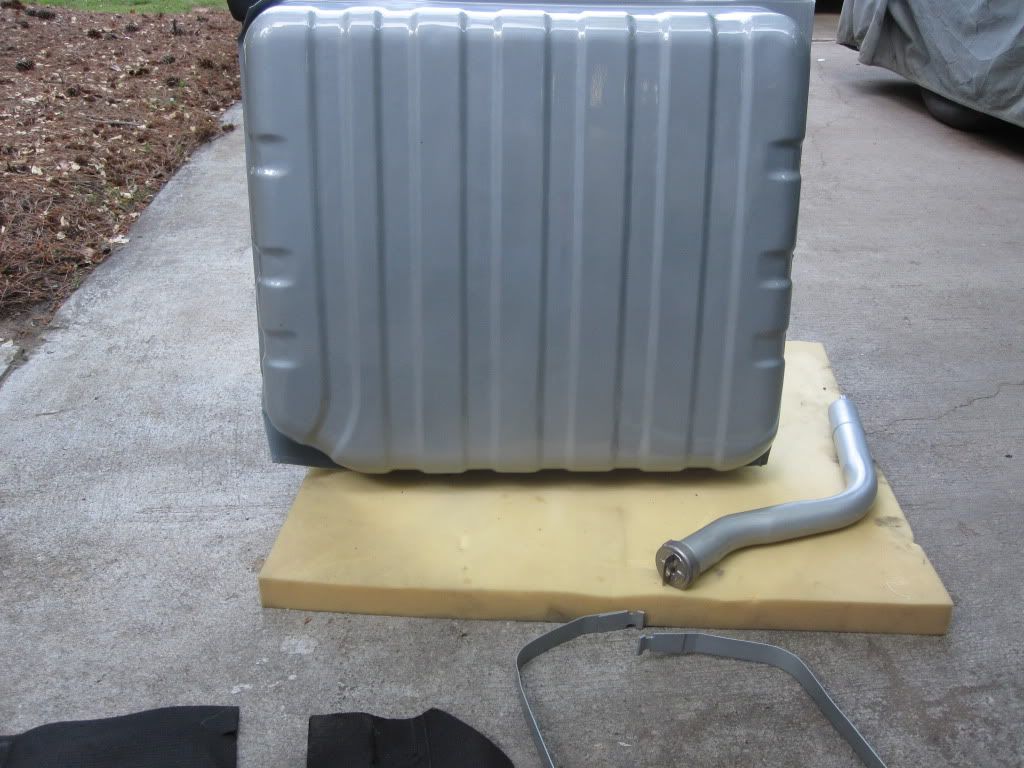
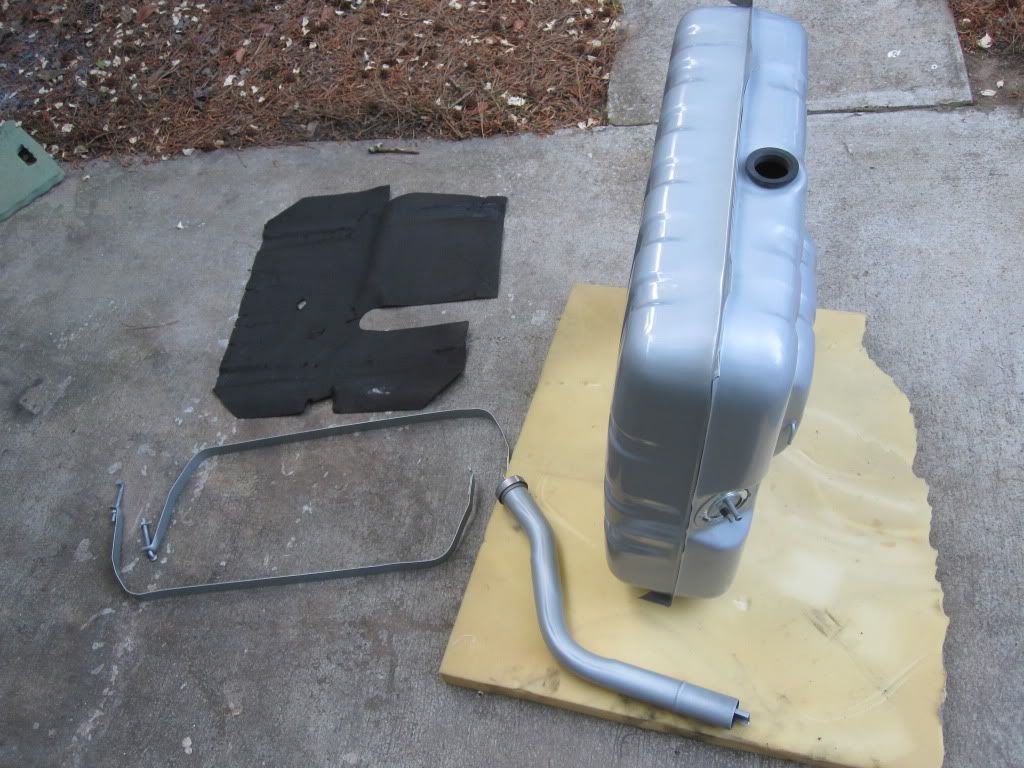
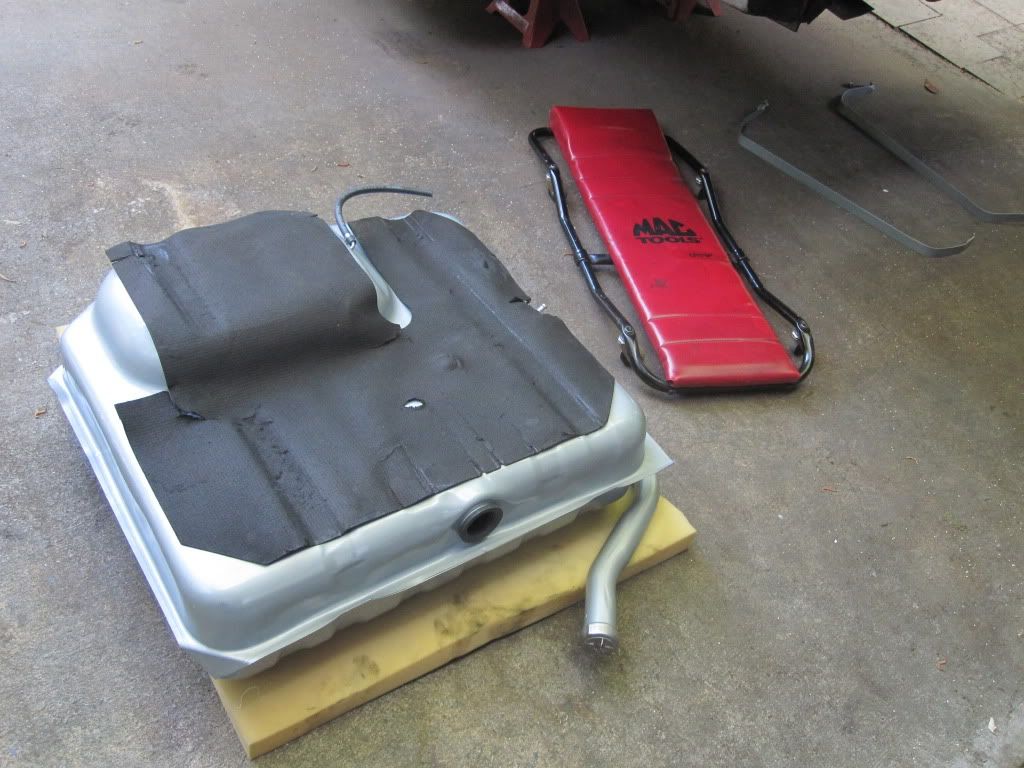
Arthur, yes the tank fit really well. I couldn't see any differences when I put them side by side. I can't seem to find the receipt for this but I believe it is a Spectra tank. It came with a new neck seal and sender ring and seal. I figured you would cut the top of your tank off and put a fuel cell in it, but it would look stock from underneath. If you were going to do something like that I would go with a new tank, less boom more zoom.  That way you can cut and weld it and make the top end the way you need to. |
|
|
|
Post by sigmfsk on Mar 27, 2012 3:53:56 GMT -5
Thanks for the info, Blusmbl. I'm a long way from working on my gas tank, but the rough plan is to install this weld-in baffle with horizontal fuel pump / filter than sticks out the front: from bluesmobiles.proboards.com/index.cgi?action=gotopost&board=owners&thread=45&post=3329So it is a cut-and-weld modification to the stock gas tank, but it's not doing anything wild with the top - just the front end. Being that your new tank fit so well, that may push my decision in that direction. thanks, arthur |
|
|
|
Post by blusmbl on Apr 5, 2012 17:26:29 GMT -5
|
|
|
|
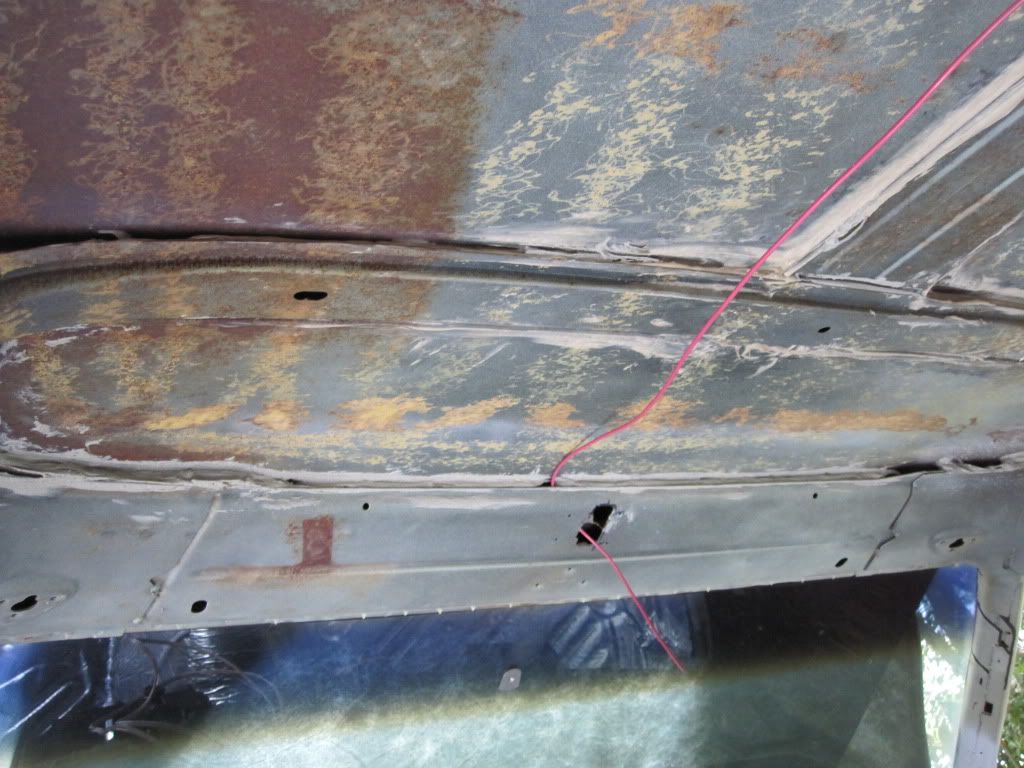
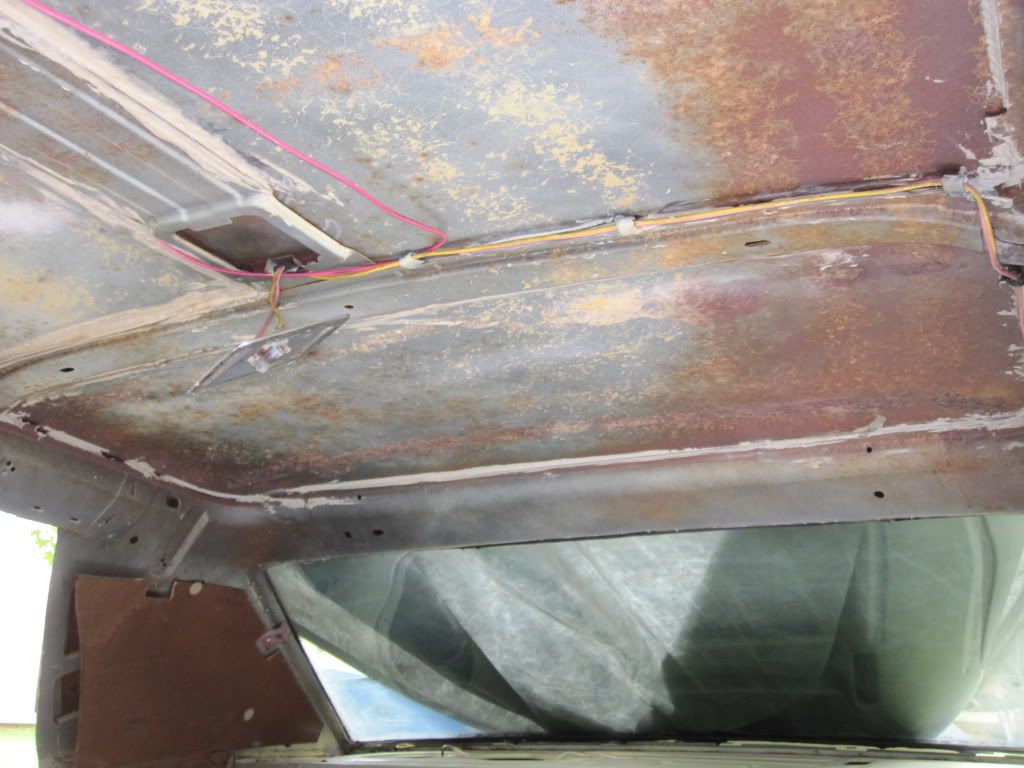
Post by sigmfsk on Apr 5, 2012 18:05:16 GMT -5
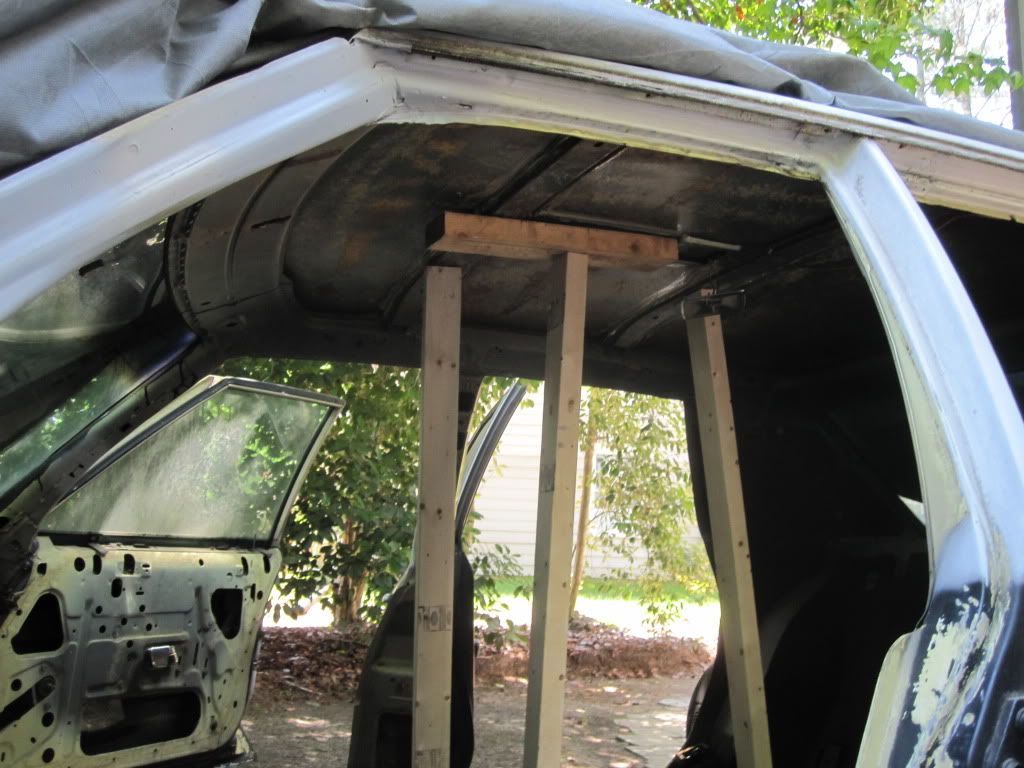
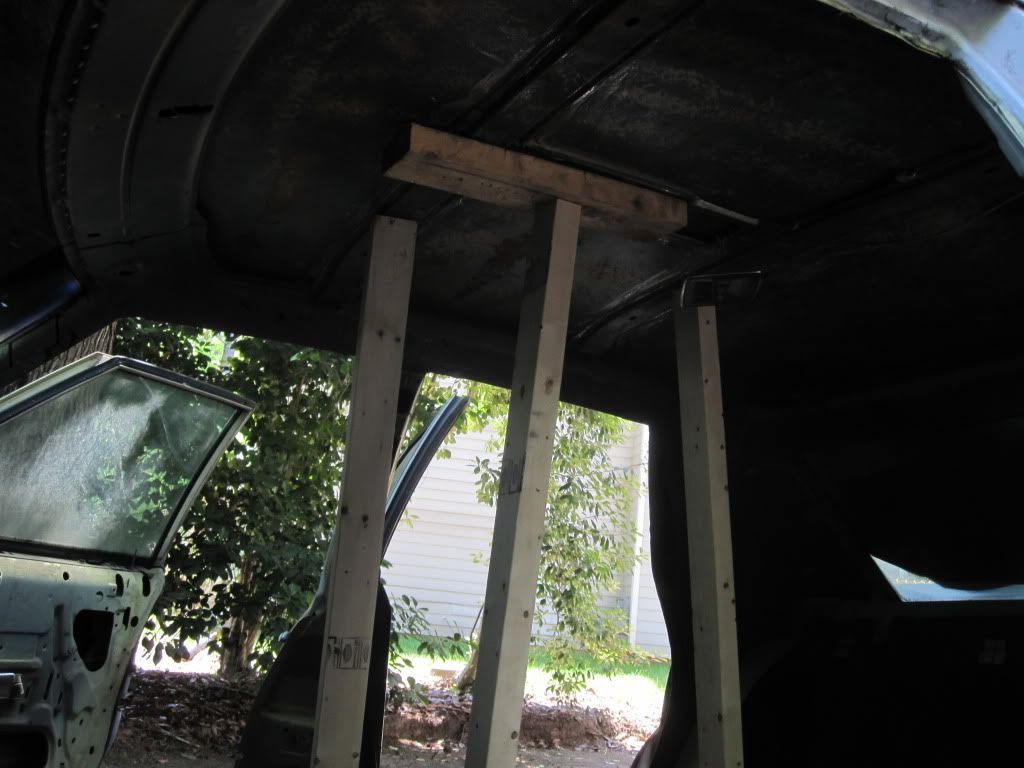
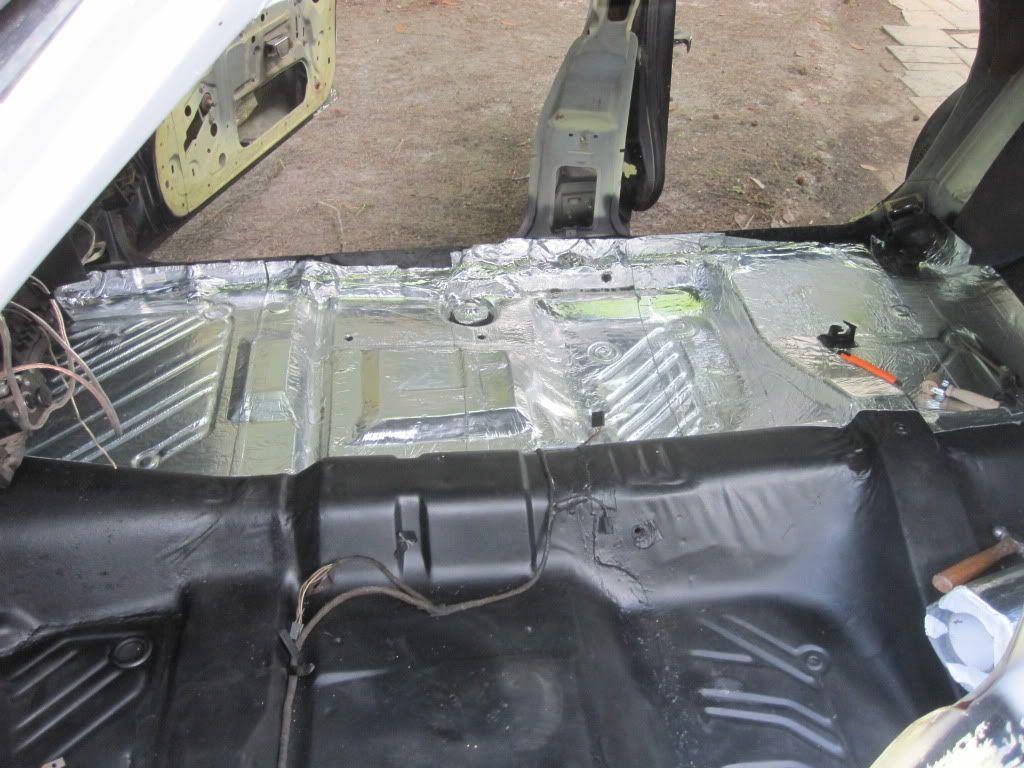
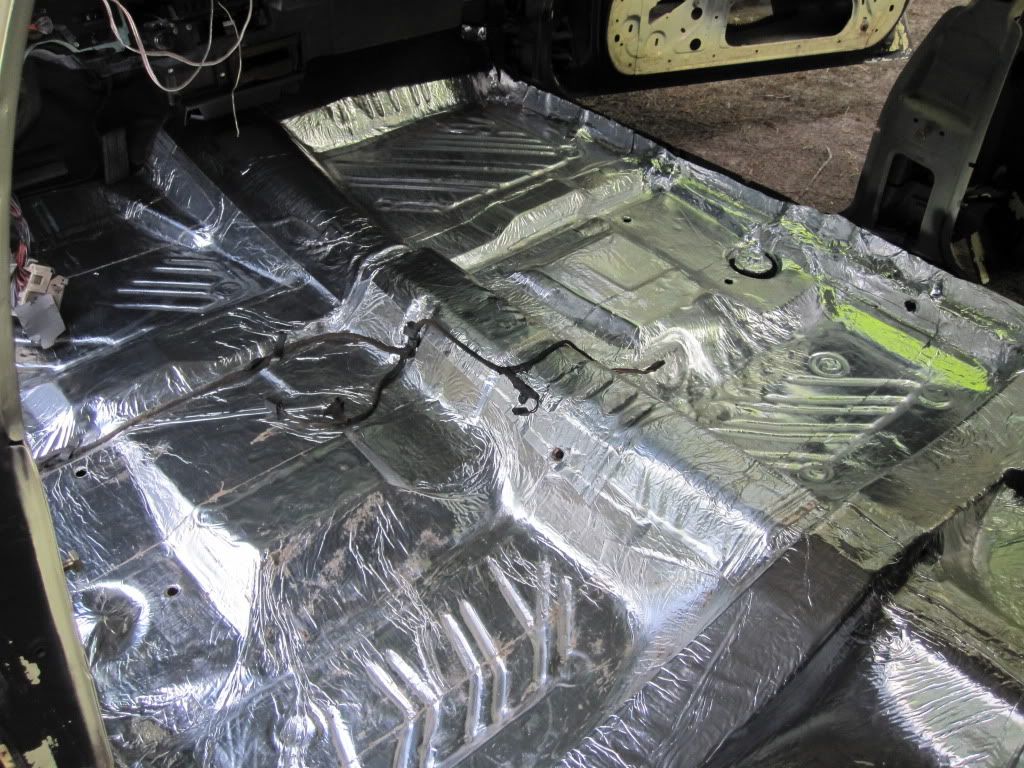
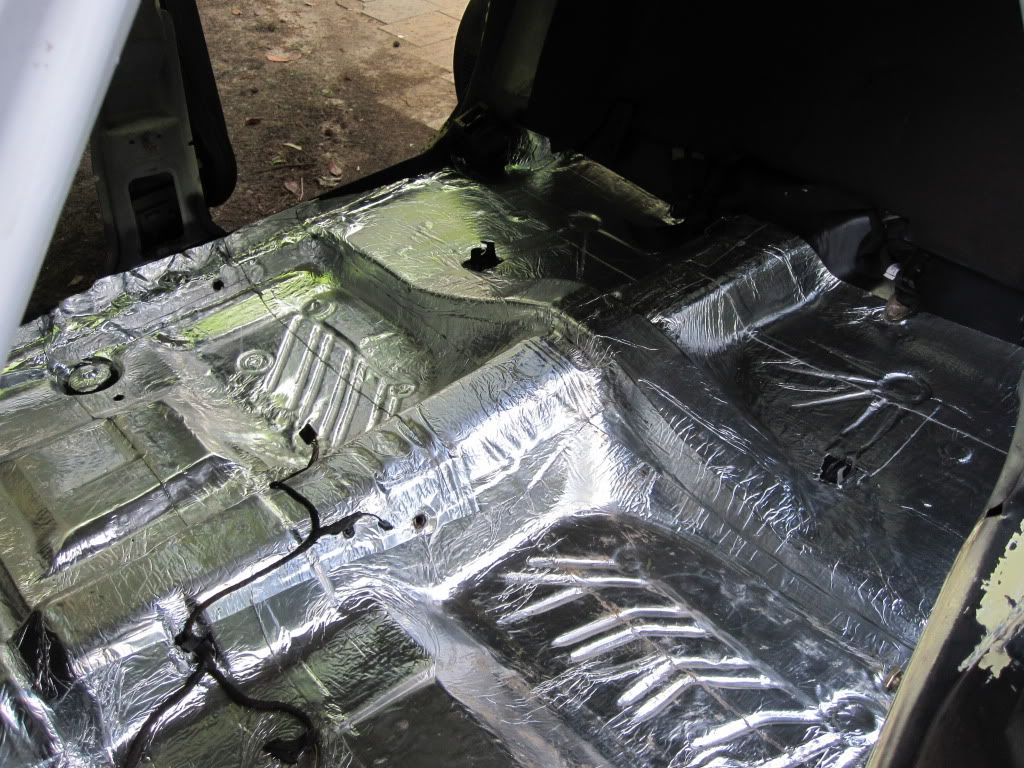
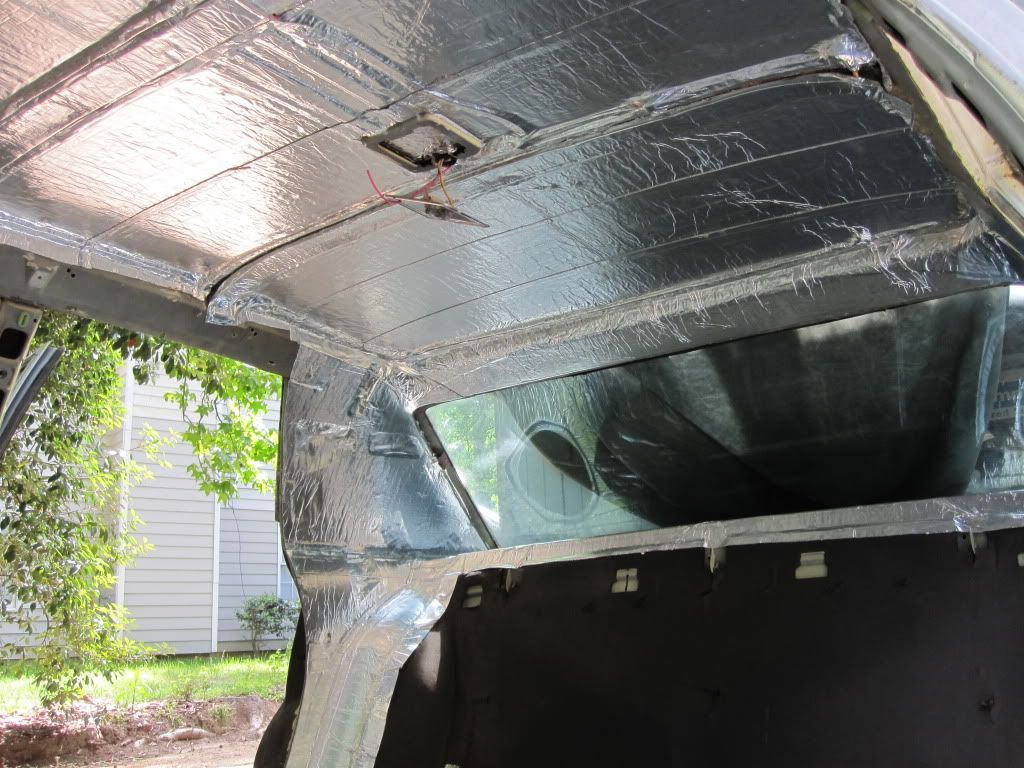
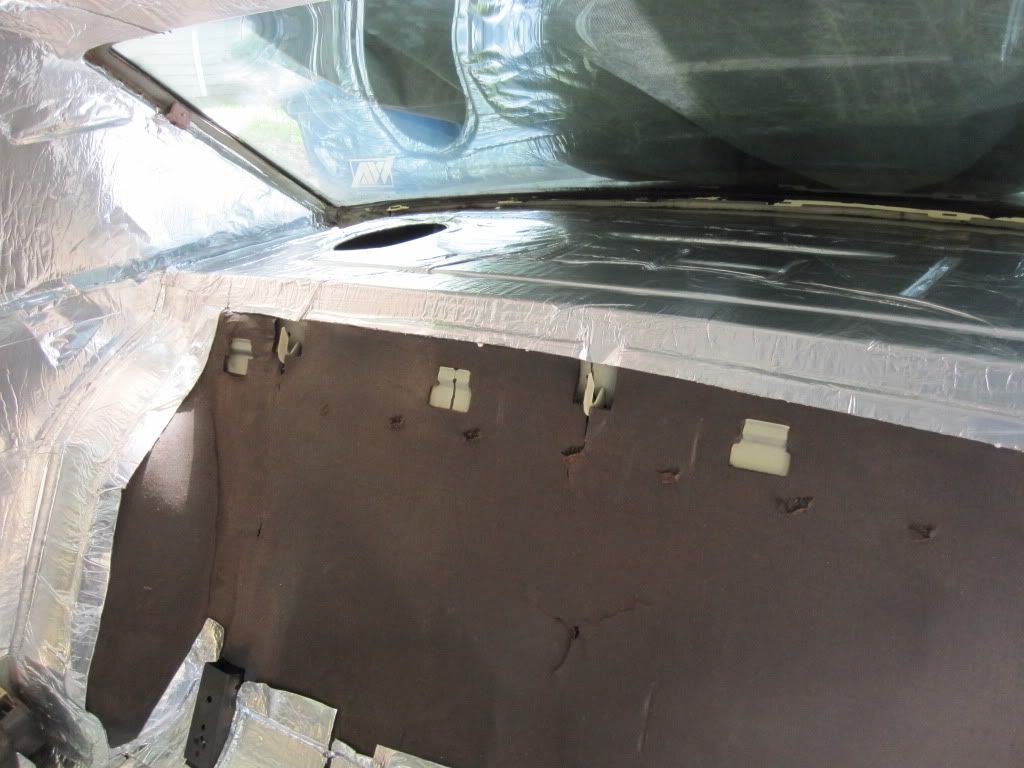
This is glue, strong stuff...I had to re glue the roof braces as someone must have done a dance number up there... Having never driven the car before this restoration I can't say how much quieter it is since installing the Fatmat but it has to help. Are you saying that: 1) something like someone dancing on the roof caused the roof braces to collapse/bend downward, and they came detached from the roof 2) then roof popped back up, so there was a gap between the brace and the roof 3) so you epoxied the brace to the roof, with the wood support pushing the braces up as high as possible against the roof in the correct position Looks good! Your fatman job looks fantastic! I've been wondering what to do about sound deadning / insulation and it looks like you picked something that turned out great. Why did you pick fatman vs. dynomat? It looks very easy to form, at least compared to when I used dynomat years ago. Why did you elect to re-use the stock cardboard/mat insulator between the back seat and the trunk (instead of using fatman instead, or fatman on top of the stock insulator)? your friend in Monaco comfort, arthur |
|
|
|
Post by Sd.Kfz. 400 on Apr 5, 2012 18:26:27 GMT -5
Does that fatmat-thing condense water between it & the floor,? Sorry for bad english, but I think you get the point.
|
|
|
|
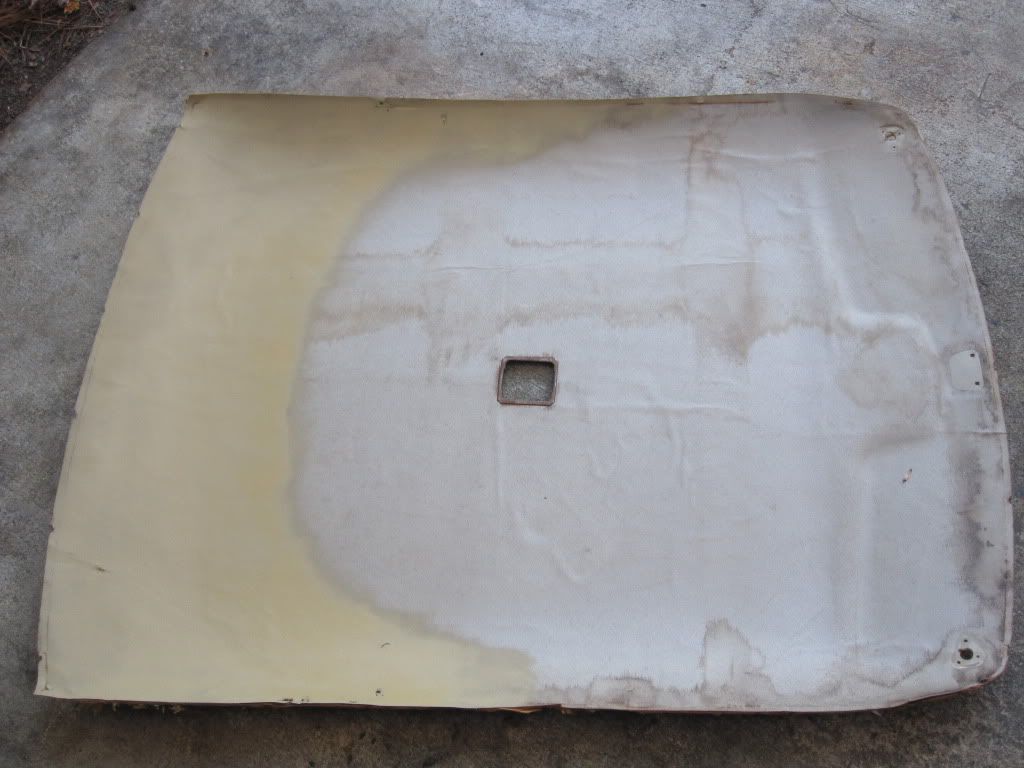
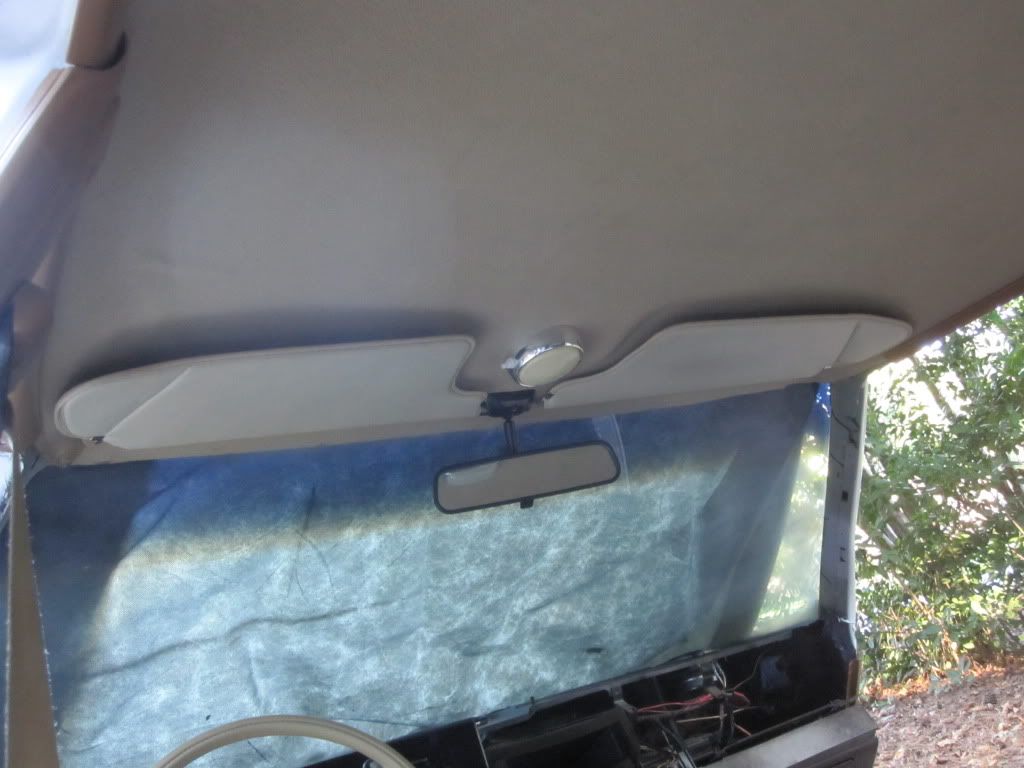
Post by blusmbl on Apr 5, 2012 19:57:21 GMT -5
Yes, the braces were broken away from the factory glue joints and it left the roof flimsy and oil canning. Epoxying the braces back restored the rigidity back to the entire roof and adding the Fatmat makes it thud like the side of a refrigerator. I went with Fatmat Butyl Megamat because it had some good reviews and was cheaper than Dynamat at the time. I paid 200. and free shipping for 100 square feet of mat that came in 2 rolls. It's about 249. now on Ebay. The mat is super sticky, once it's down, it's down. I haven't noticed any condensation between it and the floor, if anything the water sits on top of it and does not soak through. The doors were off the car for some time as I was doing bodywork on it and sometimes it would get rain puddles in it that I was able to just soak up with a sponge. I kept the rear trunk seat divider because it was in o.k. shape but it had a fuzzy dusty film on it that the mat would not stick too no matter how I wiped it. I did replace the rear lh/rh side aft pillar insulation with the mat as the factory insulation had turned to carbon and just fell apart when touched. I used every bit of the Fatmat and put left over scraps in the doors. 
|
|
|
|
Post by spanks79 on Apr 5, 2012 20:40:09 GMT -5
I was wondering when you would post the next chapter in your build. this is good stuff.
I to was trying to figure out how to handle insulation. I like the looks of the fatmat. I'll have to keep that in mind.
|
|
|
|
Post by blusmbl on Apr 11, 2012 19:38:49 GMT -5
|
|
|
|
Post by sigmfsk on Apr 12, 2012 8:57:54 GMT -5
...The top layer was like loose sand, you could put a scratch to it about a 1/16 deep and it would come off like dust. To fix this I actually sandblasted each panel with sand to scrape off the top layer and get down to the stable base... I never thought of sandblasting the plastic. Did you sandblast the actual door pocket piece? I had troubles with my pocket piece: > This pocket gave me the most trouble during prep-work. Although > both the pocket and the door panel were "flexible" plastic (not > being affected by the acetone test), there's clearly something > different about them, as the door pocket was just crumbling > apart. I scrubbed and scrubbed and kept getting residue. > Although it's important to scrub down until there's a clean part > (for best paint adhesion), it doesn't do much good to scrub down > if it results in the part disappearing (if the entire part is crumbly). > So I used my best judgment on how deep to scrub on all the > crumbly parts. Read more: www.bluesmobiles.proboards.com/index.cgi?board=blumohowto&action=display&thread=311#ixzz1rplnCCu3--------------- And TK was also afraid of eating through the entire plastic piece: > After removing the panel from the door, I sanded it down with > some very fine sandpaper. I eventually had to come to a point > where I decided it was "good enough". This is because I felt that > if I were to sand for a long enough time, the entire panel would > literally be just a pile of dust on the ground. > > Like you said, there is something weird about the plastic that > makes up the lower panels. They seem firm enough to the touch, > but put a piece of sandpaper to them, or the scrub brush that > you used, and they just keep crumbling... and crumbling, with no > end in sight. Read more: www.bluesmobiles.proboards.com/index.cgi?board=blumohowto&action=display&thread=311#ixzz1rpmLHGSSBut it sounds like there is an end. When you sandblasted, it ate away all that loose stuff (without eating away the entire panel) and gave you a solid foundation? Looking forward to continuing updates; good stuff! /arthur |
|
|
|
Post by blusmbl on Apr 17, 2012 20:50:03 GMT -5
|
|


 . The rear brake lines had been replaced when I got the car so I just cleaned them up. The rear had been changed to the 9 1/4 but it still has civilian springs. The car had Monroe air shocks, I cleaned them up and repainted them and bought a new plumbing kit for them. I routed the lines through the rear frames and out the bumper openings and up to the fuel door where it can be serviced. I haven't done anything to the mufflers, they are serviceable but I think I will replace them in the future. They are slightly cobbled up at the front where they attach to the manifolds.

 That way you can cut and weld it and make the top end the way you need to.
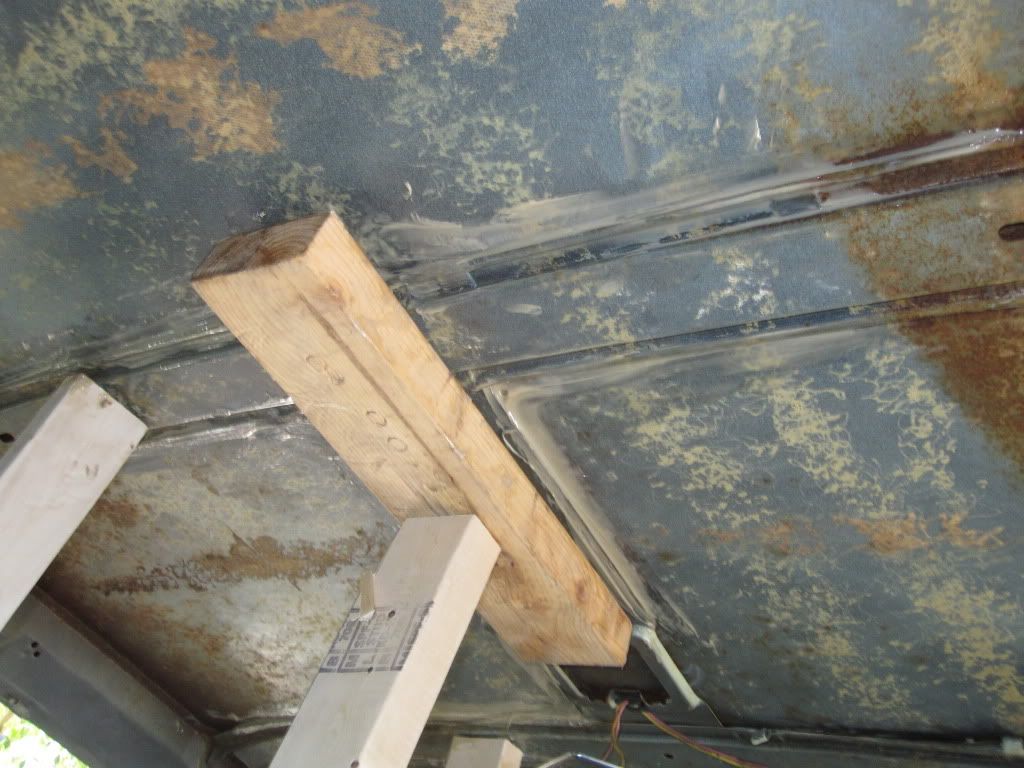


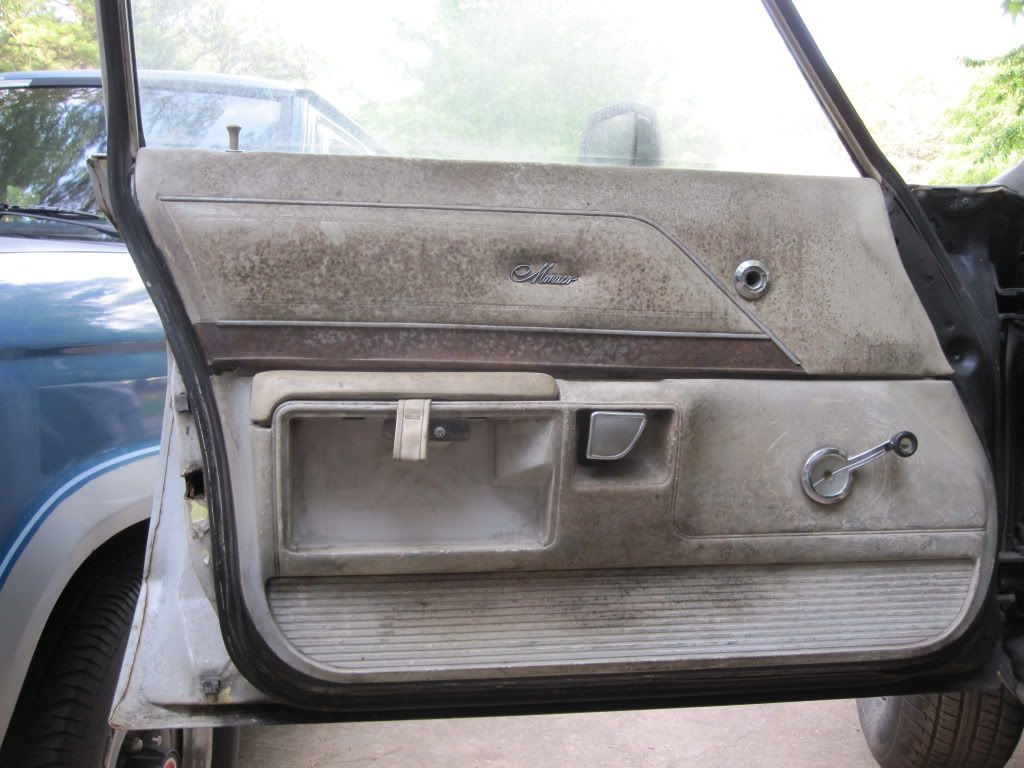
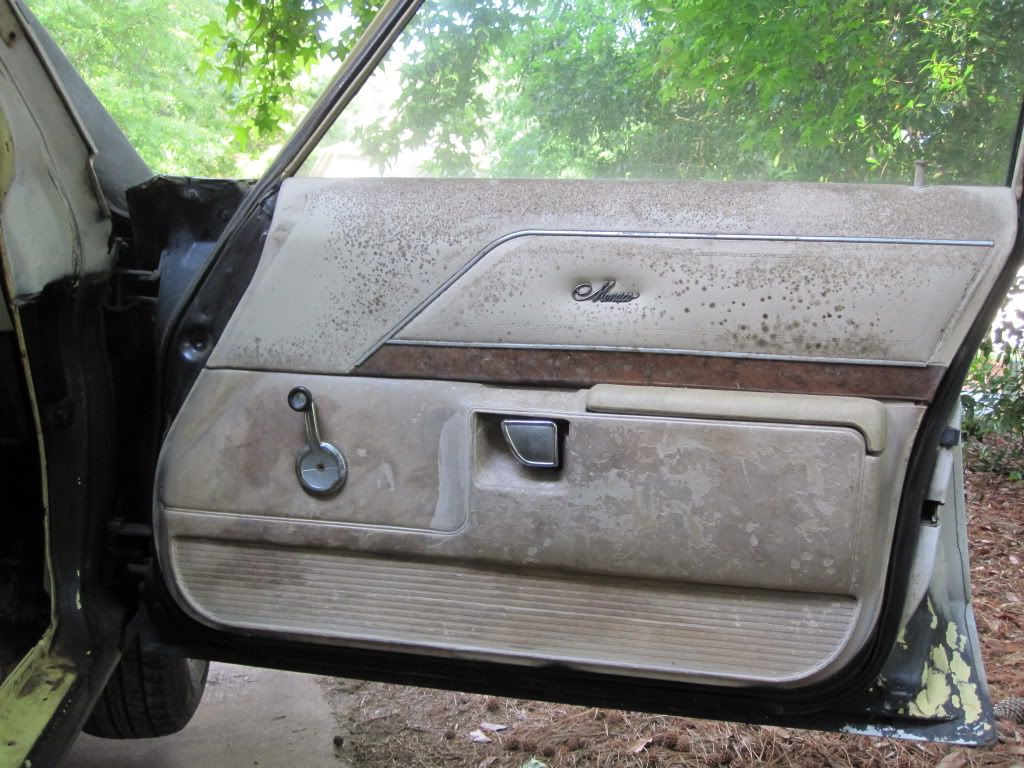
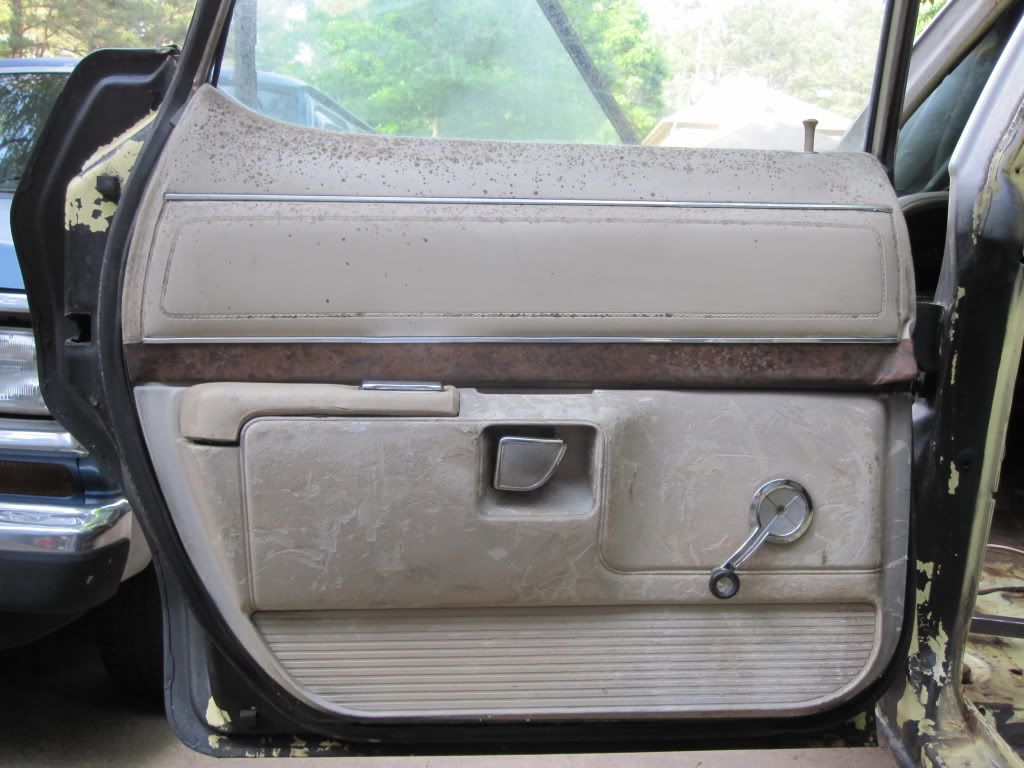
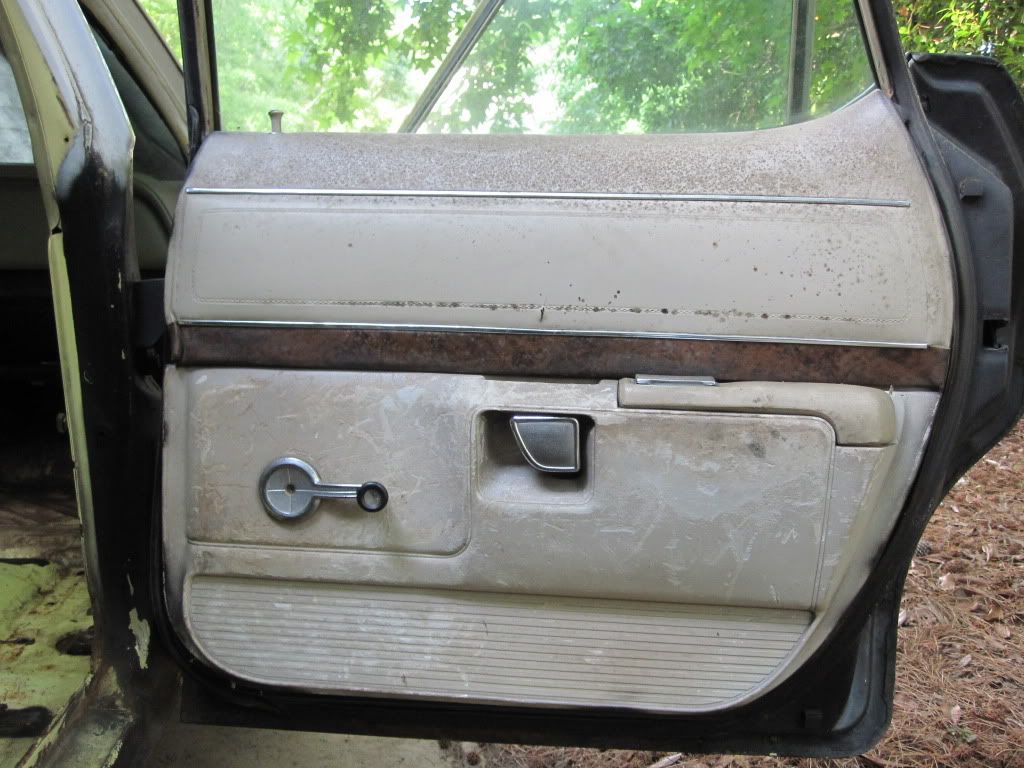
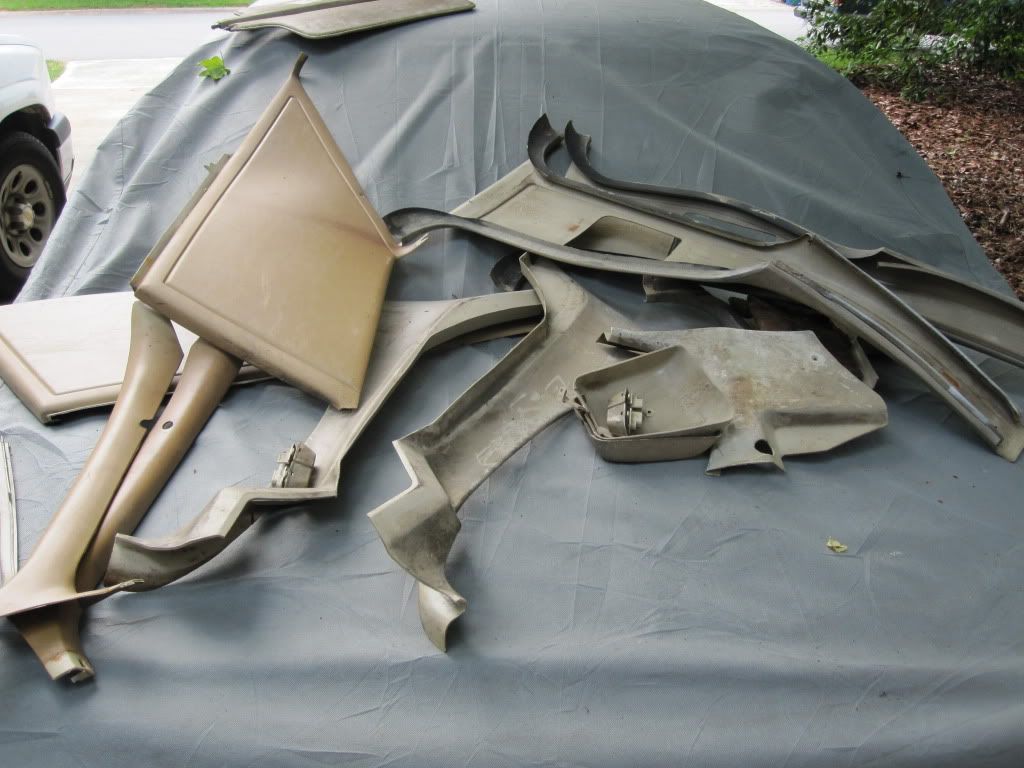
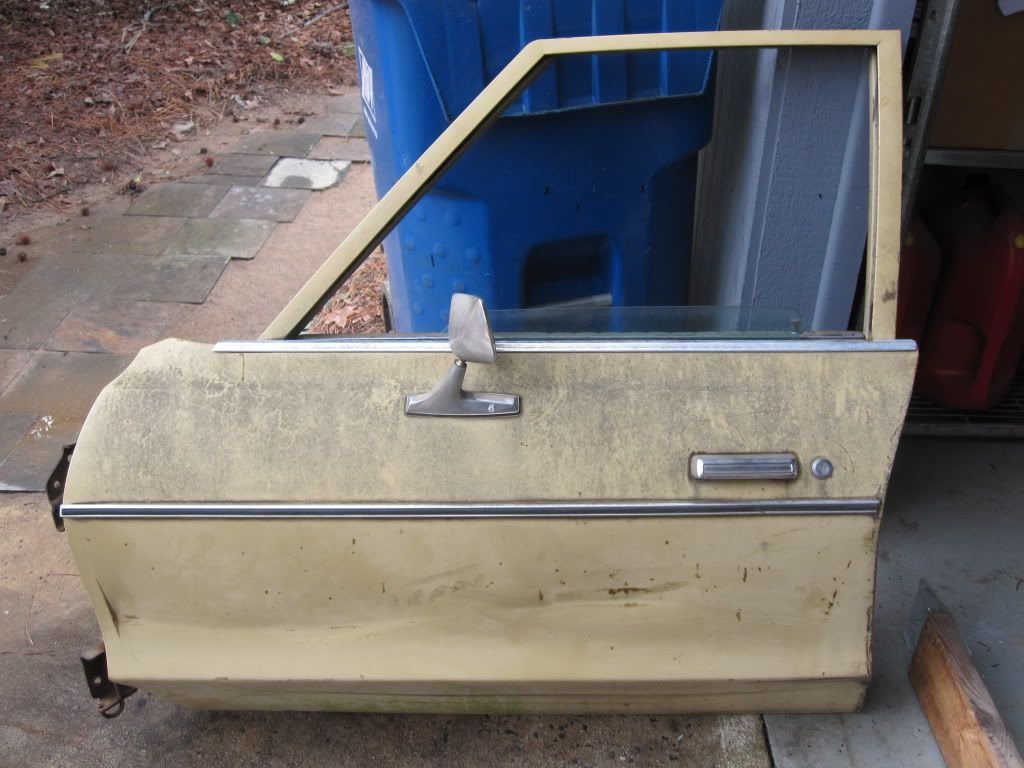
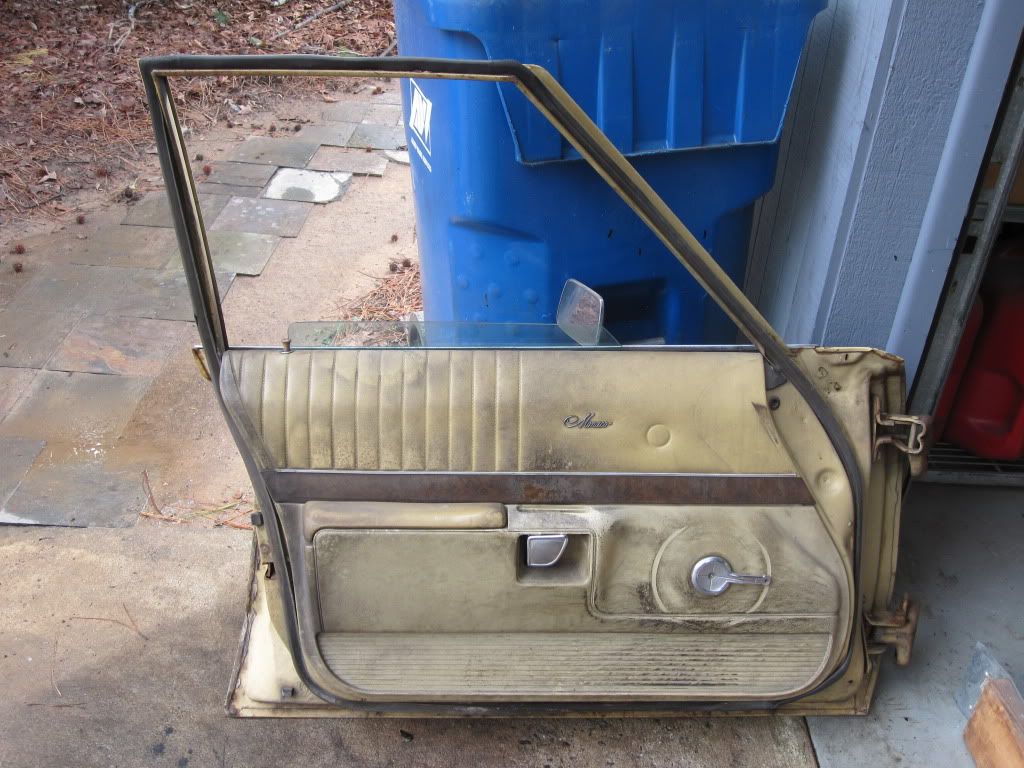
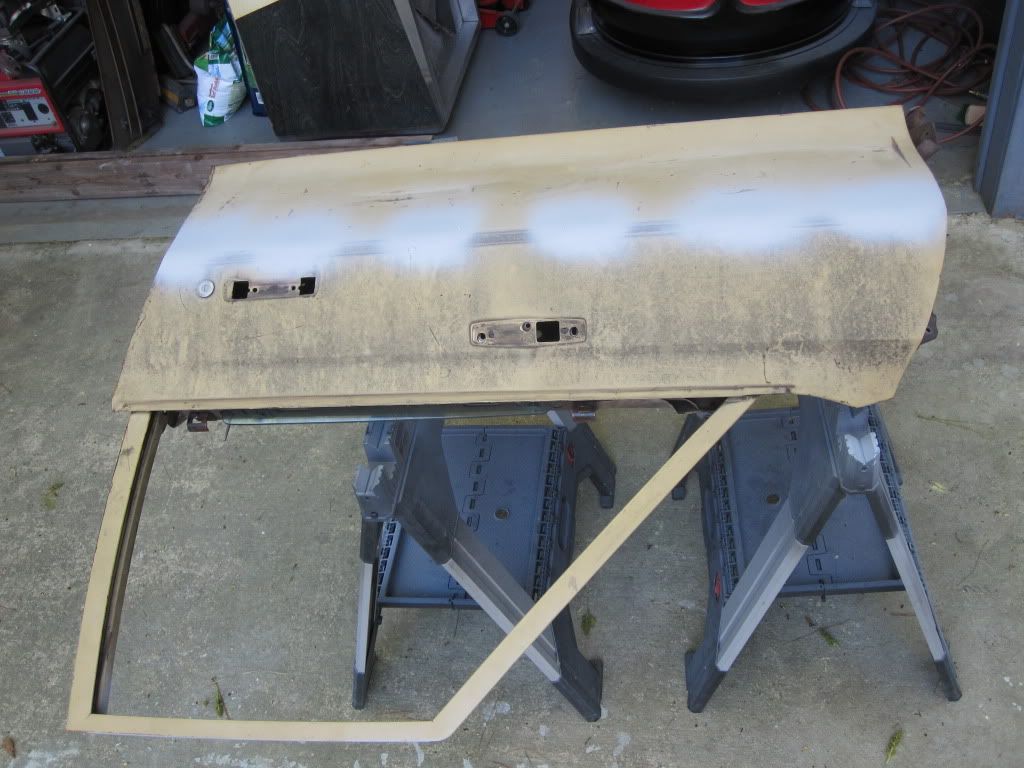
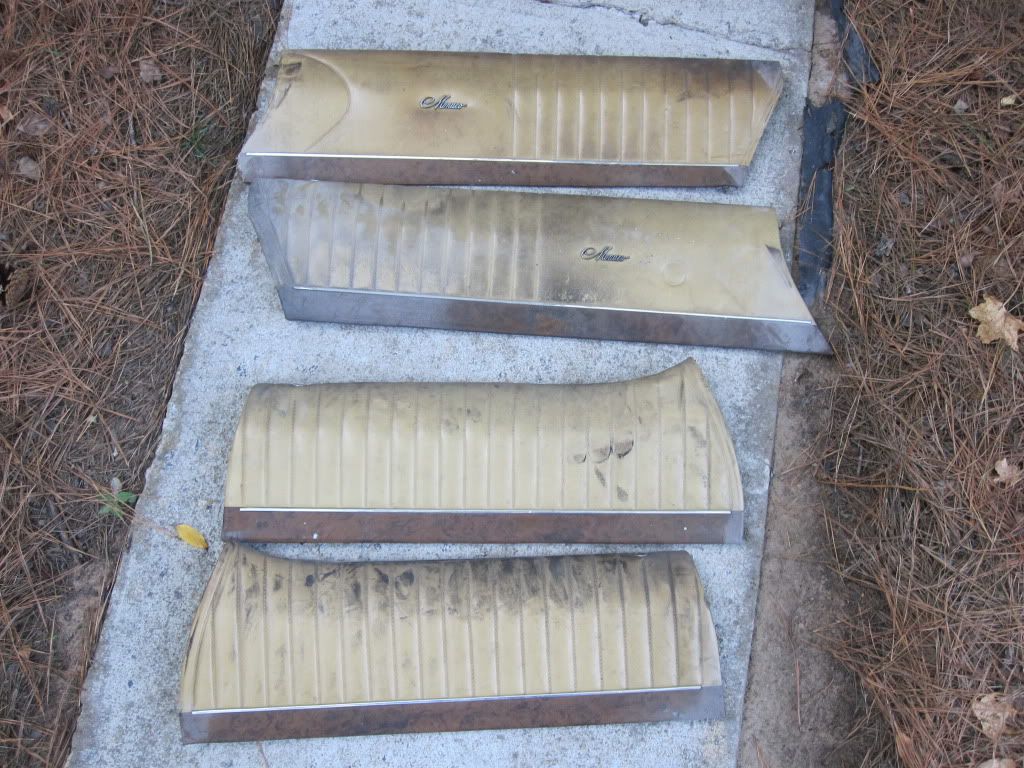
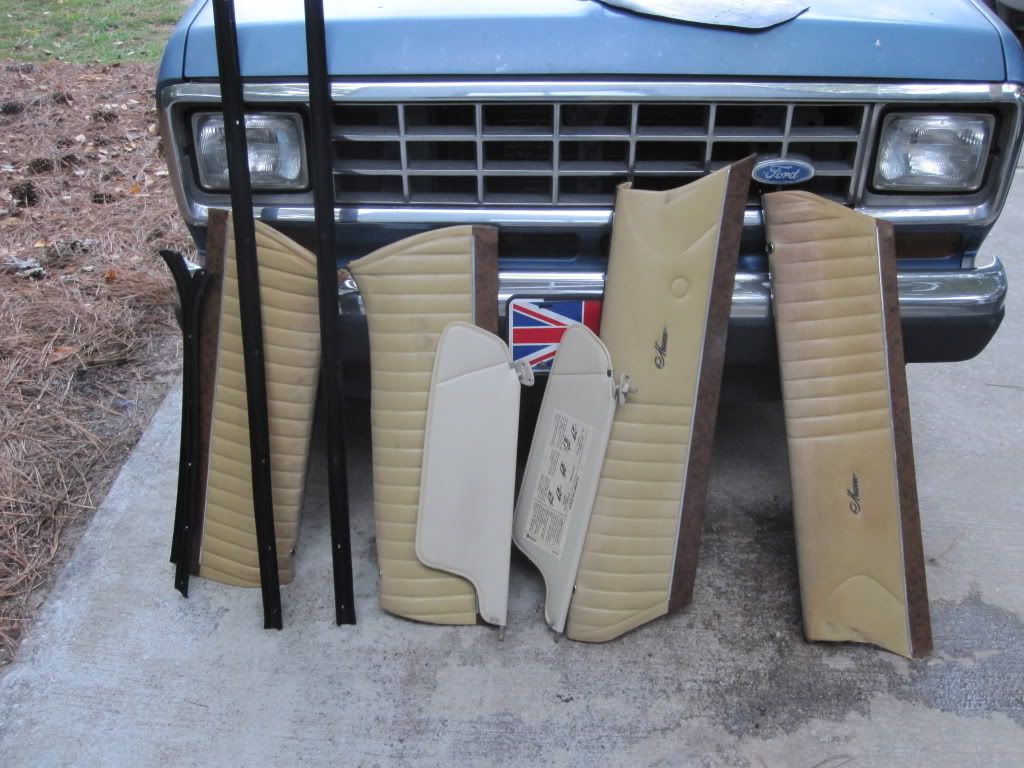
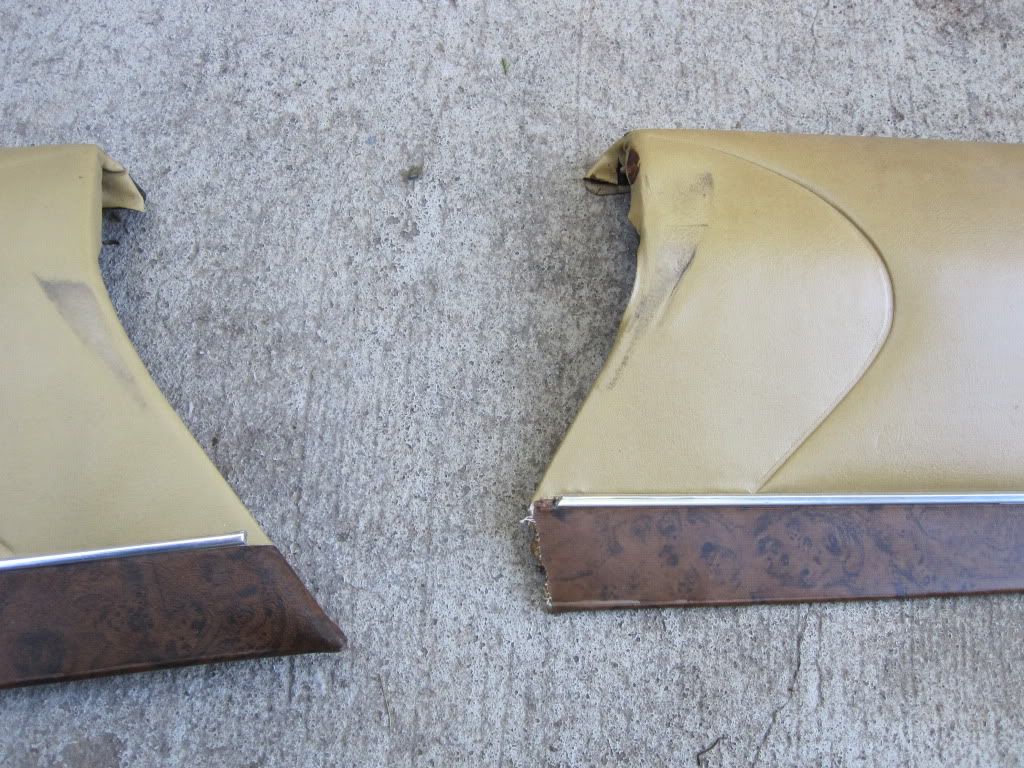
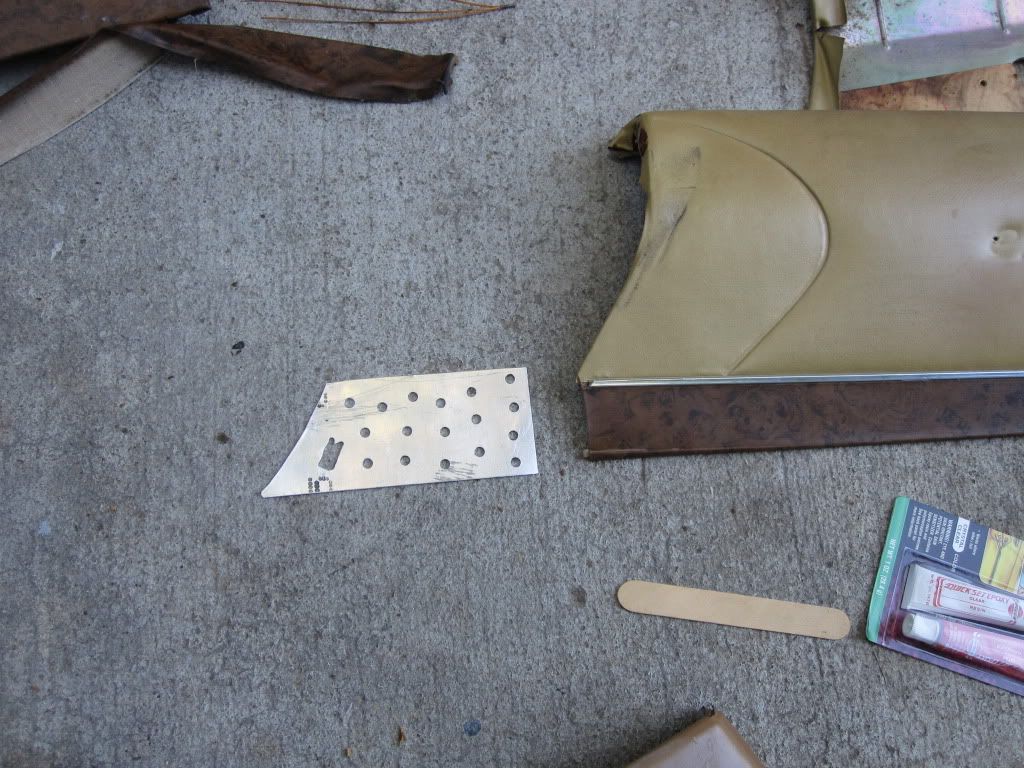
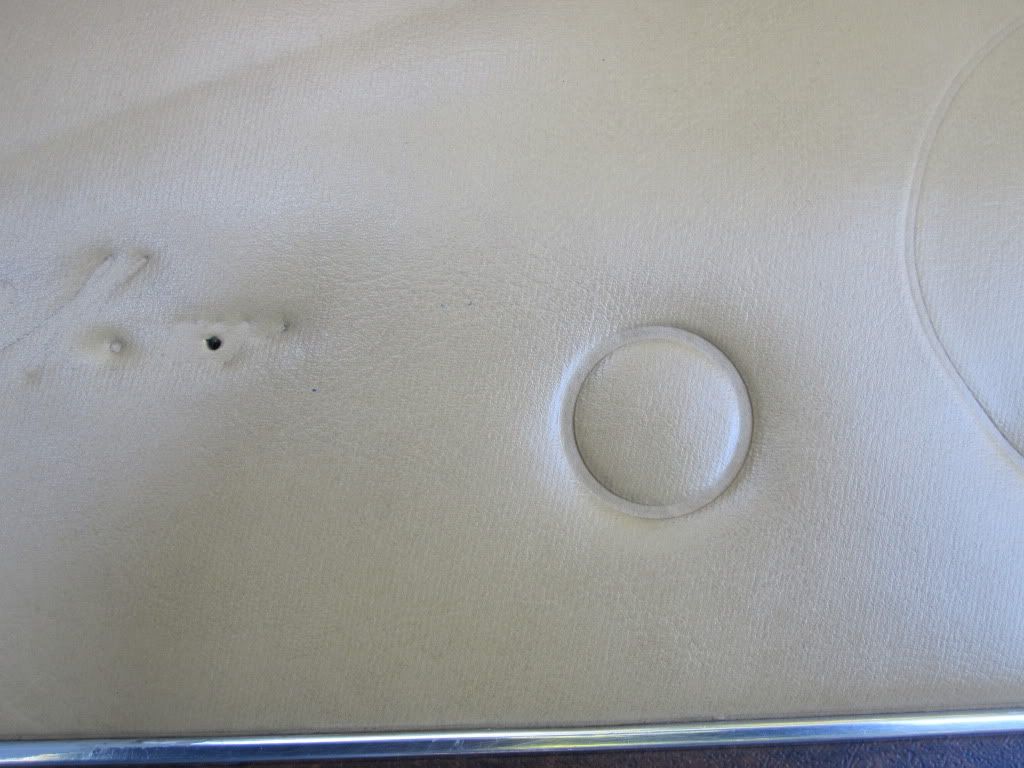
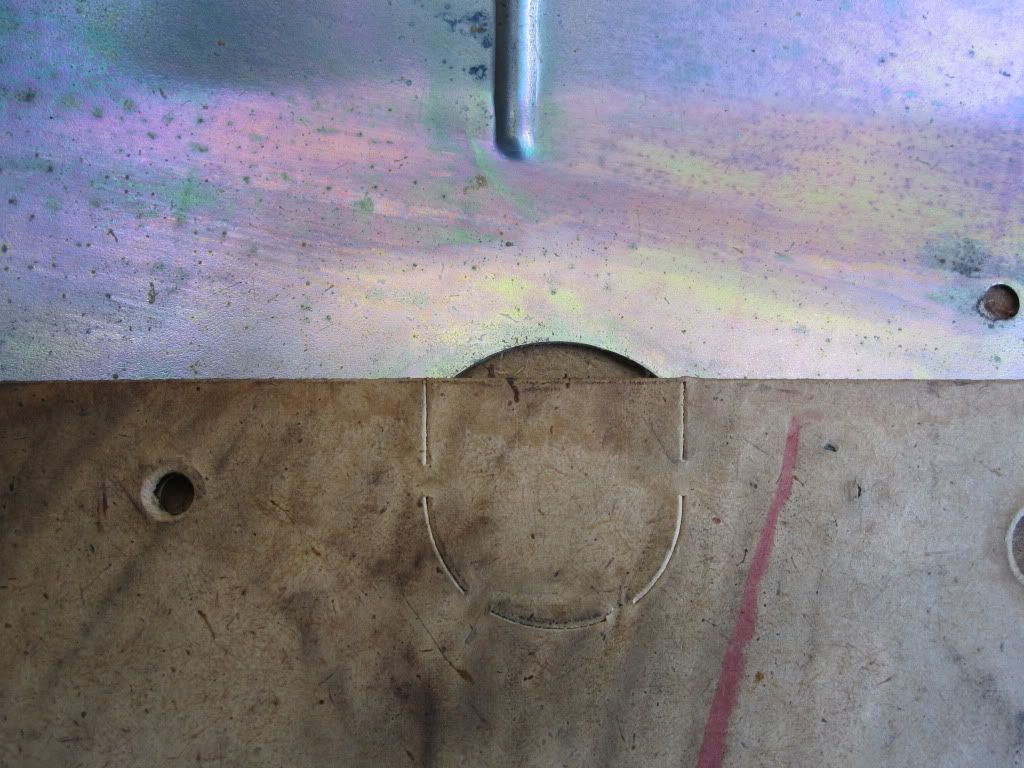
 . I had the drivers door pocket but the plastic hinge was broken. I fixed this with a piano hinge later in the rebuild. You can see how deteriorated the plastic is, all of the plastic was like this. The southern cars get all of the polymers cooked out of them. The top layer was like loose sand, you could put a scratch to it about a 1/16 deep and it would come off like dust. To fix this I actually sandblasted each panel with sand to scrape off the top layer and get down to the stable base, then I DA'ed them with 80 grit and 180 grit and hand sanded the grooves. All the panels were painted with SEM 15173 Camel flexible color coat spray paint.