|
|
Post by countrybunker on Apr 5, 2016 21:43:18 GMT -5
Hopefully my man! Can't wait to get it in the car! Not having much luck lately. I sprayed the trunk with undercoating. Then applies the spatter paint. The undercoating was turning the spatter brown in spots. I gave it a few days for everythingto dry good, and applied another coat of spatter. Didn't make no difference. Still turning brown in spots. Driving me nuts!!   |
|
|
|
Post by spanks79 on Apr 6, 2016 8:02:39 GMT -5
Hopefully my man! Can't wait to get it in the car! Not having much luck lately. I sprayed the trunk with undercoating. Then applies the spatter paint. The undercoating was turning the spatter brown in spots. I gave it a few days for everythingto dry good, and applied another coat of spatter. Didn't make no difference. Still turning brown in spots. Driving me nuts!! It will drop down a bunch. A lot of weight still missing off that car! Just curious, why did you decide to use undercoat then top coat as opposed to priming then spatter paint? It might depend on the type of undercoat used as to how well it will take a top coat. You may have to try applying a primer to seal that undercoat then apply the trunk paint. Maybe try a test section and see how it works. |
|
|
|
Post by countrybunker on Apr 6, 2016 11:38:34 GMT -5
Hopefully my man! Can't wait to get it in the car! Not having much luck lately. I sprayed the trunk with undercoating. Then applies the spatter paint. The undercoating was turning the spatter brown in spots. I gave it a few days for everythingto dry good, and applied another coat of spatter. Didn't make no difference. Still turning brown in spots. Driving me nuts!! It will drop down a bunch. A lot of weight still missing off that car! Just curious, why did you decide to use undercoat then top coat as opposed to priming then spatter paint? It might depend on the type of undercoat used as to how well it will take a top coat. You may have to try applying a primer to seal that undercoat then apply the trunk paint. Maybe try a test section and see how it works. A lot of weight is still missing. But even with my big ass putting sitting in the trunk, it barely moves lol. I was trying to replicate the factory finisb in the trunk. Thats the way it was applied. Also seen blusmbl do this with his car, and I love the way it came out. Might pick up some primer, and try again. |
|
|
|
Post by countrybunker on Apr 6, 2016 11:39:42 GMT -5
Undercoating claims to be paintable. Apparently not with this stuff though.
|
|
|
|
Post by 58hemifury on Apr 6, 2016 18:26:06 GMT -5
Lay the spatter paint on very lightly and dry and let flash for a long time between coats, the solvents are softening up the undercoat which is why the color is bleeding.
|
|
|
|
Post by countrybunker on Apr 28, 2016 21:27:56 GMT -5
Sprayed some primer down to seal the undercoating, then some more spatter. The undercoating still bled through a little in spots. But I can live with it. The new trunk mat material showed up. Used the what was left of the old one as a stencil. Also cleaned, and re painted the cardboard dress up pieces. Luckily they are still in decent shape. 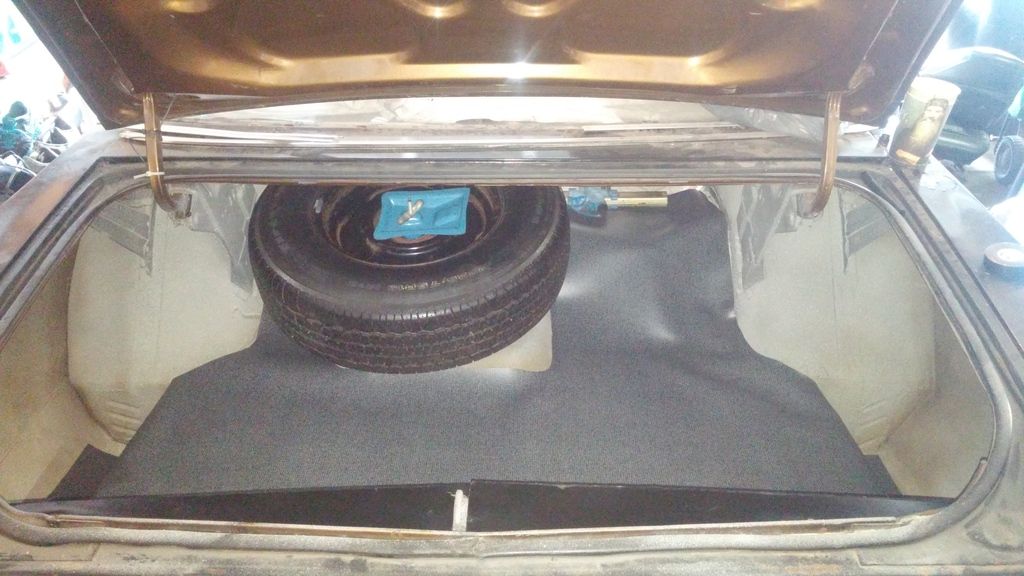 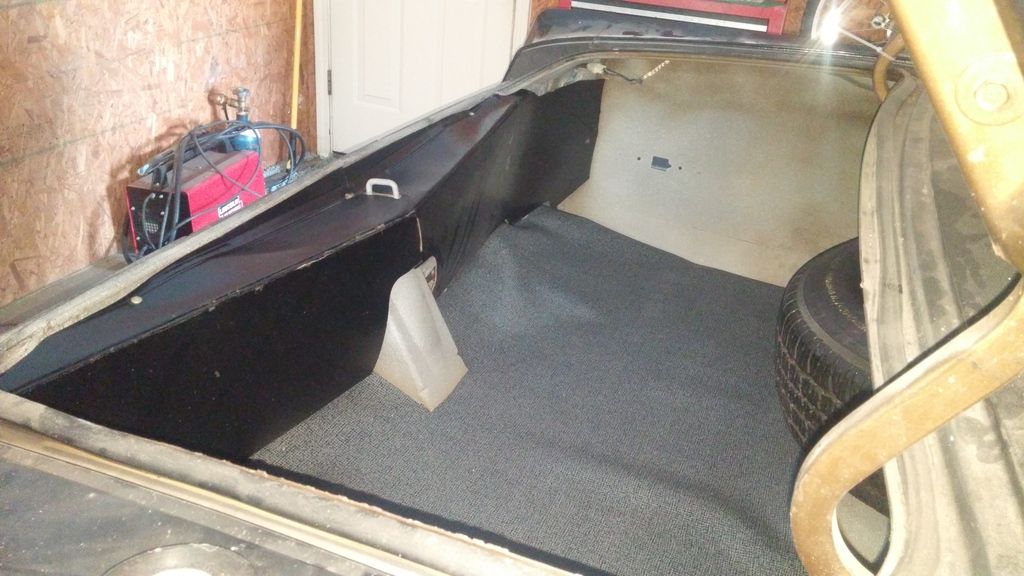 |
|
|
|
Post by cynot on Apr 29, 2016 6:24:52 GMT -5
Looks great! Nice work
|
|
|
|
Post by cynot on Apr 29, 2016 6:25:54 GMT -5
Where did you get the trunk mat?
|
|
|
|
Post by countrybunker on Apr 29, 2016 17:04:50 GMT -5
Thanks! I got the material from stock interiors. Its the 56"x80" vinyl in 03V-Grey Herringbone. www.stockinteriors.com/UnivTrunkMatnew.asp?Itemid=13802&MakeId=7&ModelId=145Looks pretty close to original. Its a little bit thinner then the original mat, but not much. Original was made from more of a rubber material. Where as the new one is thick vinyl. It comes up around 1.5inchs short in width, but barely noticible. |
|
|
|
Post by countrybunker on Apr 29, 2016 17:06:02 GMT -5
It will look much better with new paint, and weather stripping around it lol.
|
|
|
|
Post by countrybunker on May 7, 2016 22:00:38 GMT -5
Spent today prepping the 360 to come out. Just about ready to go. Exhaust is the last thing. I'm a little nervous about hurting the header panel, but think I'll be alright.. 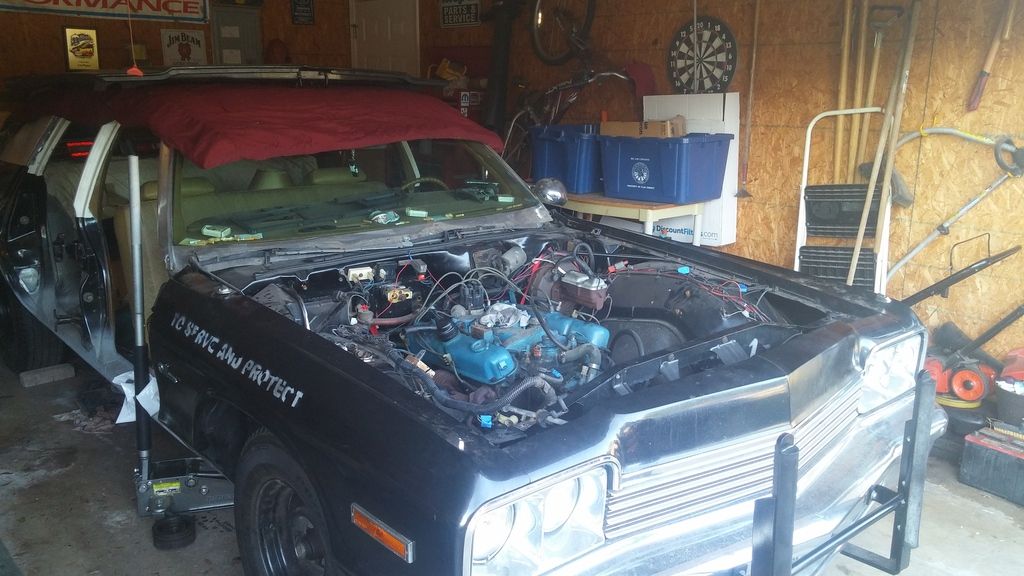 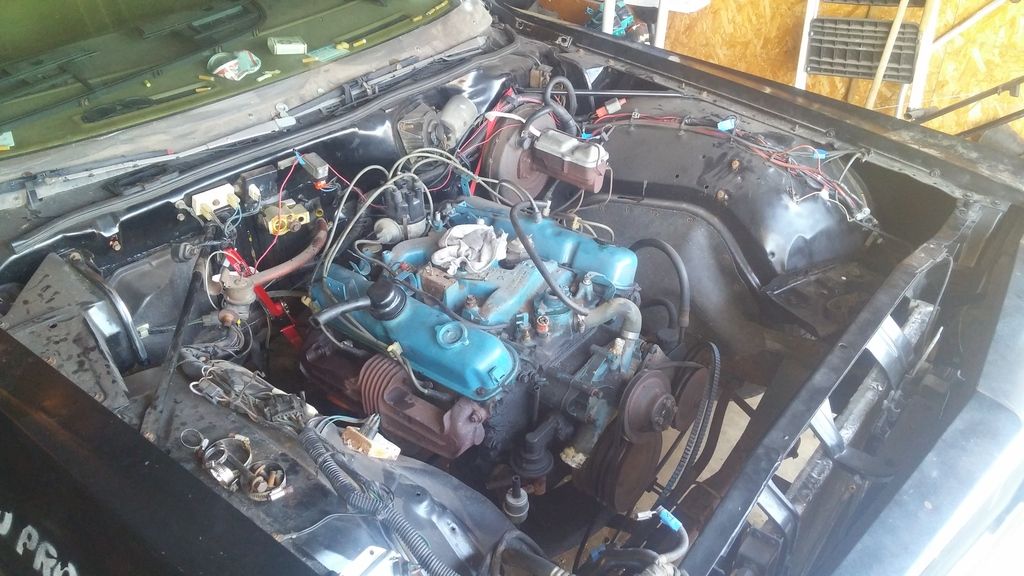 |
|
|
|
Post by countrybunker on May 15, 2016 23:22:11 GMT -5
|
|
|
|
Post by Ghostbluesman (Ghostsoldier) on May 17, 2016 13:53:01 GMT -5
I'll be watching this part with interest, Zac...my car is sitting with no front clip, waiting for new bushings and brakes, before slipping in the 440.  Rob |
|
|
|
Post by countrybunker on May 18, 2016 19:39:11 GMT -5
I will make sure to take some pics for ya!
Idk.. I might replace the steering gear, and plop the 440 in first, to make some room in the garage first. I'm running out quick! Luckily a guy on the c body board bought the old 360. But I gotta hold it for him for a couple weeks. A car, 2 motors, 4 removed doors, misc blumo parts, and cordoba parts are becoming a real pain in a car, and a half garage lol
|
|
|
|
Post by spanks79 on May 19, 2016 15:00:47 GMT -5
I will make sure to take some pics for ya! Idk.. I might replace the steering gear, and plop the 440 in first, to make some room in the garage first. I'm running out quick! Luckily a guy on the c body board bought the old 360. But I gotta hold it for him for a couple weeks. A car, 2 motors, 4 removed doors, misc blumo parts, and cordoba parts are becoming a real pain in a car, and a half garage lol Let me know if you guys have any questions. On the grand scheme of things the mopar is pretty easy to rebuild, compared to the GM's and Fords I've done. Torsion bars are WAY easier to work with than coil springs. |
|