|
|
Post by tk826 on Mar 17, 2013 22:38:00 GMT -5
Just poking around the web a little, I found these... Spectra "magic chrome" spray: www.sprayonchrome.com/magicchrome.htmlVideo of product: Also, 3M has a chrome car body wrap film.  It was originally designed to wrap entire cars:  You can find it on the Bay in smaller quantities. Just search for "chrome wrap". |
|
|
|
Post by Lord Vadus on Mar 18, 2013 2:59:29 GMT -5
An old business trick I use; not to give away too many of my secrets, mind you, is to go to the local hobby store and pick up a can of chrome paint for model cars.
If you have an airbrush, I'd recommend alclad; it works great and is excellent for small pieces that have lost their shine if you don't want to pay to re-chrome something in a high-wear area; such as chrome trim rings on wheels.
|
|
|
|
Post by Ghostbluesman (Ghostsoldier) on Mar 18, 2013 9:42:50 GMT -5
Thanks, guys! I looked at the Magic Chrome spray, but even the pint price is more than I want to spring for this old bumper.  Then I tried the 'Bay, and found and ordered a 4"x19" sample of the vinyl chrome wrap from China, for $2.45, plus free shipping...that's right up my alley!  I remember seeing this stuff on an episode of Discovery Channel's Fast n' Loud, where the Gasmonkey boys it used to wrap a '79 Ford Fairmont drift car they built...ugly as hell, but as shiny as a drunk (gas)monkey's butt! And, since my work office is about 2 miles from a well-stocked, local hobby shop, I'm going to drop in and pick up some Alclad 2 Chrome spray in the 4 oz. can, too, and give it a try...it can't hurt, plus I've got to wait the 3 weeks for the China delivery, anyway....I'll post a pic or two of the results. Rob |
|
|
|
Post by countrybunker on Mar 18, 2013 11:10:57 GMT -5
Good to see her finally starting man!! I will be eagerly following along!
You need any help with anything, or extra set of hands, let me know. Only a 30-45 min drive lol.
|
|
|
|
Post by Ghostbluesman (Ghostsoldier) on Mar 18, 2013 14:47:32 GMT -5
10-4 on that, Zac ol' buddy! Yeah, the Blumo has been patiently waiting it's turn at the resto mill, and languishing in the back yard since 2009. Now that all of my other projects are pretty much done, and spring is here (I'm a shade tree mechanic, lol), it's time I got rolling on it.  Of course, my Blumo schedule is still dictated by what the missus has planned for me in the afternoons and on weekends, but I'm gonna work on it every spare moment I can find!  Rob |
|
|
|
Post by Ghostbluesman (Ghostsoldier) on Mar 18, 2013 19:55:11 GMT -5
Distributor before.... 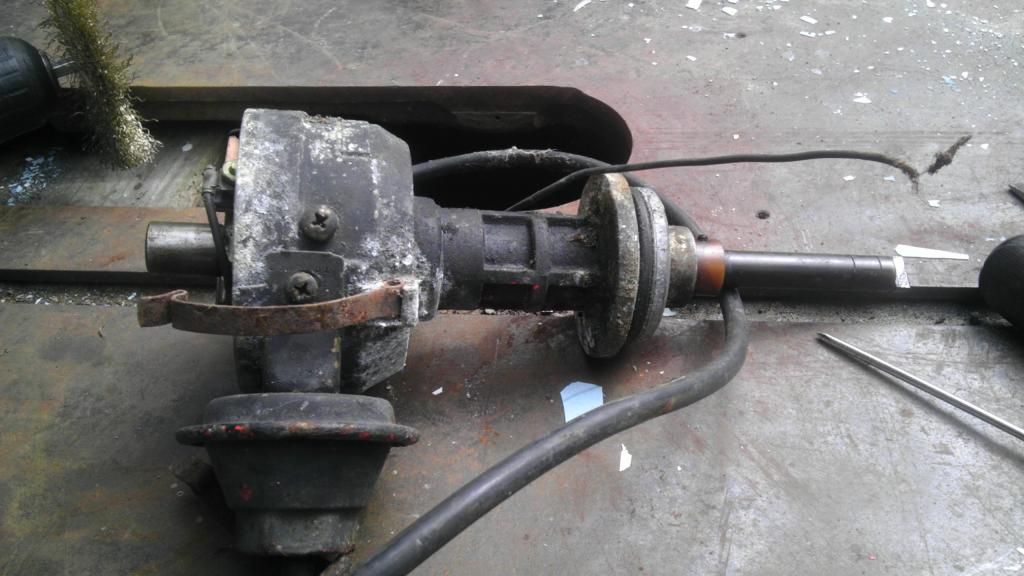 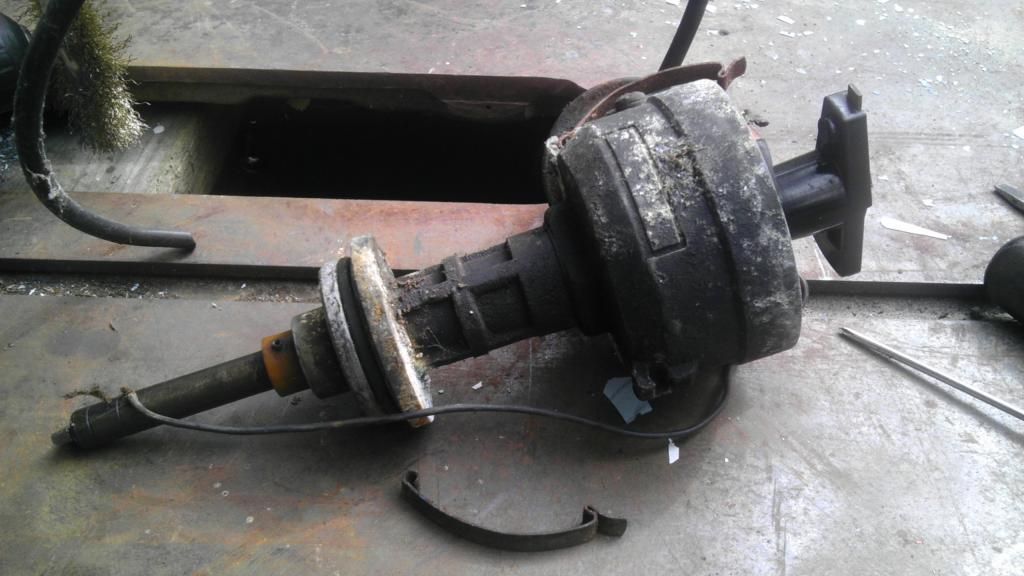 Distributor after.... 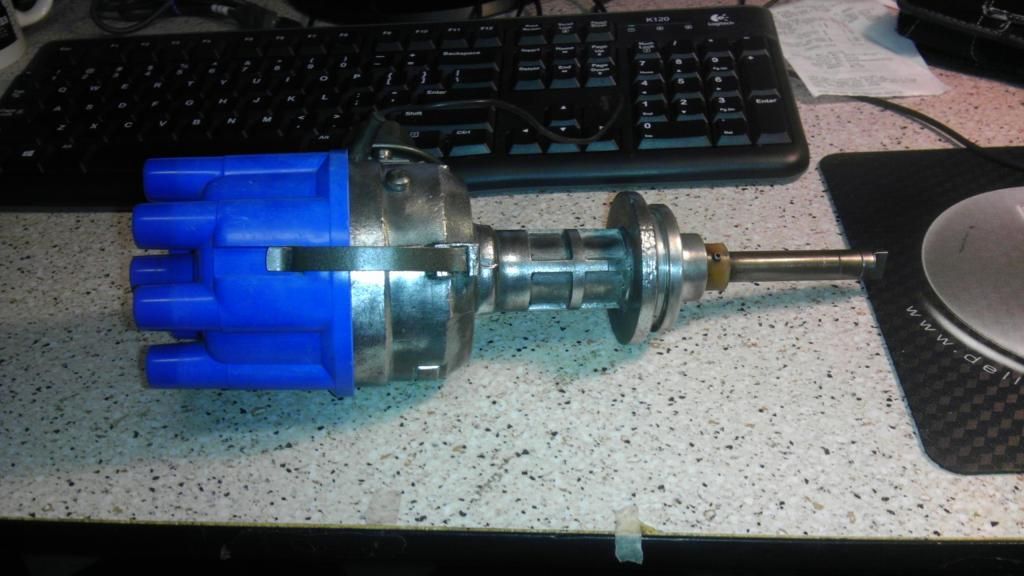 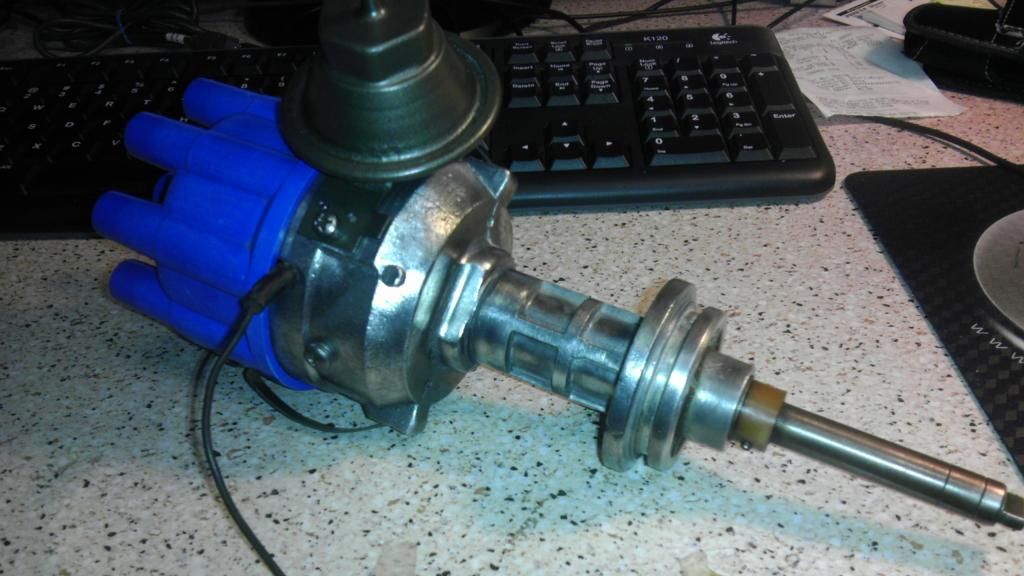 Got all new internals (pre-set the points), a buff job on the outside, some paint, and cleaned the cap. Need the big o-ring seal, and it's good to go. Rob |
|
|
|
Post by Ghostbluesman (Ghostsoldier) on Mar 18, 2013 19:59:28 GMT -5
Don't have any pics of the exhaust manifolds before, although they were rusty as hell (you can see a portion of them in the Before pic of the 440, while it was still in the Dart)... Exhaust manifolds after.... 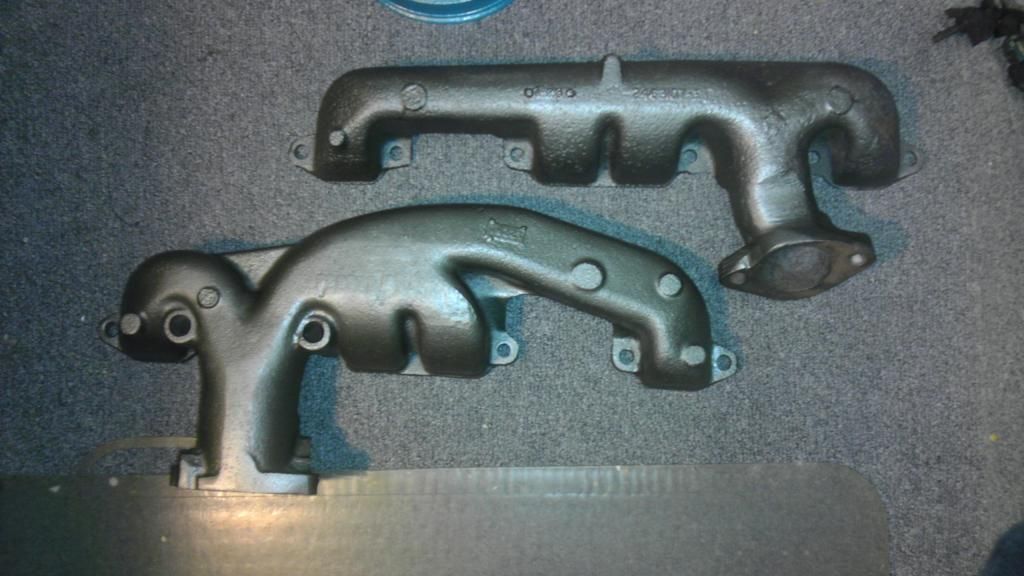 Wire-wheeled them, added several coats of high-heat cast iron spray... Rob |
|
|
|
Post by Ghostbluesman (Ghostsoldier) on Mar 18, 2013 20:08:02 GMT -5
I still have the one issue of the broken stud, though (yellow arrow)....and then I noticed that someone had apparently broken another one (green arrow), drilled it out, and replaced it with a smaller exhaust stud. 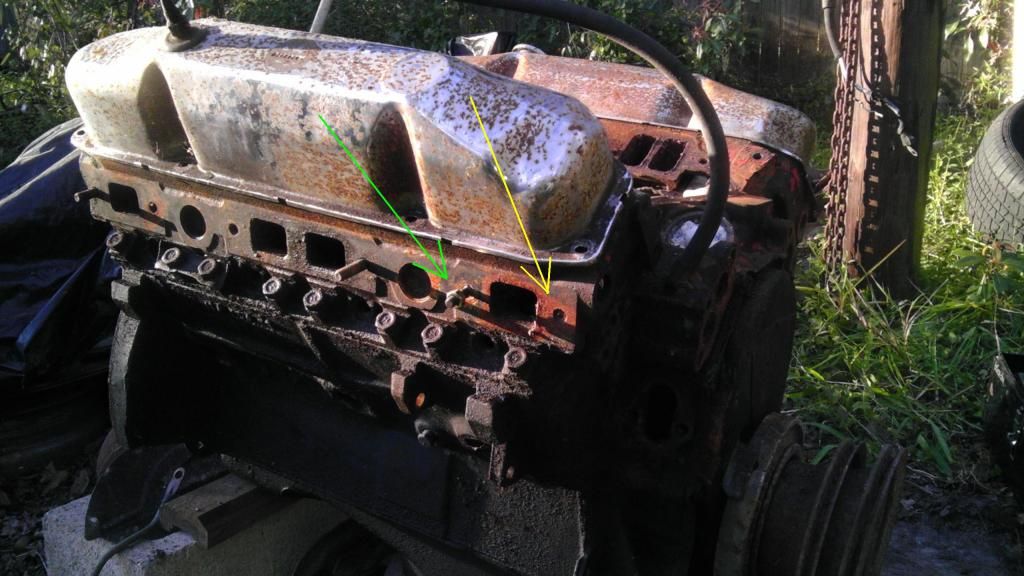 Although I've had this car since the mid-80's, I never noticed it.... I'm going to try to drill out the remains of the broken one, with stepped drill sizes, but if I can't get it out 100% to the stock size, I may do something similar and put in a smaller stud; I don't see why it won't work, as long as it seals the gasket. Rob |
|
|
|
Post by Ghostbluesman (Ghostsoldier) on Mar 18, 2013 20:10:08 GMT -5
Miscellaneous goodies after cleaning and painting with Chrysler Green... 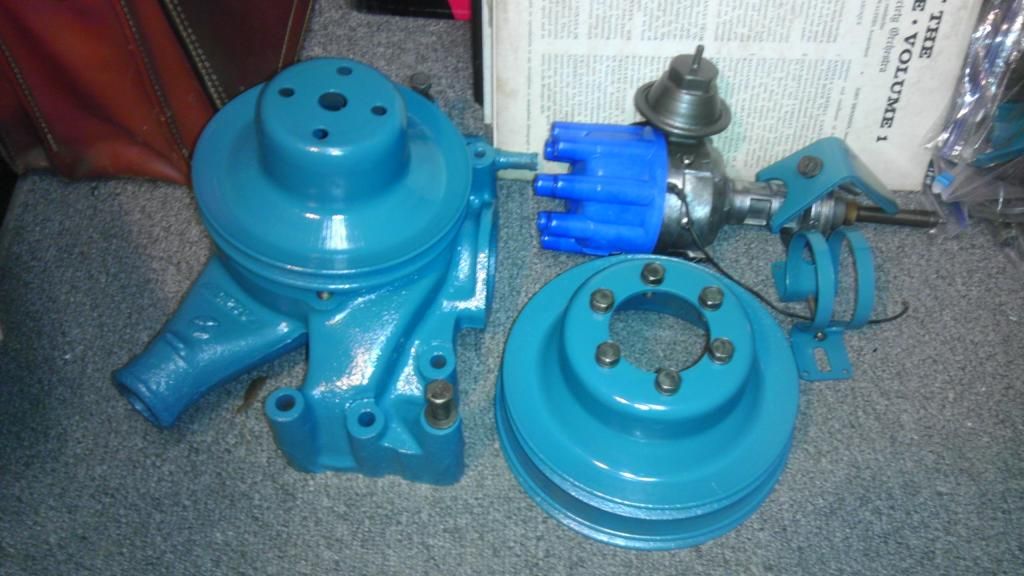 My son said he thought it was Ford Blue, right before I punched him in the nose. ;D Rob |
|
|
|
Post by Ghostbluesman (Ghostsoldier) on Mar 18, 2013 20:15:38 GMT -5
Good news: Got some email notifications that my intake gaskets, water pump, and chrome wrap shipped today...more goodies to work with will be arriving soon! Rob |
|
|
|
Post by countrybunker on Mar 18, 2013 20:27:40 GMT -5
What did you use to clean the distributor? Need to clean mine up... Did you paint the base as well?
|
|
|
|
Post by Ghostbluesman (Ghostsoldier) on Mar 18, 2013 20:35:23 GMT -5
Zac,
I used a combination of a 8" fine wire wheel on a bench grinder, and a 4" brass wire wheel on my hand drill, to get the aluminum sheen you see in the pics. I then sprayed it with a coat of clear enamel, so it wouldn't oxidize again, but would hopefully keep that shine in the under hood environment.
I stripped it down to the advance springs, but since I didn't want to monkey with those, I just cleaned them with the drill brush, them sprayed them with a coat of WD-40 for good measure.
Rob
On another note, the other day I just realized I missed your call about the OP K-Mart car show at the beginning of the month (@#$!&! smartphone messages); if you're going to try to be at the next one (first Saturday in April, I think), I'm going to mark it on my calender to be there...if you are, then maybe we can hook up to talk some cars! ;D
|
|
|
|
Post by sigmfsk on Mar 19, 2013 1:56:48 GMT -5
|
|
|
|
Post by spanks79 on Mar 19, 2013 6:52:47 GMT -5
Lookin good!
What do you know about those exhaust manifolds? I am in search of a proper set of 440 manifolds that won't cost me an arm and a leg. Are the casting numbers still visible on them? I have 2 sets of 400 manifolds but they are not the same as the 440 manifolds.
As for the broken studs, I have become a broken bolt / stud expert. Do you have access to a mig welder? I have become fairly skilled with a mig welder over the years and have a nice 220 machine that is easy to use. I have had 100% success rate with the following method, it doesn't take a lot of welding skill but you need a fairly powerfully machine to zap a nice weld quickly, you can't use a machine that does a bunch of popping and cracking before it gets warmed up enough to lay down a good bead.
Clean up the broken stud / hole area. Take a flat washer that has the inside diameter that is the same or slightly smaller than the bolt to be extracted. Carefully weld the washer to the stud, the good news here is that cast iron and aluminum (cylinder heads) don't easily weld with a mig welder, so it is fairly easy to weld to the broken stud even if it is recessed below the surface a bit. Once the washer is welded to the stud, take a short 5/16 or 3/8 bolt and weld it to the washer. Finally use a 1/2" or 9/16" wrench and loosen it up. Sometimes you need to spray some penetrating oil and work the welded bolt assembly back and forth a bit to free it up but eventually it comes out. If the bolt breaks off, weld on another and go again. I have found this process does two things. 1. Obviously it gives you something to "grab" on the the broken stud with and 2. If you work quickly enough the welding process puts a significant amount of heat directly into the offending broken bolt which aids in freeing it up.
I use this over drilling because in my experience, drilling almost always ends in a goofed up hole. Unless you have really nice bits, cutting oil, and the ability to center punch the broken bolt the drill bit will always "walk" and run down the side of the bolt screwing up the hole.
|
|
|
|
Post by Ghostbluesman (Ghostsoldier) on Mar 19, 2013 11:23:01 GMT -5
Art, Since my 440 was built in '69, I opted for the "turquoise" (as it's called) from this list here: www.turbinecar.com/misc/enginecolor.htmDuplicolor calls it "green", but it looks turquoise out of the can...the Mopar Paint number P4120752. The list also said the HiPo/Police color in 1969 was to be "Hemi Orange", but I'm not a fan of that color, personally. My block had 3 colors on it....dark blue, turquoise, and black. Rob |
|


 I remember seeing this stuff on an episode of Discovery Channel's Fast n' Loud, where the Gasmonkey boys it used to wrap a '79 Ford Fairmont drift car they built...ugly as hell, but as shiny as a drunk (gas)monkey's butt!